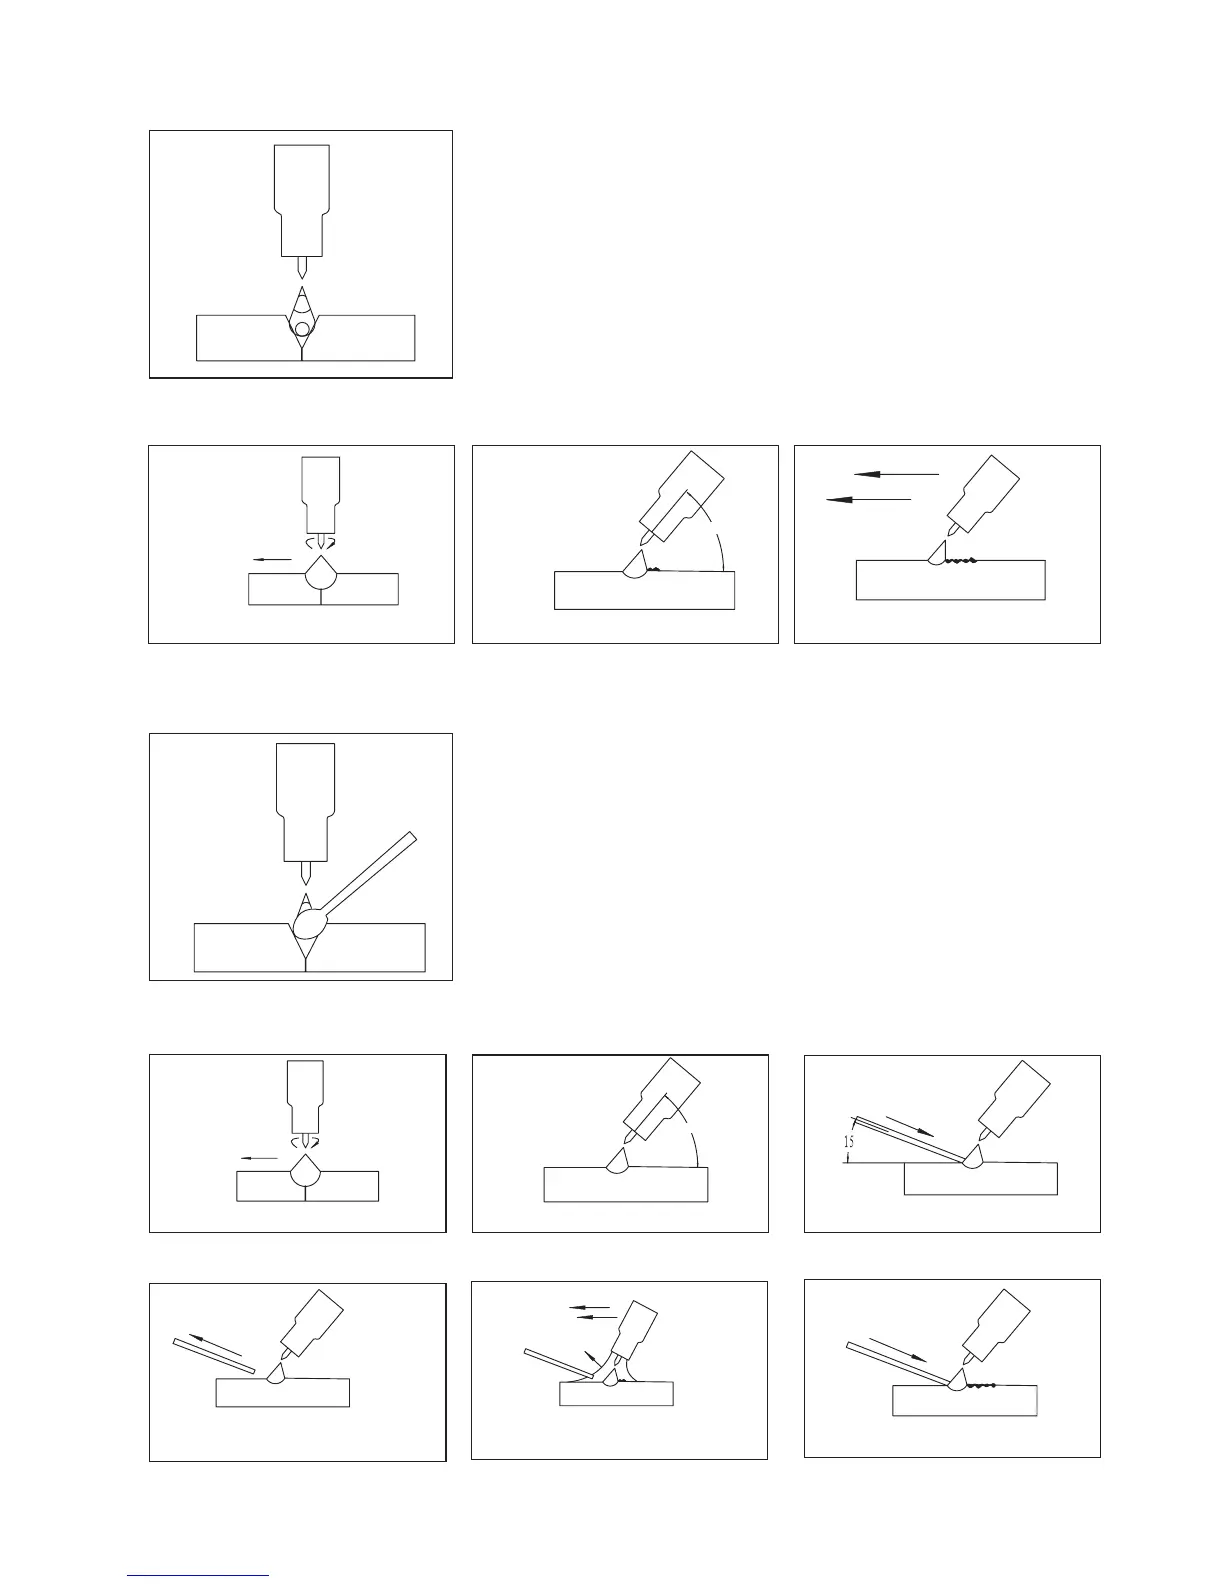
TIG Welding Fusion Technique
Fig. 14-1-9: TIG arc
Manual TIG welding is often considered the most difficult of all the welding
processes. Because the welder must maintain a short arc length, great care and
skill are required to prevent contact between the electrode and the workpiece.
Similar to Oxygen Acetylene torch welding, TIG welding normally requires two
hands and in most instances requires the welder to manually feed a filler wire into
the weld pool with one hand while manipulating the welding torch in the other.
However, some welds combining thin materials can be accomplished without filler
metal like edge, corner, and butt joints. This is known as Fusion welding where the
edges of the metal pieces are melted together using only the heat and arc force
generated by the TIG arc. Once the arc is started the torch tungsten is held in place
until a weld pool is created, a circular movement of the tungsten will assist is
creating a weld pool of the desired size. Once the weld pool is established tilt the
torch at about a 75° angle and move smoothly and evenly along the joint while
fusing the materials together.
Travel direction
Form a molten pool
Angle torch
75
Move the torch slowly and evenly forward
Fig. 14-1-10: Form a weld pool Fig. 14-1-11: Angle torchh Fig. 14 -1-12: Torch Move
TIG Welding with Filler Wire Technique
Fig. 14-1-13: Add TIG filler wire
It is necessary in many situations with TIG welding to add a filler wire into the weld
pool to build up weld reinforcement and create a strong weld. Once the arc is
started the torch tungsten is held in place until a weld pool is created, a circular
movement of the tungsten will assist is creating a weld pool of the desired size.
Once the weld pool is established tilt the torch at about a 75° angle and move
smoothly and evenly along the joint. The filler metal is introduced to the leading
edge of the weld pool. The filler wire is usually held at about a 15° angle and fed
into the leading edge of the molten pool, the arc will melt the filler wire into the weld
pool as the torch is moved forward. Also a dabbing technique can be used to
control the amount of filler wire added, the wire is fed into the molten pool and
retracted in a repeating sequence as the torch is moved slowly and evenly forward.
It is important during the welding to keep the molten end of the filler wire inside the
gas shield as this protects the end of the wire from being oxidised and
contaminating the weld pool.
Angle torch
75
Travel direction
Form a molten pool
Add TIG filler wire
Fig. 14-1-14: Form a weld pool Fig. 14-1-15: Angle torch Fig. 14-1-16: Add TIG filler wire
Repeat the process
Move the torch forward to the front of the molten pool
Gas shield
Retract the filler wire
Fig. 14-1-17: Retract the filler wire Fig. 14-1-18: Torch move Fig. 14-1-19: Repeat the process
81