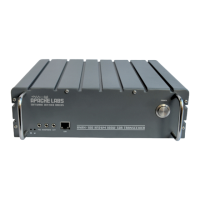
Apache Labs ANAN-100/D
10Mhz Oscillator Jumpers
J20: When a jumper is inserted between pins 1 and 3 (the default setting) the internal 10 MHz reference
oscillator is selected. When pins 2 and 4 are jumpered, an external 10 MHz reference is selected at J25.
J22: When inserted (the default setting) this jumper terminates an external 10 MHz reference with 50 ohms.
J23: When inserted (the default setting) this jumper enables power to be supplied to the internal 10 MHz
TCXO reference oscillator.
J24: When inserted (default) this jumper connects the outer of J25 to the ground of the Hermes board.
Mic Jumpers
JP4: This jumper selects the microphone connection, either tip or ring - see the diagram below. Some
microphones come with their element wired between a 3.5 mm jack plug ‘tip’ and sleeve (ground), whilst on
others the element is wired between a 3.5 mm jack plug ‘ring’ and sleeve (ground). To select the tip, place the
jumper on pins 2 and 3 (default); to select the ring, use pins 1 and 2.
JP5: This provides bias if you wish to use an electret microphone. If the microphone is connected between to
the 3.5 mm jack plug ‘tip’ and sleeve (ground), then place a jumper between pins 2 and 3. If the microphone is
connected between the 3.5 mm jack plug ‘ring’ and sleeve (ground), then use pins 1 and 2. If bias is not
required then do not fit this jumper (this is the default
setting).
JP6: If your microphone is fitted with a PTT button, then this jumper enables it. If the PTT button is connected
between the 3.5 mm jack plug ‘tip’ and sleeve (ground) then place a jumper between pins 2 and 3. If the PTT is
connected between the jack plug ‘ring’ and sleeve (ground) then place the jumper between between pins 1 and
2. If your microphone is not fitted with a PTT, or you do not wish to use it, then do not fit a jumper to JP6 (this
is the default setting).
WARNING: If your microphone plug uses tip and sleeve connections only and you set the PTT jumper to the
ring setting, then the PTT will be permanently enabled (i.e. the transmitter will be permanently switched on).
NOTES: Ensure that the jumper on JP6 is NOT connected to the same terminal (tip or ring) that your
microphone is connected to. The PTT button should present a voltage-free contact that connects its associated
pin to the outer sleeve (ground) of the coaxial microphone cable when pressed. This is the
most common way of wiring a PTT button, but users are advised to check the connections with a multimeter set
to the lowest ohms range if unsure of the exact configuration.
An alternative PTT input connection is available via pin 1 of connector J16.
Revision v1.8 April 23, 2013 65 of 70 authors N9VV and KC9XG