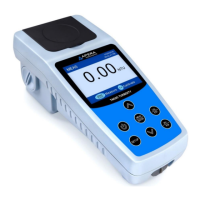
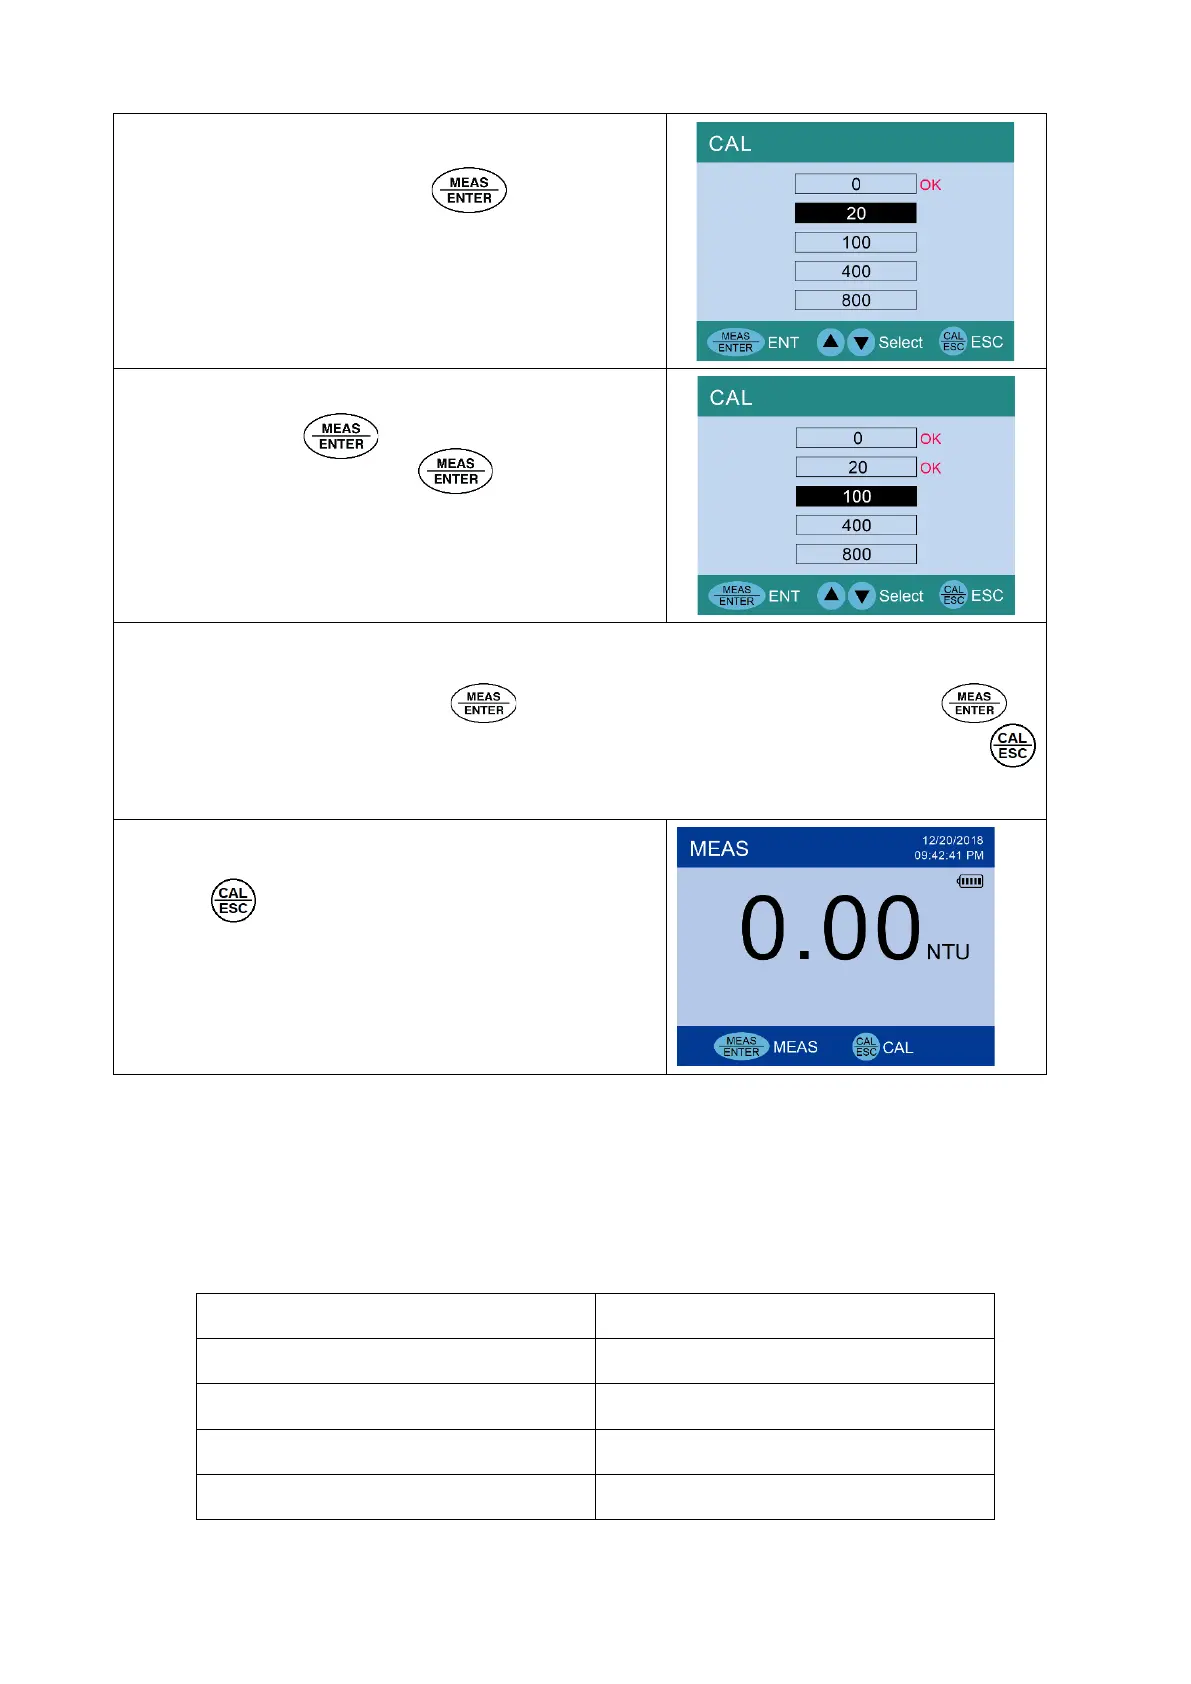
4) After calibration is done, press to confirm.
The instrument will return to the calibration menu (see
Diagram on the right side). The OK sign indicates that 0
NTU has been calibrated and prompt to calibrate 20 NTU.
5) Place the 20.0 NTU calibration vial in the sample
vial holder, press to start 20 NTU calibration.
After calibration is done, press to confirm. The
instrument will return to the calibration menu (see
diagram on the right side). The OK sign indicates that
20 NTU has been calibrated
6) If you want to continue to calibrate 100, 400 and 800 NTU, place the 100 NTU calibration vial in
the sample vial holder and press to calibrate. After calibration is done, press to
confirm; repeat the steps to calibrate 400 NTU and 800 NTU. After calibration is done, press
to return to measurement mode.
7) Press to exit calibration mode, the instrument will
return to measurement mode as shown in Diagram on the
right side.
4.3 Notes for Calibration
a) Calibration point verification: The calibration point can be verified after the calibration is
completed. If the calibration point has a large error, enter the calibration mode and repeat the
calibration. For calibration point accuracy, users can refer to the following standards: