MoreSecurity,MoreConveniencewww.apexis.com.cn/www.apexis.cc
Figure 7.3
You have to register an account firstly, keep the user, password, host, then input it.
NOTE: Only one DDNS can be chosen, for example, if you use manufacturer’s DDNS, the 3
rd
one won’t
work, if use the 3
rd
DDNS, the manufacturer’s one won’t work.
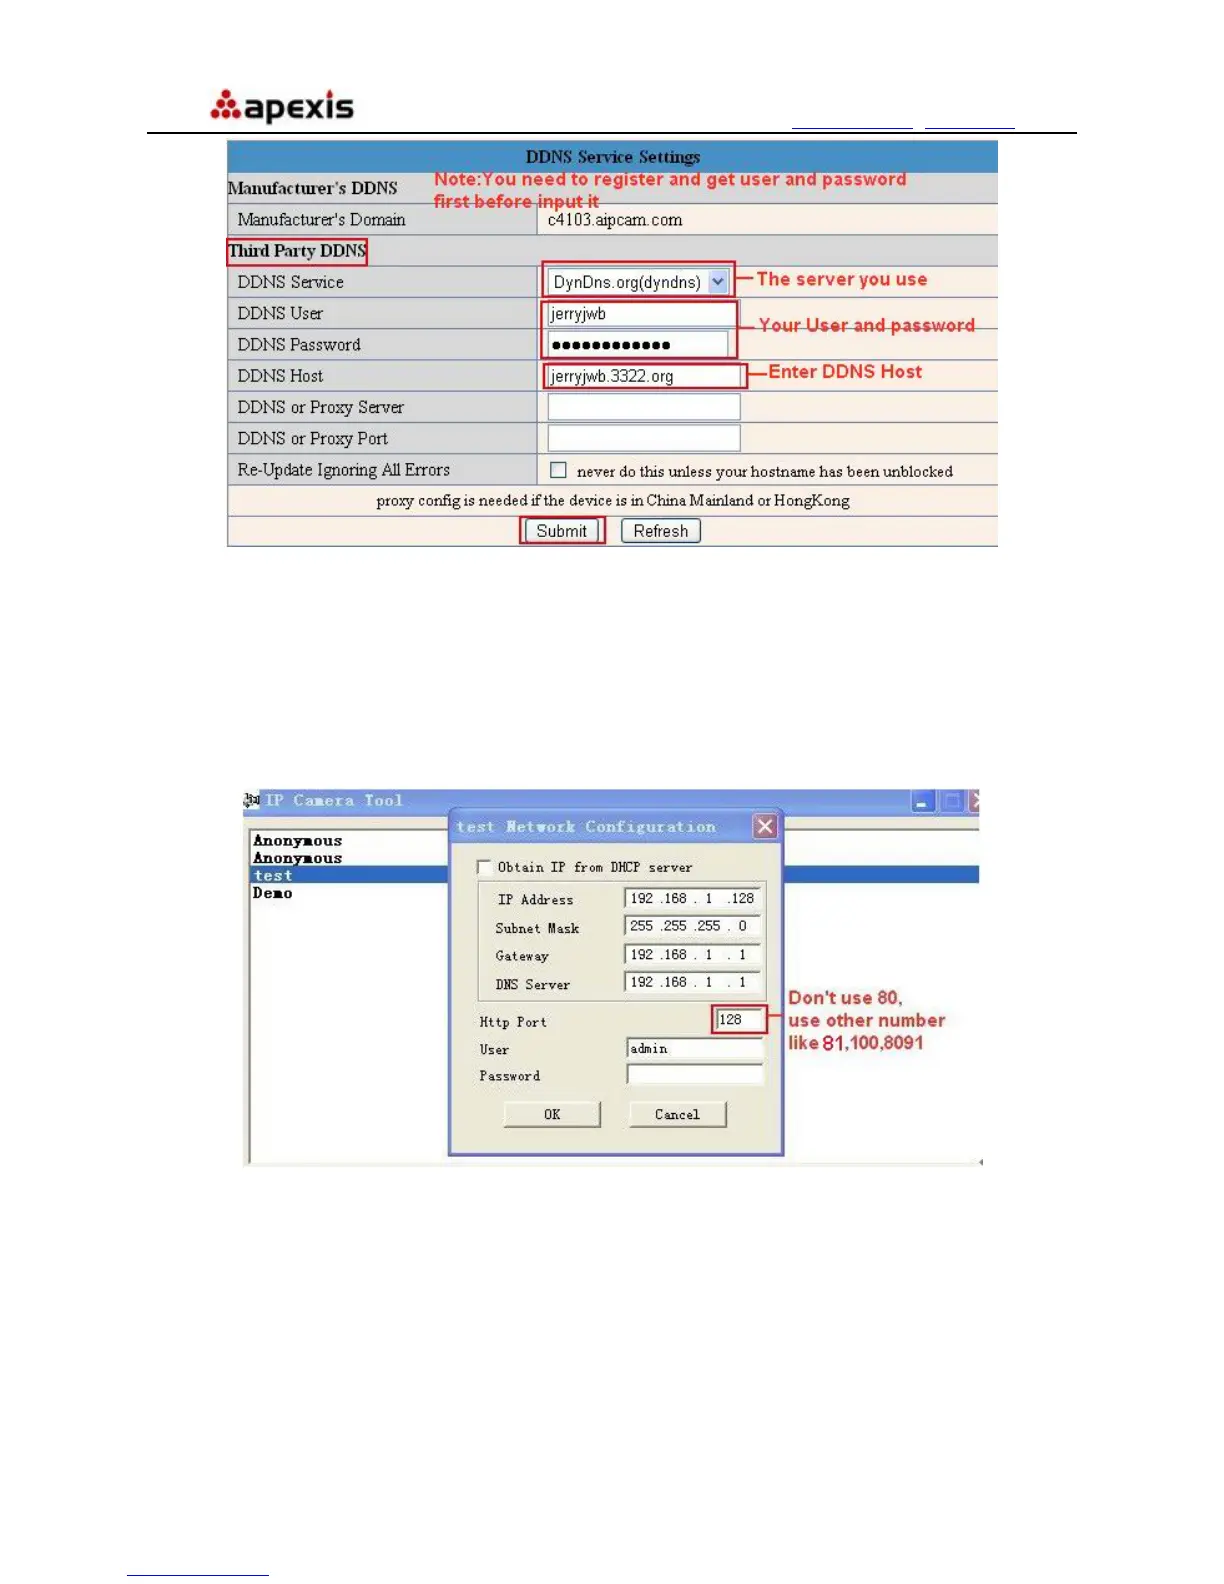
Change the camera’s port.
The default port of camera is “80”, please change “80” to any other one you like, such as “81”, “100”, “8091”
etc. Click “OK”, the camera will reboot, wait about 30 seconds
.
Figure 7.4
Make sure the “Subnet Mask”, “Gateway”, “DNS Server” is the same as your router.
Set Port Forwarding in the router.
This is the most important step. Set port forwarding in router refer to the IP of your camera correctly, then the
DDNS will work. Because there are so many kinds of routers from all over the world, so it’s difficult to show a
fix steps, but there are some samples of different routers’ port forwarding settings as below, just for reference:
Shenzhen Apexis Electronic Co., Ltd Tel: +86-755-26509025 Fax: +86-755-26509229
33