Unpacking the Sewing Head Box
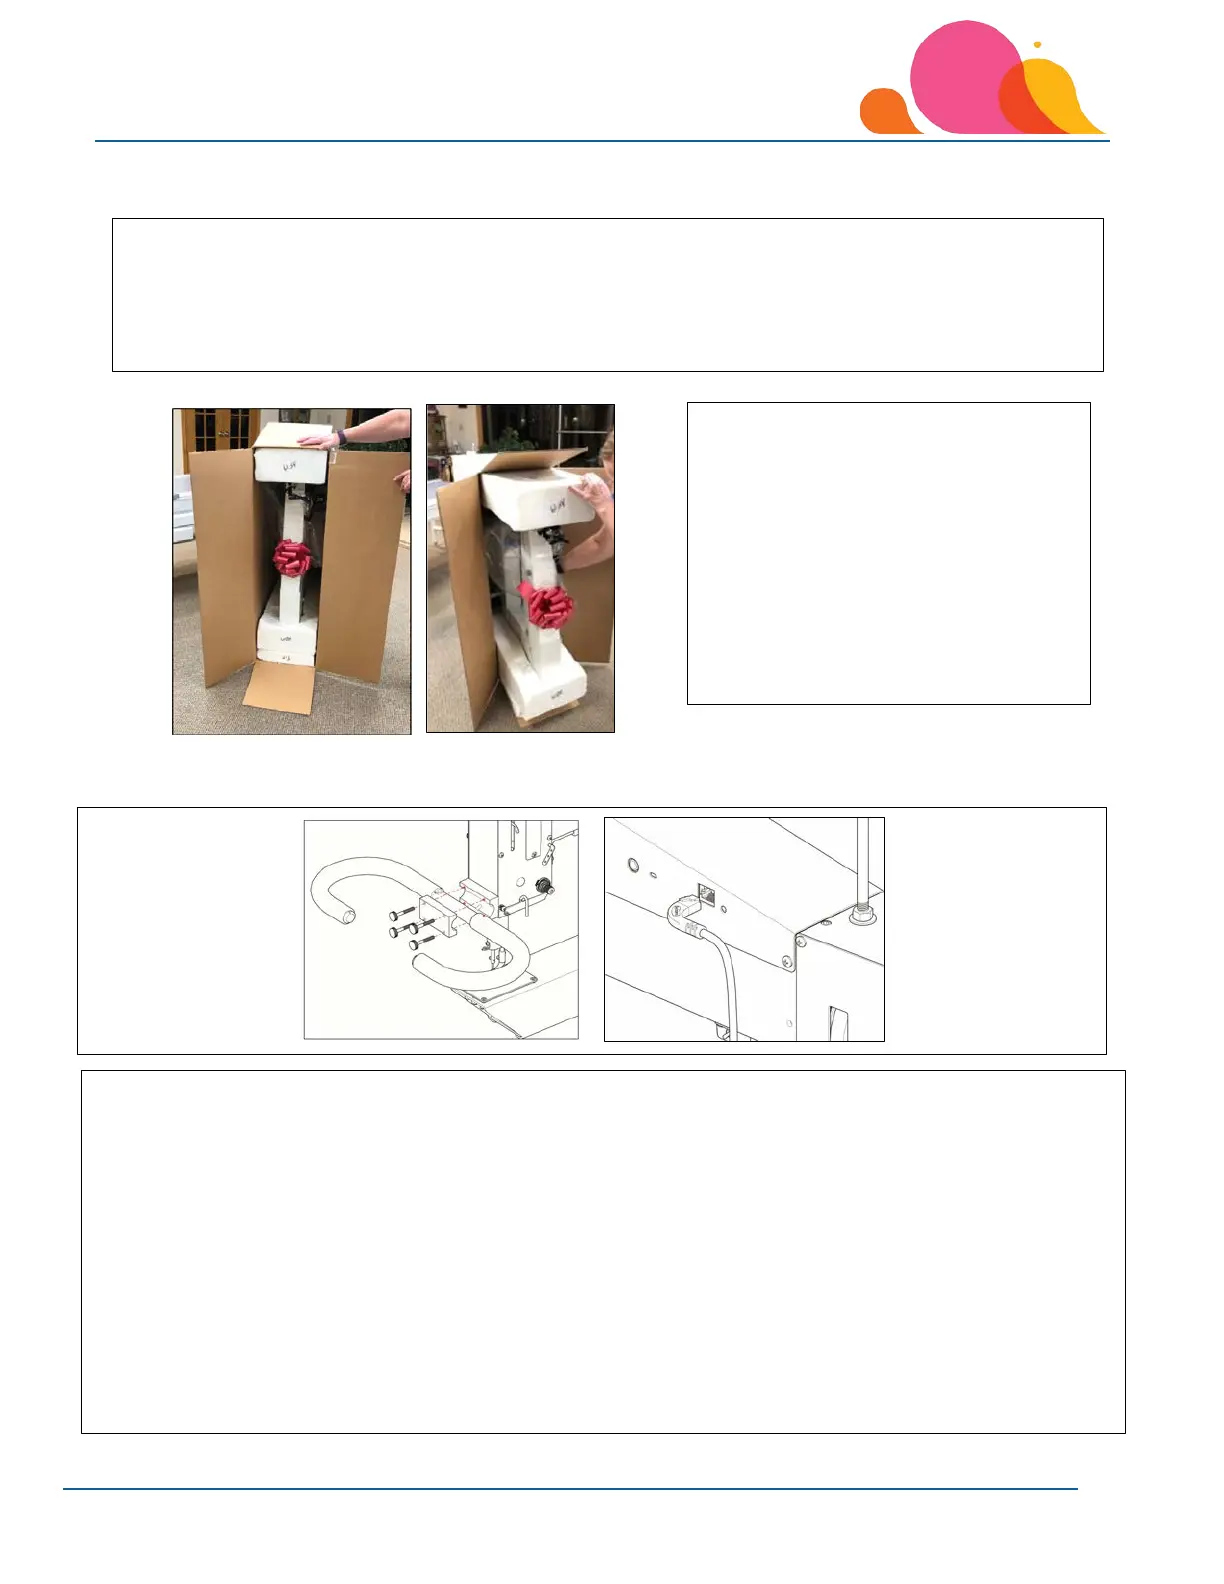
Install the Front Handles
3. Tip the box so that the machine's back
side rests on the floor. Pull the
machine carefully out of the box
leaving the machine head to sit in the
foam that is on the back side of the
machine.
Keep the sewing head box and packing
material for any future factory or service
needs.
1. Locate the front handle mount (GG) and 4 black hand knobs (HH) inside of the sewing head box. Set other
smaller contents from the head box aside for now.
2. Carefully remove any packing foam and plastic from the handles.
3. Remove the foam from the front of the machine (top side as machine comes out of box).
4. Place the handle (FF) on the pre-installed bracket on the machine.
5. Place the front handle mounting plate (GG) over the handle and insert the 4 black hand knobs (HH). Tighten
each of the black hand knobs screws a little at a time to prevent the mounting plate from binding.
6. Plug the handle wire into the handle jack on the left side of the sewing head. Slip the cable into the provided
cord clips.
7. Plug the cable into the jack on the left side of the top cover.
NOTE: Black hand knobs can be loosened so that you can adjust the handles to a more comfortable level. You can
tighten the knobs to hold the handles in a fixed position.
1. Carefully open the sewing head box. The head box includes custom foam inserts to protect the machine
during shipping. Sometimes the box’s handle holds get stuck in the foam molds, making it difficult to
remove the head from the box. If this happens, just slide a flat head screwdriver between the foam
insert and the box’s side to force the cardboard flap out of the foam insert.
2. Remove all accessories and supplies from the head box.