Lenni – Lucey Standard Table Manual
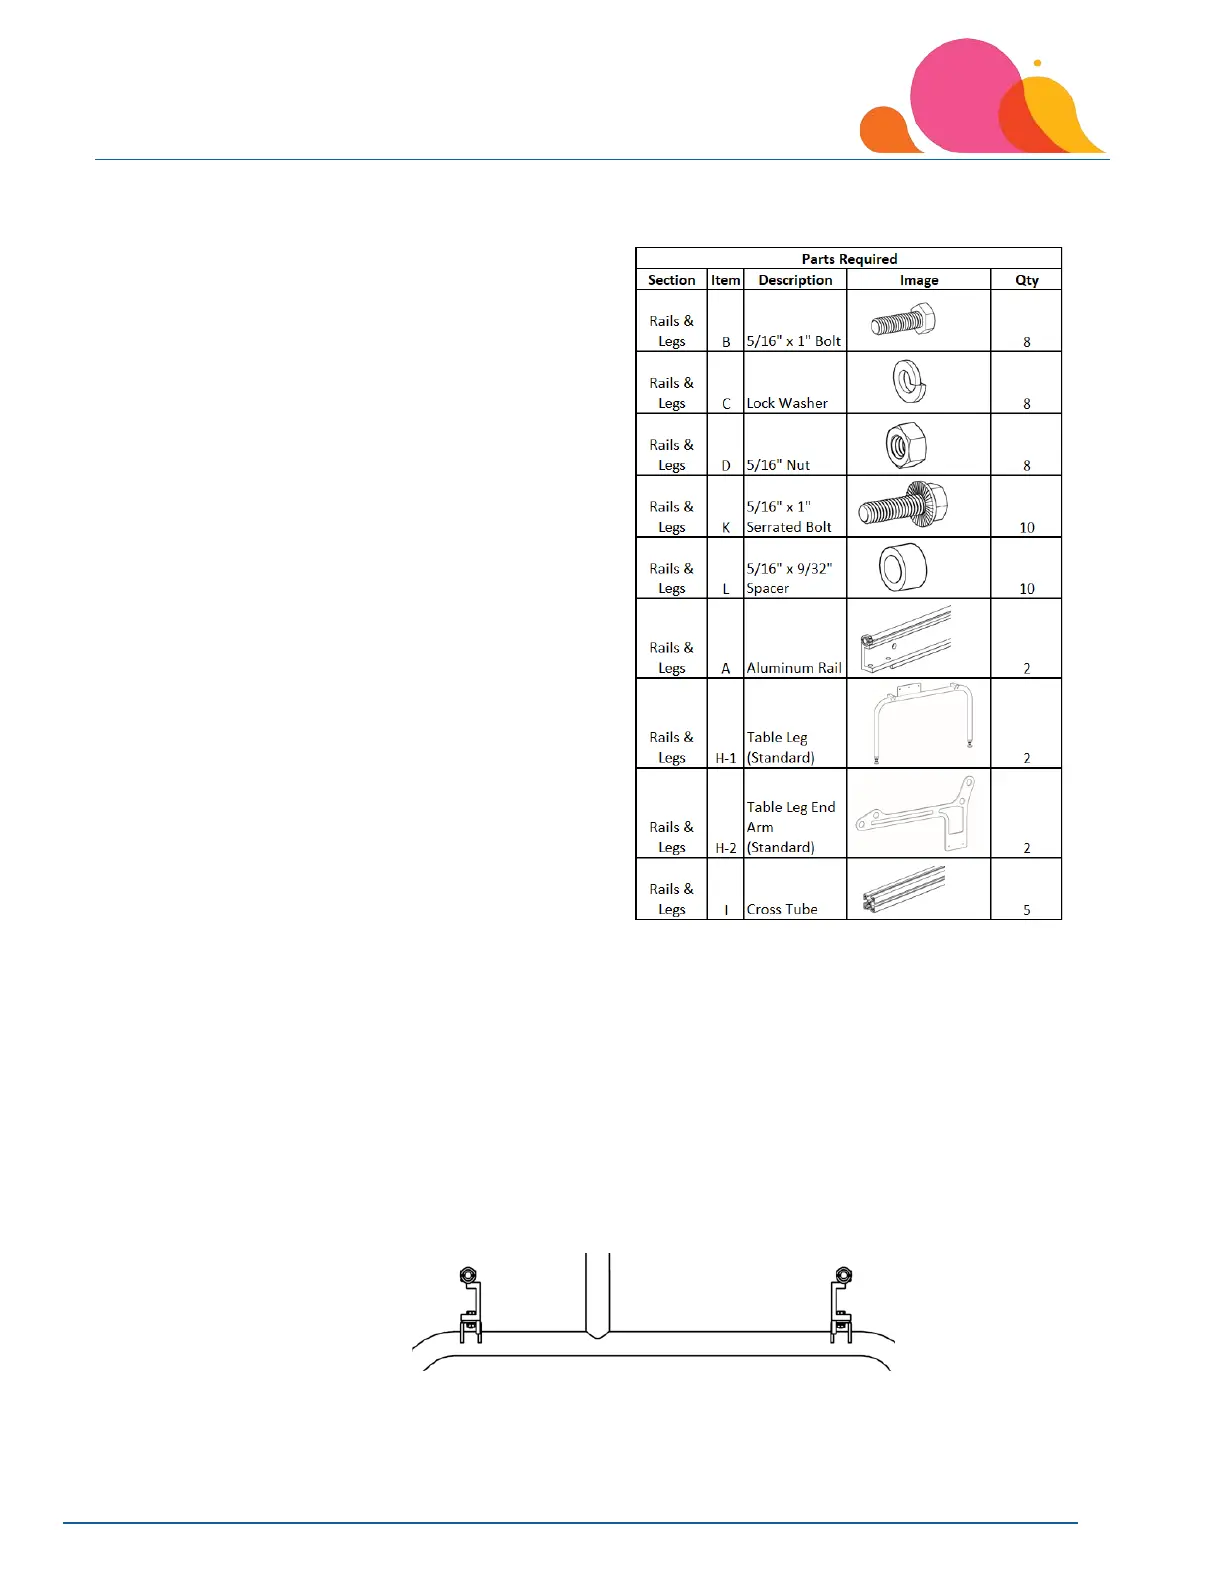
Standard Table Step 1: Assemble the Rails & Legs
Tools Utility knife
Required: Wire Cutter or Scissors
Phillips Screwdriver
½-inch Box End Wrench
½-inch Socket Wrench
3/4-inch Box End Wrench
or Crescent Wrench
Rails Box (Box 1)
THE RAIL BOX DOES NOT NEED TO BE MOVED TO YOUR SEWING AREA IMMEDIATELY, it is a heavy box and can be opened
before moving.
1. Remove two Phillips Head screws from each side of the top cover of box
2. Using utility knife, cut packing tape on box
3. Once open, cut zip ties from rails using wire cutters or scissors
4. Locate all hardware (attached to rails under a zip tie, it is packed in plastic … do not throw this away)
5. MOVE rails to sewing area individually, be aware of sewing table orientation before moving the rollers and rails.
Each roller is stamped for the use of each, “Backing”, “Pick-Up”, “Quilt Top”. The stamped portion of the roller
will be installed to the right or needle side of the frame. The rails will be installed with the flat side of each rail
facing each other.