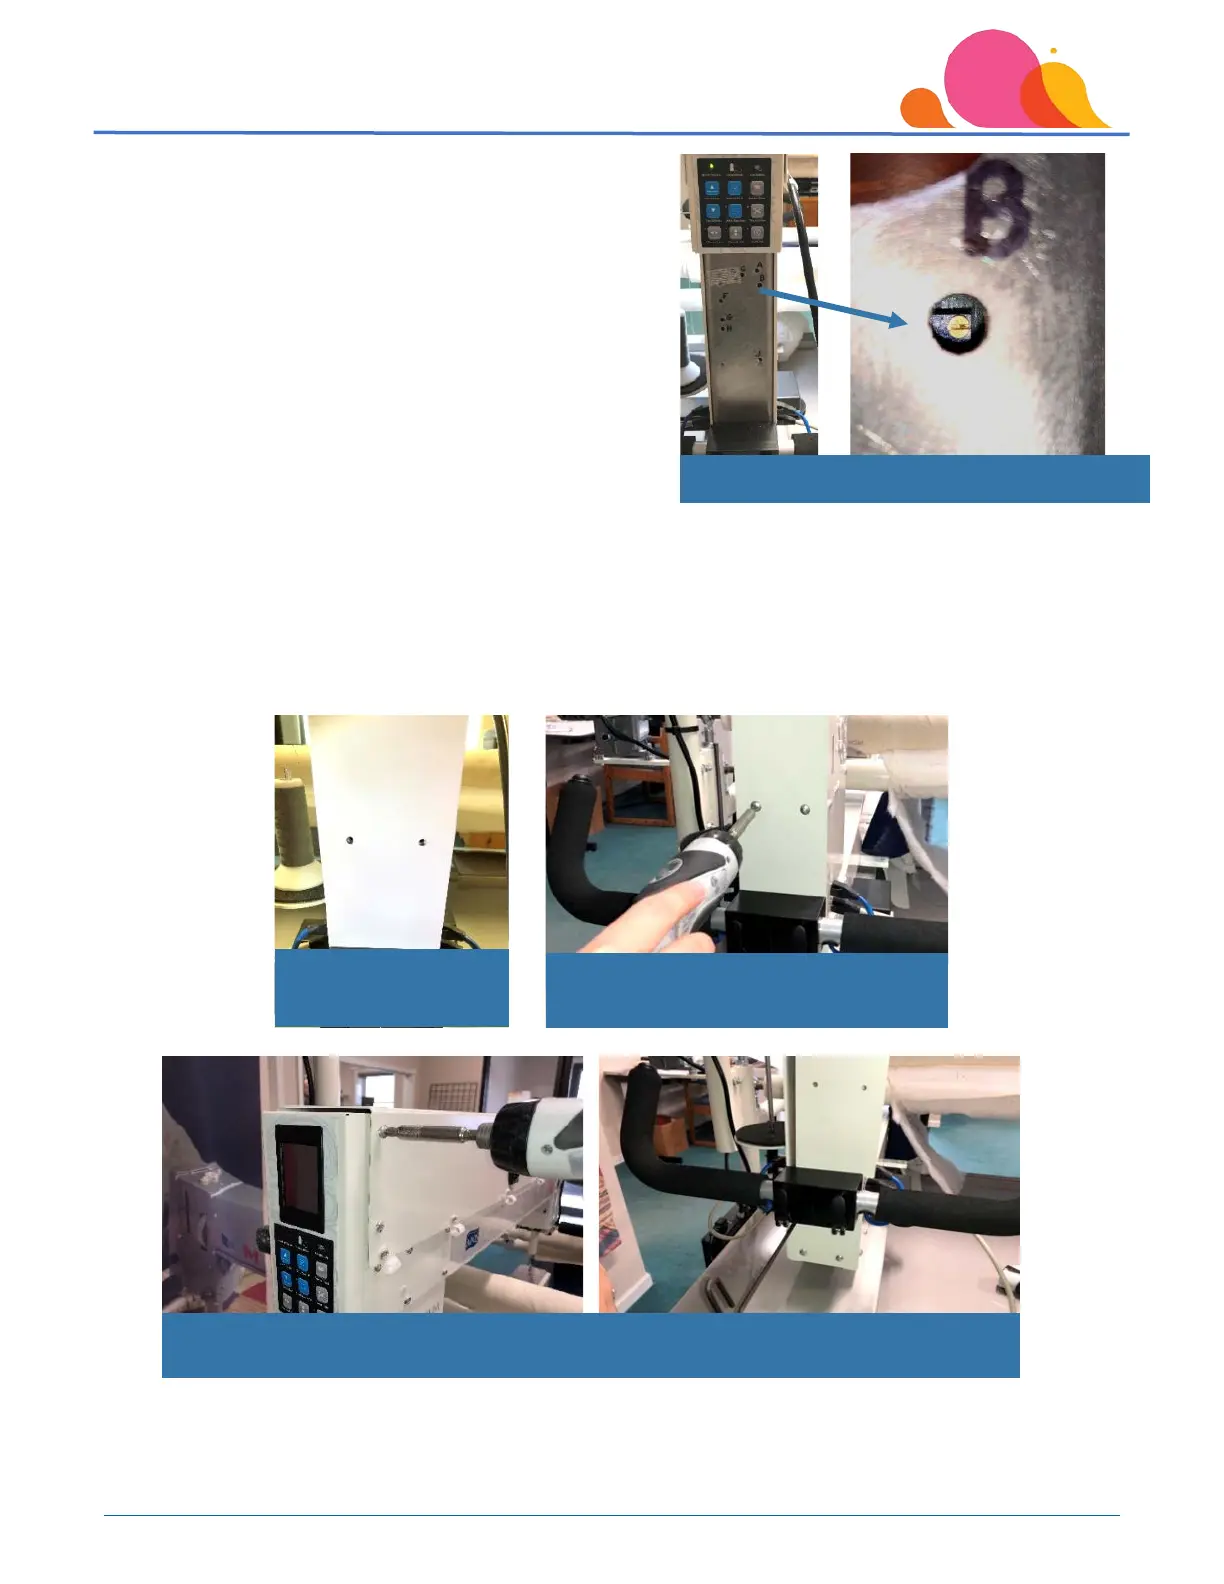
The access holes in the back plate are lettered for the
calibration process – be sure you are ONLY working with the ‘B’
adjustment point. With a flashlight, look inside the ‘B’
adjustment access hole and locate the adjustment screw.
The direction you turn the screw will depend on whether the
needle is over-cycling, or having problems completing a cycle.
Ideal time lapse for the needle up/needle down is one full
second from position to position.
• If the machine is over-cycling, turn the screw to the left
– counterclockwise. Start with half a rotation.
• If the machine is taking more than one full second to complete a cycle, turn the screw to the right, or
clockwise.
Continue to adjust the speed of the needle up/needle down until the “one full second” time lapse has been achieved.
Once the adjustment has been made, reinstall the back plate and tighten the screws securely, but do not over-
tighten them.
Remember to tighten any other cover screws or the rear handle mounting brackets that may have been loosened so
the rear plate could be removed.
Locate ‘B’ access hole in back circuit board cover
Reinstall rear plate
using 2 Phillips screws
Tighten screws securely –
DO NOT OVER TIGHTEN!
Remember to tighten rear cover and handle mounting bracket if you have loosened them
previously.