12
B) Fix the screw on the rail.
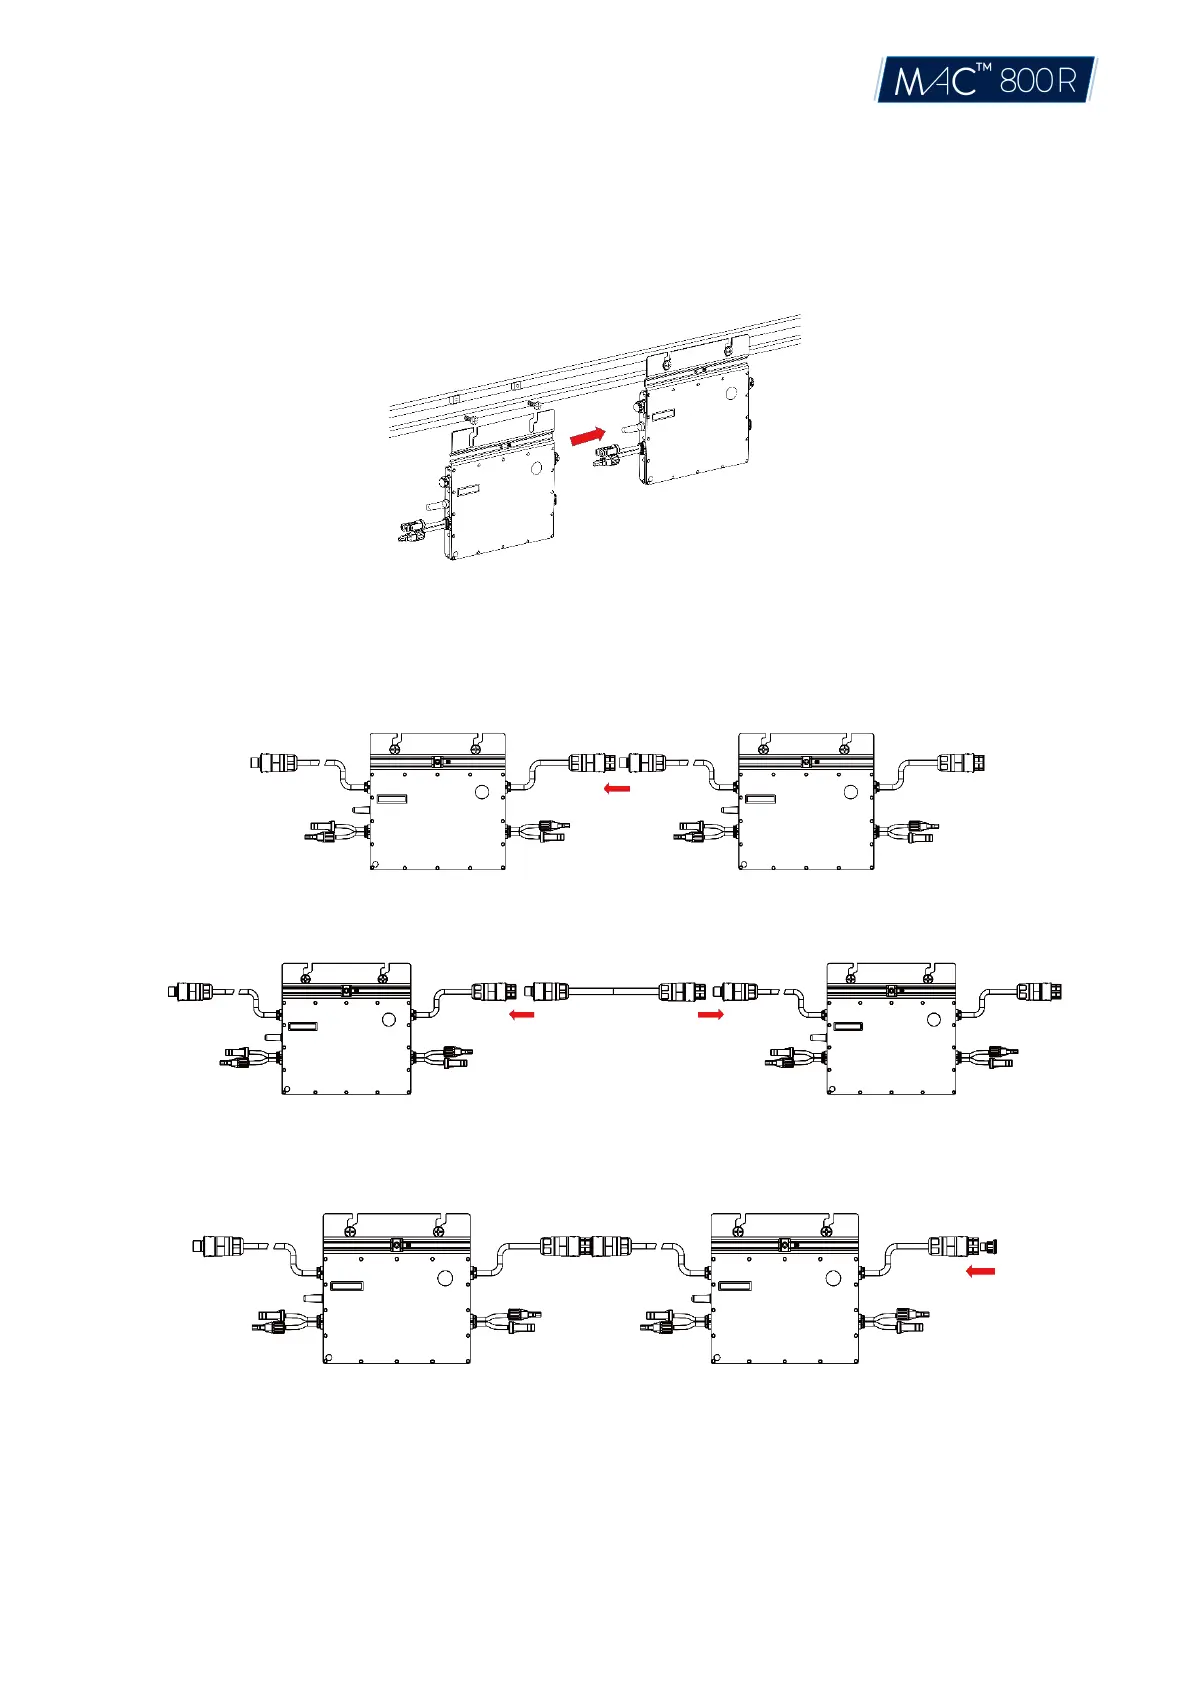
C) Hang the microinverter on the screw (shown as pictured below), and tighten the screw. The
silver
cover side of the Microinverter should be facing the panel.
Step 2. Connect AC Cables of Microinverter
A) Plug the AC connector of the first microinverter with the connector of the second microinverter to
form a continuous AC branch circuit.
*Note: The length of AC cable on Microinverter is around 2.06m. If the distance between two Microinverters is more
than 1.2m, please use the AC extension cable between two inverters (as picture indicated below).
B) Install the AC end cap on the open AC connector of the last microinverter in the AC branch circuit.
Step 3. Connect AC End Cable
A) Make the end cable
1. Dissemble the AC port into 3 parts
© 2021 Aptos Solar Technology, LLC. All rights reserved.