loudspeakers
Notes on making speaker
connections
< Do not make any connections to any amplier
while it is switched on. We recommend that
your amplier is completely disconnected from
the mains supply before starting.
< Before switching your amplier(s) on for the
rst time aer connecting to speakers, please
check all connections thoroughly. Ensure that
bare wires or cables are not touching each other
or the amplier’s chassis (which could cause
short circuits), and that you have connected
positive (+) to positive and negative (–) to
negative. Be sure to check the wiring for both
the amplier and the speaker.
< Aer making connections: switch the
amplier(s) on, select a source signal, then
gradually increase the volume to the required
listening level.
< If you are unsure as to how your system should
be connected, or need advice on bi-amping,
please contact your Arcam dealer who will be
happy to help you.
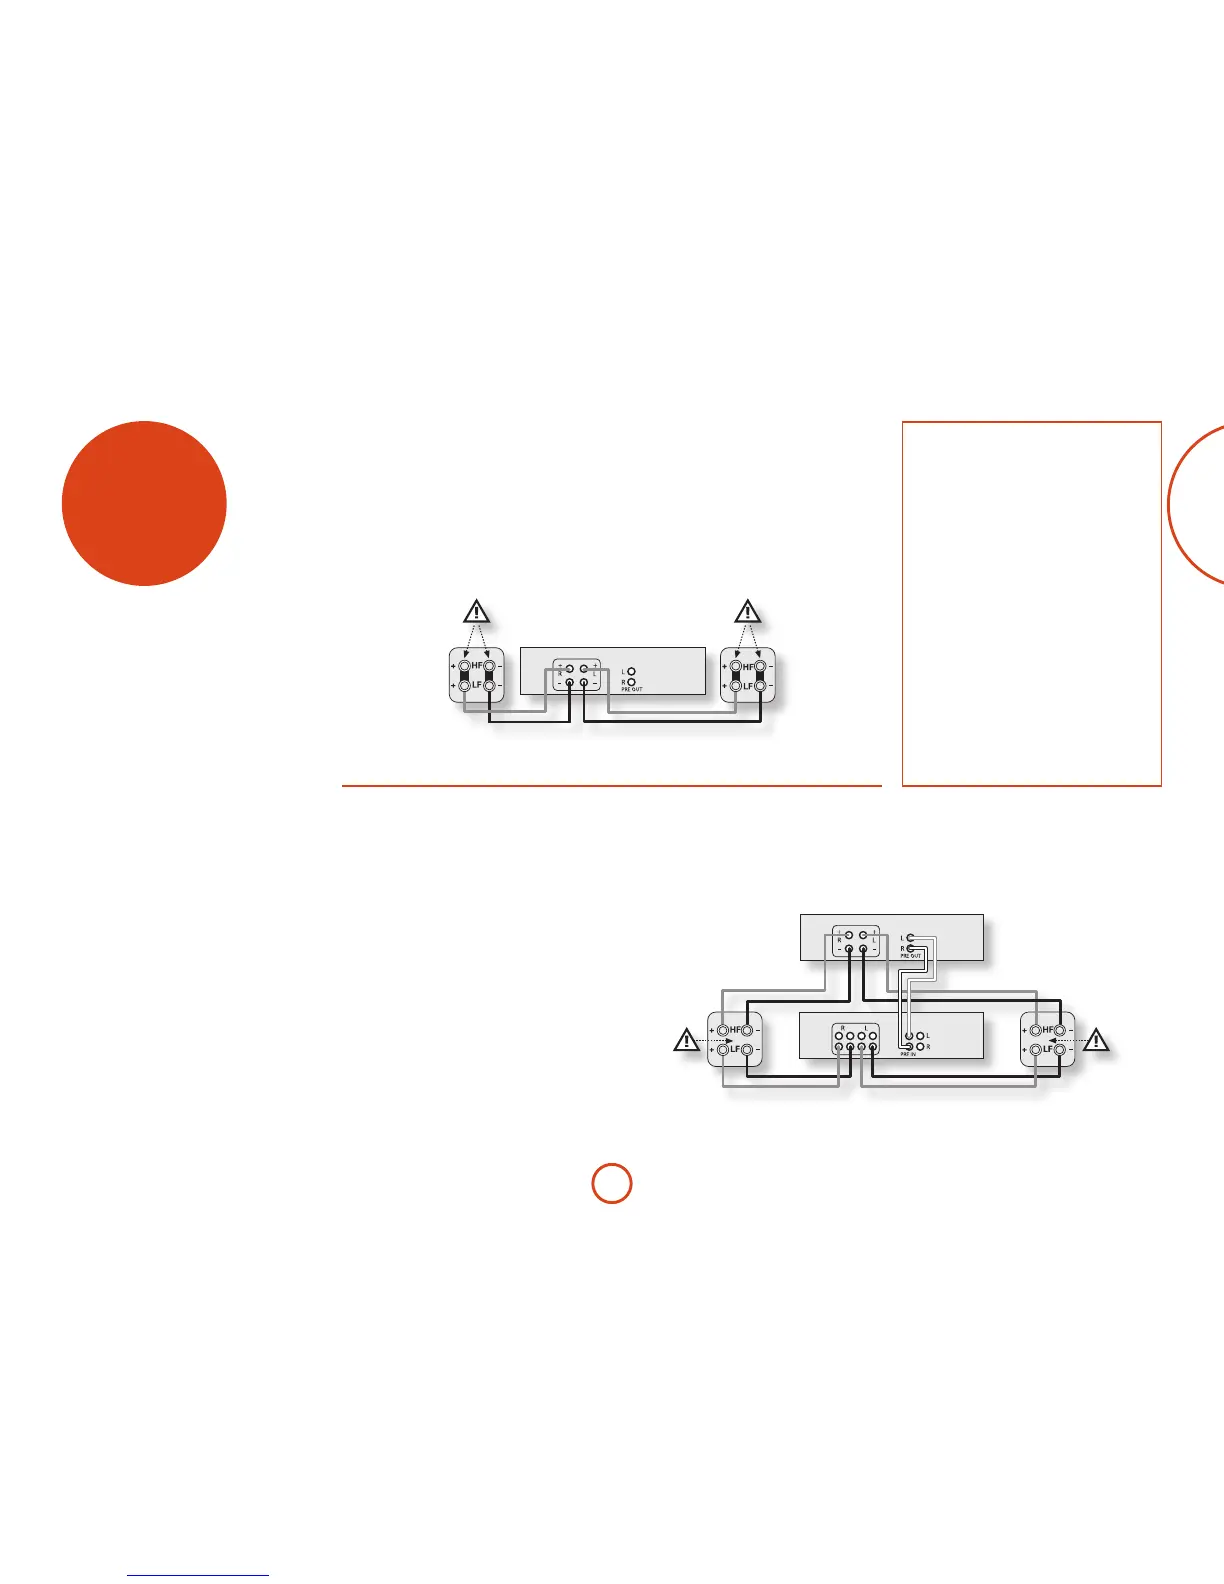
Single wiring
Single wiring is the conventional wiring method of
running a single cable per channel between the amplier
and the speaker; this is the easiest technique.
If each speaker has more than one pair of connecting
terminals, use the terminals labelled
LF or ‘Low
Frequency’ for each speaker.
Connect the positive terminal of the right speaker
connection on the amplier (coloured red and labelled
+R) to the positive terminal of your right speaker.
Bi-amping
Bi-amping is the separation of the amplication of low-
and high-frequency signals over two ampliers.
Bi-amping requires the use of two ampliers per
channel. Normally, your A19 is used to drive the high-
frequency (treble) speakers, with a P38 used for the
lower (bass) frequencies.
Connect your A19 to the speakers as described for
single wiring, with the exception that the A19 should
be connected to the speaker terminals labelled
HF or
‘High Frequency’. en connect the power amplier
(an Arcam P38 for example) to the LF or ‘Low
Frequency’ terminals, as in the diagram. A pair of audio
interconnect cables are also required to connect the
pre-amp outputs of the A19 to the power amp inputs of
the P38.
An A19 connected to speakers using single wiring
Arcam A19
An A19 and P38 connected to speakers using bi‑amping
Arcam A19
Arcam P38
Similarly, connect the negative terminal of the amplier
(coloured black and labelled with R–) to the negative
terminal of your speaker. Repeat the process for the le
speaker, using the amplier terminals labelled +L and L–.
If your speakers support bi-wiring, then there is a strip
of conductive metal on the speakers connecting the low-
frequency terminals to those for the higher-frequencies;
this MUST NOT BE REMOVED in a single-wired
system.
Note that the strip of metal on the speakers connecting
the lower terminals to the upper terminals MUST BE
REMOVED. Failure to do so will result in damage to
both ampliers, which will not normally be covered
under warranty.