EN-10
Operation
Switching On
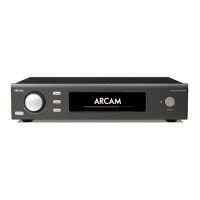
The POWER button switches the unit on and off. The
status indicator LED indicates the state of the ST60:
it changes from red to white when mains power is
connected and the unit is switched on.
Auto Standby
In order to comply with international regulations for
consumer products, this unit is designed to enter a low
power standby mode if no user interaction and no audio
input signal are detected for an extended period of time
(default time is 20 minutes). The unit can be brought
out of standby by either turning the control knob on
the front panel in either direction or by pressing the
POWER key on the remote control.
The amount of time before the unit enters standby is
configurable in the setup menu. See “Timeout” on page
EN-13 for details.
NOTE: if the standby time-out is set to OFF, the
standby feature will be disabled.
Display
To adjust the brightness of the front panel display press
the DISPLAY button on the remote control or use the
setup menu.
If the ST60 is powered off with the display brightness
set to ‘OFF’, the display will momentarily resume to full
brightness then turn off when the unit is powered back
on.
Selecting An Audio Source
Audio sources can be selected either using the INPUT
button on the front panel or with the remote control,
by pressing the required button, labelled as DIG 1, DIG
2, DIG 3, DIG 4, USB or NET. In each case, the source is
selected from the input sockets with the corresponding
name.
Digital Audio Inputs
The ST60 features two coaxial and two optical digital
inputs, which can be connected to the respective
digital audio output of your source equipment.
Digital inputs can renamed to suit the connected
source. See “Input Names” on page EN-13 for details.
WARNING: The ST60 only supports two channel PCM
audio input. Do not attempt to send multichannel
audio of any type as this could result in serious
damage to any connected amplier and speakers.
USB
This input is for playback of audio files from a USB pen
drive or similar device. Simply plug in the USB stick and
use the remote control or front panel to browse.
Network Audio
In order to use the network audio capability of the
ST60 please refer to “Connecting to a Network” on page
EN-11 to allow you to use AirPlay, Chromecast built-in or
playback from a NAS drive using the Arcam Music Life
app.
MusicLife
Digital Audio Outputs
Connect one of the digital audio outputs (optical or
coaxial) to the digital input of your device.
NOTE: the ST60 digital output is disabled by default.
See “Digital Output” on page EN-13 for information on
configuring the outputs to work with your device.
NOTE: the ST60 digital outputs provide a xed level
PCM stereo output only.
Analogue Audio Outputs
The ST60 features both balanced and unbalanced
outputs.
Using cables of suitable length, connect the left/right
outputs to the left/right inputs on your amplifier,
respectively.
NOTE: The analogue outputs will be disabled when
the digital output is enabled.
Listening
Volume Control
During playback, use the control knob, or the buttons
on the remote control, to change the volume.
Fixed Volume
If this feature has been enabled in the setup menu, the
output level will be set to full volume and all volume
control inputs will be ignored by the ST60.
Muting The Output
The output of the ST60 can be silenced by pressing the
MUTE button on the remote control or pressing the
control knob during playback. Press again to cancel the
mute.
Navigating Network or USB
Media
Selecting the NET or USB input will open the media
browsing screen.
Navigate up and down using the UP and DOWN
buttons on the remote control or by turning the
control knob.
Select a location or file with the OK button on the
remote control or by pressing the control knob.
To go back use the BACK button on the remote
control or the MENU button on the front panel.
To return to the top level use the HOME button on
the remote control or long press the MENU button
the front panel.
To skip quickly through a list of tracks use the LEFT or
RIGHT button on the remote control.
Home Automation Control
When connected to a network the ST60 can be
controlled and monitored remotely using dedicated
home automation software. See “Connecting to a
Network” on page EN-11 for details on how to connect
the ST60 to your network.
The same controls are also available via the RS232 input.
Various third-party systems are available providing
sophisticated control over all your entertainment
devices. Contact your dealer or installer for details.
The technical details of the remote control protocol
are available upon request, by contacting Arcam at
luxurysupport@harman.com.
For details of the available controls please refer
to the control document which can be found at
www.arcam.co.uk for further information.

 Loading...