3 Ratings
3.1 Recommended Operating Conditions
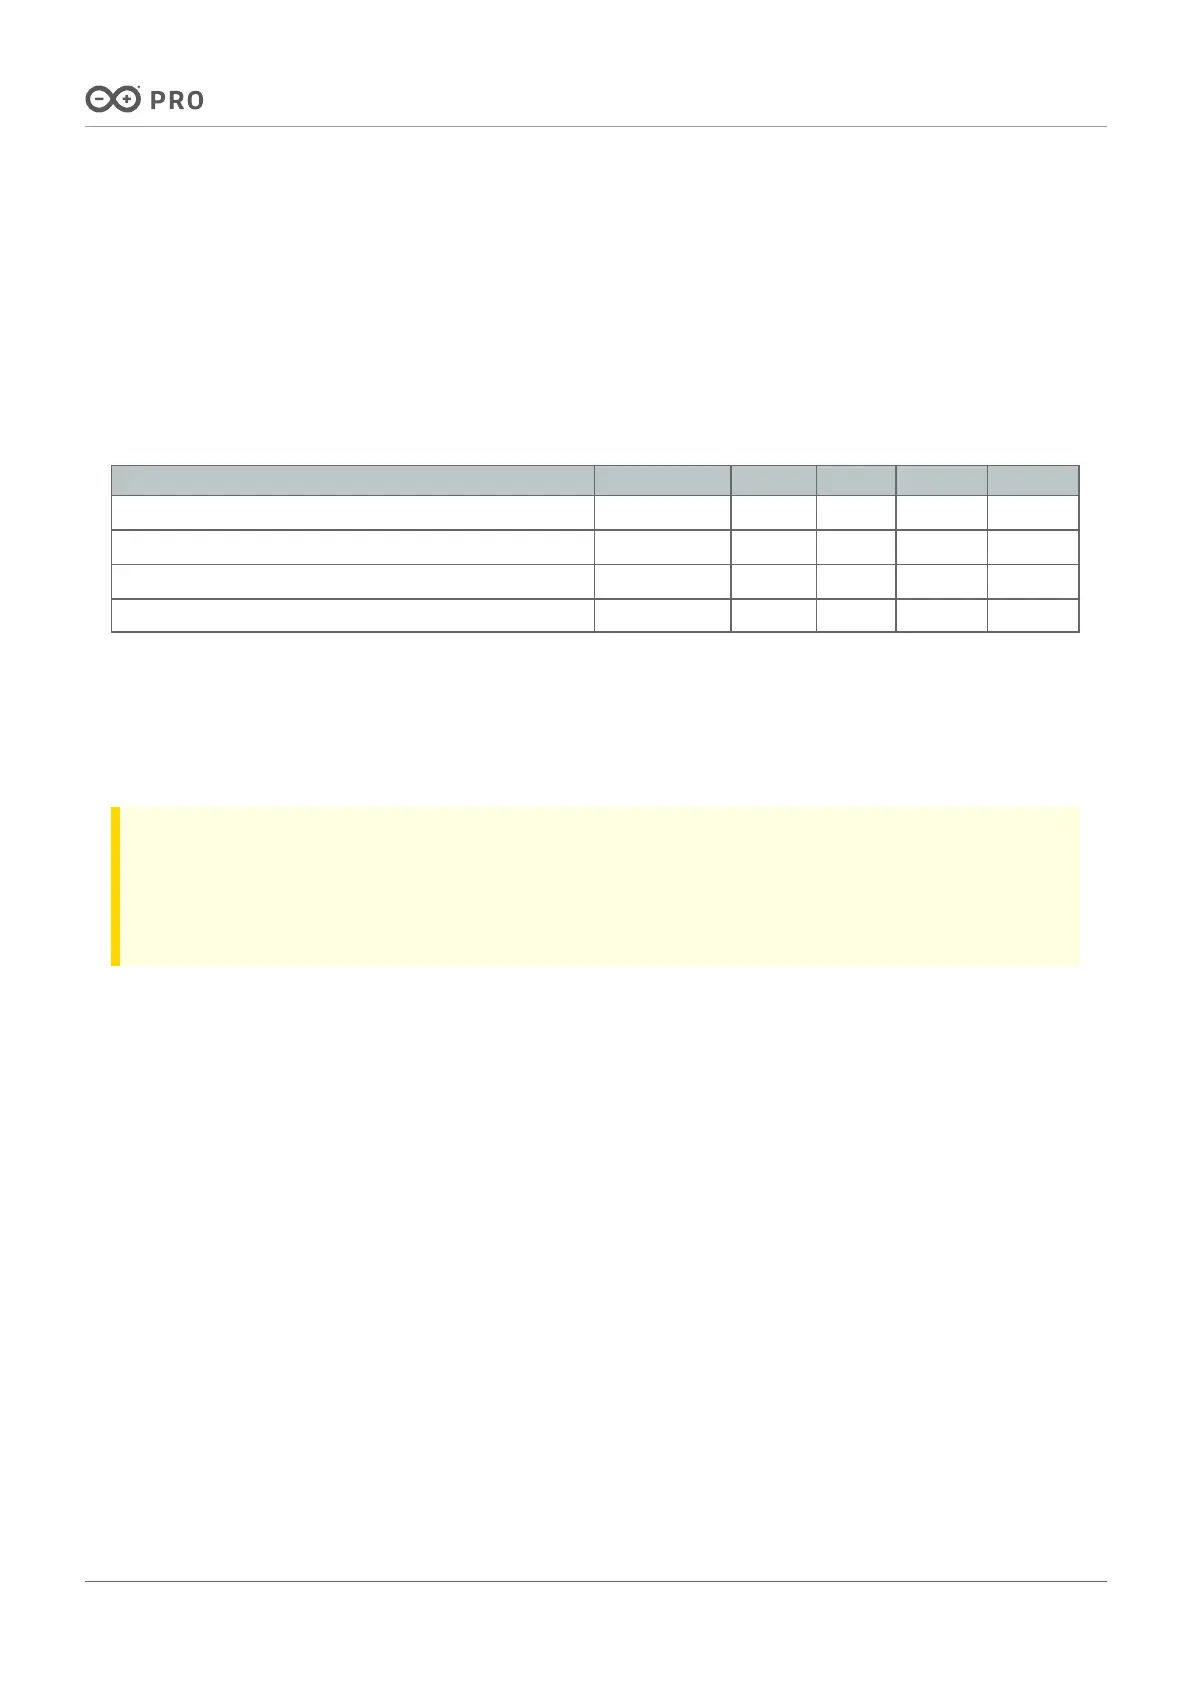
The table below provides a comprehensive guideline for the optimal use of the Arduino Portenta Mid Carrier,
outlining typical operating conditions and design limits. The operating conditions of the Portenta Mid Carrier are
largely based on the specifications of its components.
Parameter Symbol Min Typ Max Unit
USB Supply Input Voltage
1
V
USB
- 5.0 - V
Supply Input Voltage
2
V
IN
- 5.0 - V
Current delivered by the Carrier
3
I
C
- - 2.0 A
Operating Temperature
T
OP
-40 - 85 °C
1
Carrier powered through the USB-C® port of the connected Portenta family board to the carrier.
2
Carrier powered through its onboard screw terminal block (J4, IN 5V terminal) or its breakout pin header
connector (J15, IN 5V pins).
3
Available only for the Mini PCIe card connected to the carrier.
Note: Remember to check out the power specifications of the Mini PCIe card intended to be connected to the
carrier to avoid damage to both the card and the carrier. For more safety tips, refer to the carrier's user
manual.
 Loading...


