V 11/21 93
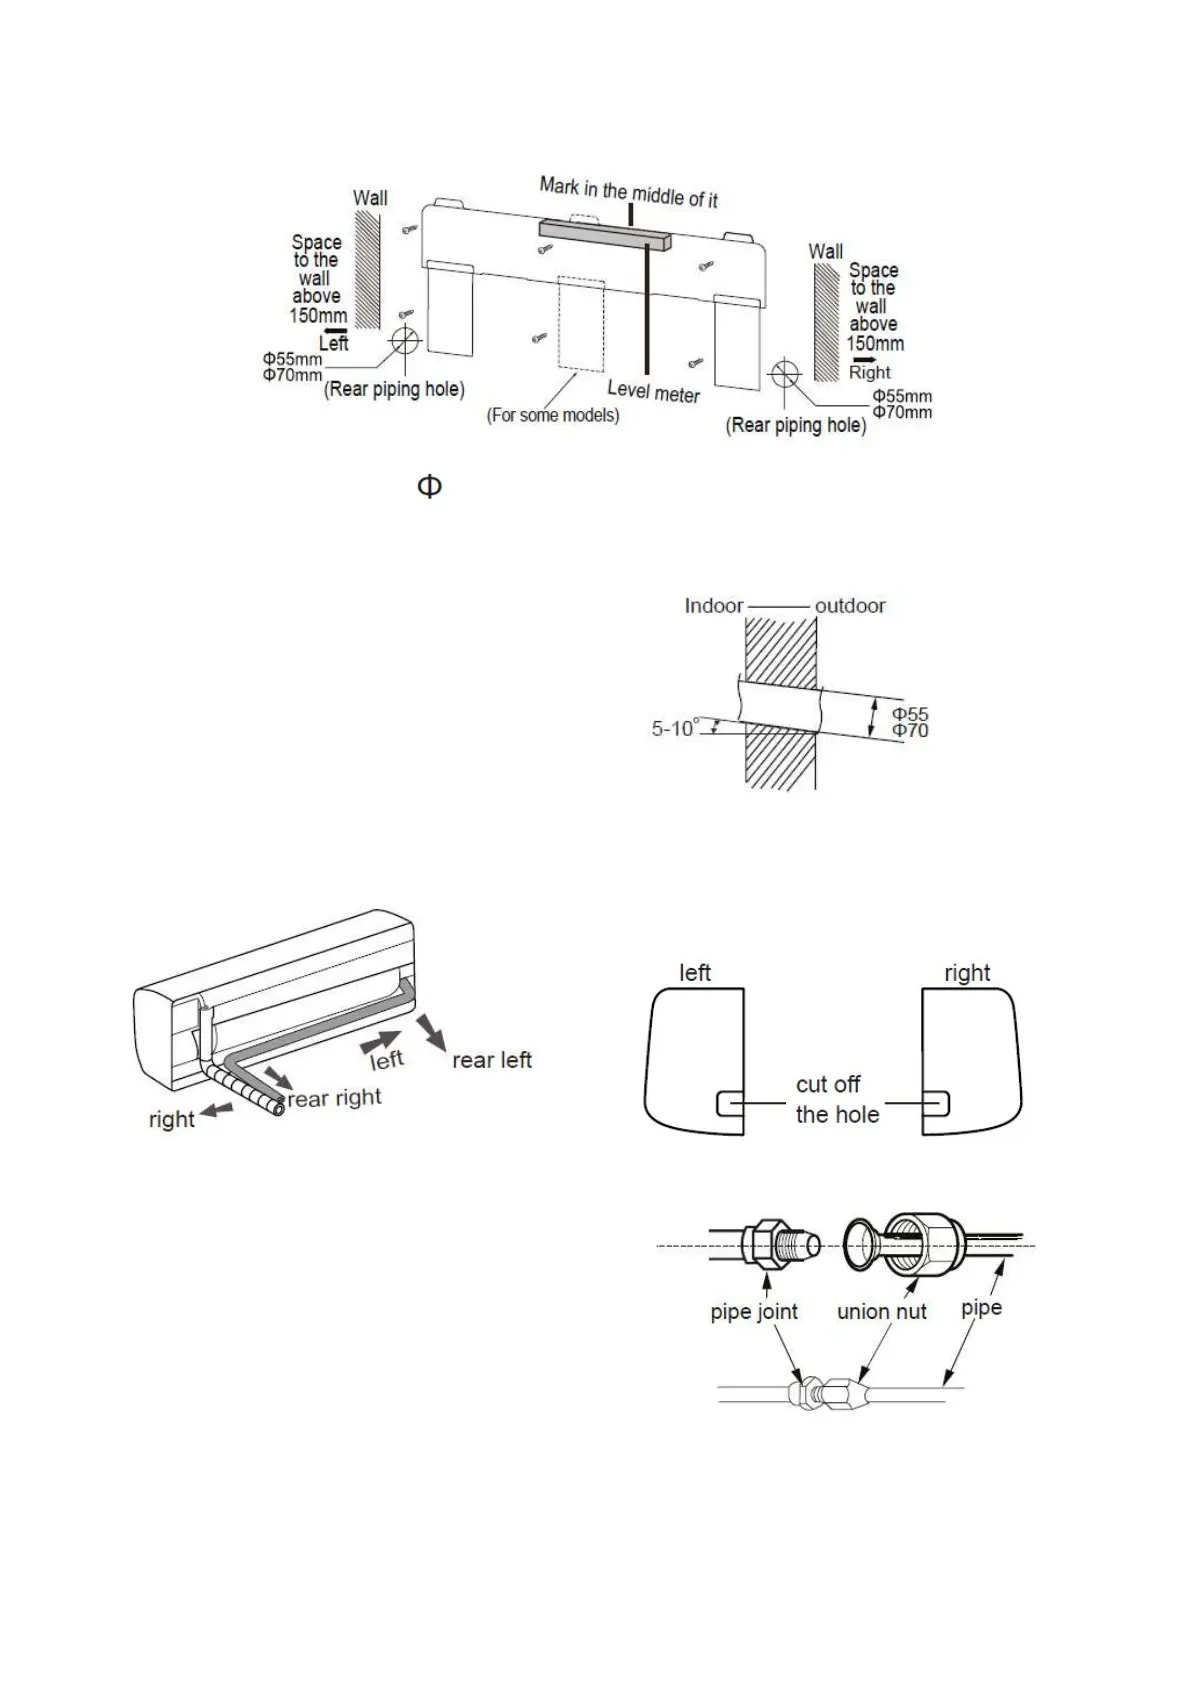
Step three: drill the hole for the piping
Select the position for the piping hole according to the direction of the outlet pipe. The piping hole
must be slightly lower than the wall-installation frame, as shown below.
Drill a piping hole of diameter 55 at the chosen location for the outlet pipe. To allow for proper
drainage, the piping hole in the wall must slant slightly downwards to the outdoor side, with a gradient
of 5 – 10°.
N.B.:
• Take the necessary safety measures when
drilling the hole and do not allow dust to enter.
• The plastic wall plugs are not supplied but
must be purchased on site.
Step four: outlet pipe
The pipe can be brought out in various different
directions: right, rear right, left or rear left.
Once you have selected the direction of the
outlet (left or right), drill the corresponding hole
at the bottom.
Step five: connect the indoor unit pipe
1. Position the pipe joint in the
corresponding bellmouth.
2. Pre-tighten the union nut by hand.
3. Adjust the torque according to the
following table. Position the open-end
spanner on the pipe joint and position
the torque wrench on the union nut.
Tighten the nut with the wrench.