12. ACCESSING THE CAMERA
In order to access the camera, power and network connectors have to be connected appropriately.
For more information see the Quick Install Guide. Follow the five steps below:
1. Connect the camera to a computer or a network switch using the Ethernet cable, then power
the camera on. Soon both status LEDs (at the camera front) turn on and stay lit while the
camera is booting. When the green status LED flashes two times and the red LED turns off the
camera is ready for operation.
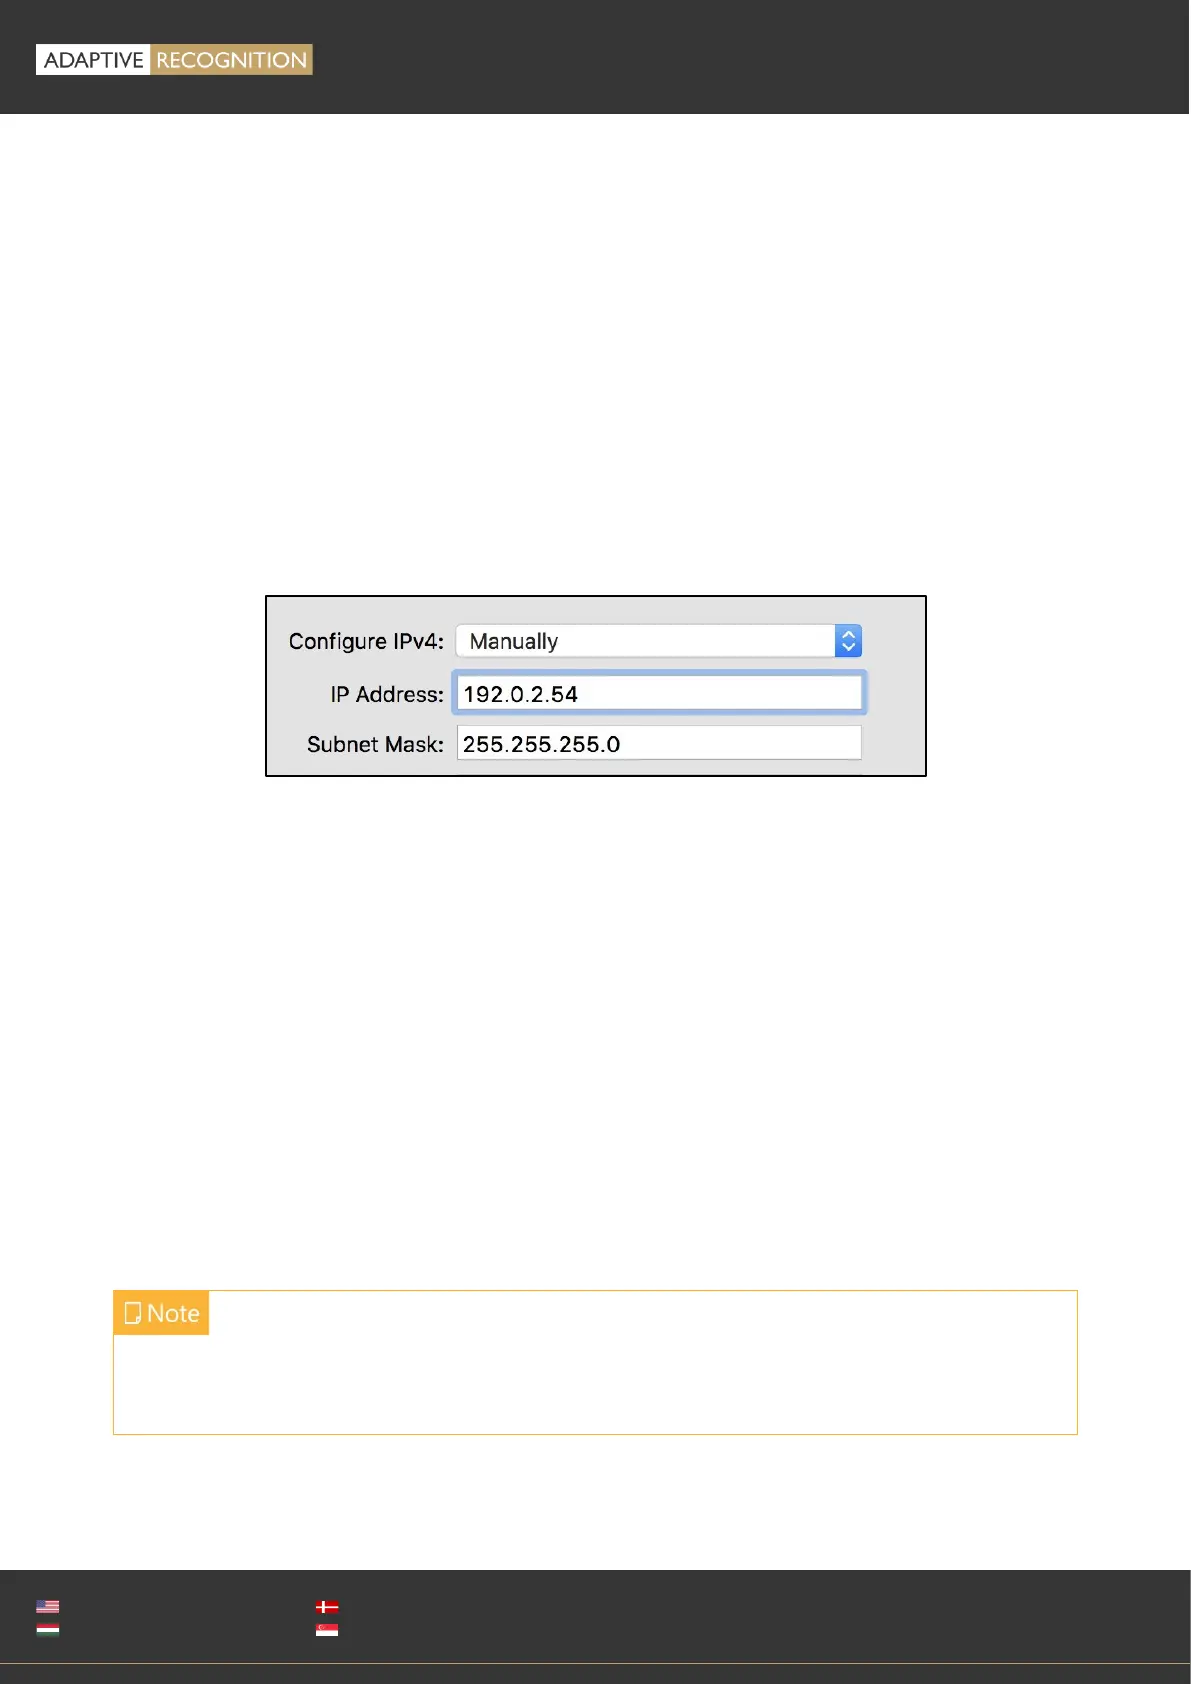
2. Set your computer’s IP address as 192.0.2.x (with x other than 3 or 255, for example
192.0.2.54), with the subnet mask 255.255.255.0
3. Use the ping command to test network connection to the camera
Windows: c: \ping -t 192.0.2.3
Linux: [username@mylinux ~]$ ping 192.0.2.3
4. In a couple of second the ping echo package will be received, if not:
• check the Ethernet link LEDs at the computer or network switch for a physical link
• check the IP of the computer by pinging its own address (using the example at step #2:
ping 192.0.2.54)
5. Start a browser and enter the default IP of the camera: http://192.0.2.3 into the address bar.
The camera’s user interface starts up with administrator privileges, ready to be set up and
configured. If the web interface is not accessible, make sure that neither a proxy nor a firewall
is blocking access, and that the browser is not in offline mode.
Under recent versions of Firefox (v. 56.0) it might be necessary to disable the feature "Use hardware
acceleration when available" to avoid possible browser/machine hangs (Located at:
Preferences/Performance/Use Recommended Performance Settings).