EasyManua.ls Logo

Aries 4504 User Manual

Aries 4504
4 pages
To Next Page IconTo Next Page
Page #1 background imageLoading...
Page #1 background image
PAGE 1 • 4504-INS-RB • 800.798.0813 • NEED ASSISTANCE?ARIESAUTOMOTIVE.COM
Level of Difficulty
Easy
Tools Required
Ratchet Socket, 10mm
Ratchet extension Socket, 14mm
Level Wrench, 14mm
INSTALLATION MANUAL
4504 WITH 6" OVAL
Scan
for helpful
install tips
Product Image
Front Front
Rear Rear
Notes and Maintenance
Before you begin installation, read all instructions thoroughly.
Proper tools will improve the quality of installation and reduce the time required.
To protect the product, wax after installing. Regular waxing is recommended to
add a protective layer over the finish. Do not use any type of polish or wax that may
contain abrasives that could damage the finish.
For stainless steel and aluminum, polish may be used to clear small scratches
and scuffs on the finish. Mild soap may be used also to clean the product.
Parts List
2 6" oval side bar
4 Universal bracket, #4504
4 Stainless steel bolt plate
16 Flat washer, M6
16 Nylock nut, M6 x 1, CL8.8
16 Flat washer, M8
16 Lock washer, M8
16 Hex head cap screw,
M8 x 1.25 - 25mm, CL8.8
8 Hex nut, M8 x 1, CL8.8
8 Clip nut, 8mm
Additional Hardware*
16 T-bolt, M8 x 1.25 - 25mm, CL8.8
16 Flat washer, M8
16 Lock washer, M8
16 Hex nut, M8 x 1, CL8.8
* Aluminum side bars are supplied
with additional hardware.
Quantities listed are in addition
to the standard supplied hardware.
Question and Answer IconNeed help?

Do you have a question about the Aries 4504 and is the answer not in the manual?

Aries 4504 Specifications

General IconGeneral
BrandAries
Model4504
CategoryAutomobile Accessories
LanguageEnglish

Summary

Installation Steps

Locate Pinch Weld Holes

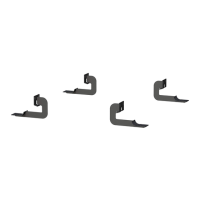
Identify the three pinch weld factory holes on the driver's side for mounting.

Prepare Mounting Points

Remove factory tape from rocker panel mounting holes and insert 8mm clip nuts.

Attach Mounting Brackets

Secure brackets using 8mm hex bolts, flat washers, and locking washers on clip nuts.

Install Second Bracket

Repeat steps for the second driver side bracket at the rear mounting location.

Position Side Bar

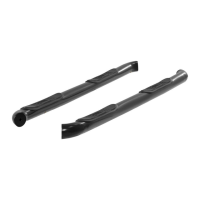
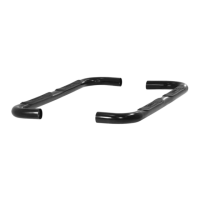
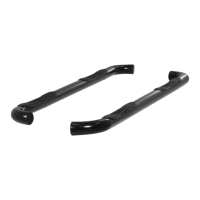
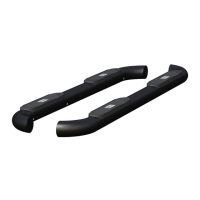
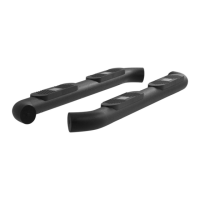
Place the side bar onto the brackets with the larger step pad towards the front.

Secure Side Bar (Stainless Steel)

Attach stainless steel side bars using bolt plates, 6mm washers, and nylock nuts.

Secure Side Bar (Aluminum)

Insert T-bolts into aluminum side bar channels and attach to brackets with washers and nuts.

Tighten All Hardware

Ensure side bar is centered, then fully tighten all bracket-to-vehicle and side bar connections.

Install Passenger Side

Repeat all installation steps (1-9) on the passenger side of the vehicle.

Final Checks and Protection

Periodically inspect hardware for tightness and apply a layer of nonabrasive wax.

Notes and Maintenance

Product Protection and Waxing

Wax after installing and regularly to maintain finish. Avoid abrasive polishes or waxes.

Cleaning Stainless Steel and Aluminum

Use polish for minor scratches on stainless steel/aluminum. Mild soap for general cleaning.

Related product manuals