Do you have a question about the Aries AL235041 and is the answer not in the manual?
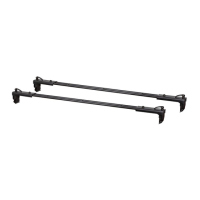
Lists all components required for installation, including side bars and mounting hardware.
Specifies essential tools like torque wrench and sockets for proper installation.
Provides crucial pre-installation advice and maintenance tips for product longevity.
Identify the two mounting locations underneath the vehicle on the driver side.
Insert M8 bolt plate and M12 bolt/nut plate into the driver-side front mounting holes.
Secure the driver-side front bracket using M12 and M8 hardware for vehicles with factory inserts.
Install bracket on older models without factory inserts using provided plates and M10 hardware.
Install the rear bracket using M12/M10 nut plate and M8 hardware for specific vehicle models.
Align and attach the side bar to the installed brackets using M10 hardware.
Adjust and level the side bar, then tighten all bracket and side bar hardware.
Insert M12/M10 nut plate and M8 bolt plate into passenger-side mounting locations.
Secure the passenger-side front bracket using M8 and M12 hardware based on vehicle model.
Repeat steps 4-6 for the passenger side and perform final checks.
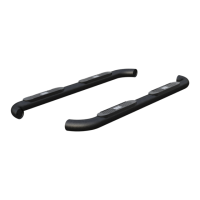
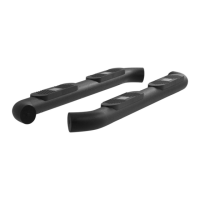
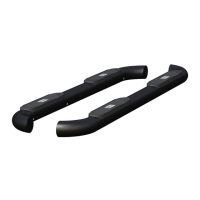
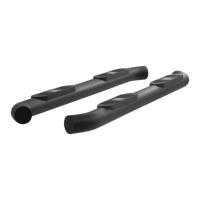
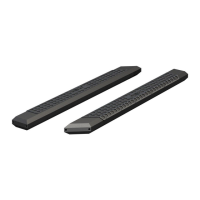
This document outlines the installation and maintenance procedures for ARIES Big Step™ 4" round side bars, designed to enhance vehicle accessibility and aesthetics. The side bars serve as a convenient step for entering and exiting the vehicle, providing a secure and stable platform.
The ARIES Big Step™ 4" round side bars are aftermarket accessories that attach to the vehicle's rocker panel, offering a sturdy step for passengers and drivers. Their primary function is to facilitate easier entry and exit, especially for taller vehicles or individuals who may find it challenging to step directly into the cabin. Beyond their practical utility, these side bars also contribute to the vehicle's overall appearance, adding a rugged and finished look. The installation process involves securing mounting brackets to existing points on the vehicle's chassis, followed by attaching the side bars to these brackets. The design ensures a robust connection, capable of supporting significant weight and withstanding various environmental conditions. The side bars are engineered to integrate seamlessly with the vehicle's design, maintaining ground clearance and avoiding interference with other components. The installation is designed to be straightforward, with clear instructions provided for both newer and older model vehicles, accommodating variations in factory-threaded inserts.
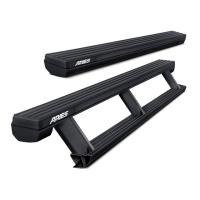
The side bars are designed for practical, everyday use. Once installed, they provide a consistent and reliable step. The 4-inch round design offers a comfortable and wide stepping surface, enhancing safety and stability when entering or exiting the vehicle. The robust construction ensures durability, allowing the side bars to withstand regular use and exposure to elements such such as dirt, water, and road debris. The side bars are positioned to be easily accessible, aligning with the vehicle's door openings to provide an ergonomic stepping point. The installation process is detailed to ensure a secure fit, which is crucial for the safety of users. Different hardware components, such as bolt plates, hex bolts, flat washers, and lock washers, are specified for various mounting points and vehicle models, ensuring a tailored and strong attachment. The instructions differentiate between vehicles with and without factory-threaded inserts, providing specific guidance for each scenario to ensure proper installation. Plastic bolt retainers are included to hold bolts in place during the initial stages of installation, simplifying the process and preventing components from falling. The side bars are designed to be adjusted and leveled after initial attachment, allowing for a precise and aesthetically pleasing fit. This adjustability ensures that the step is parallel to the ground and aligns correctly with the vehicle's body lines. The final tightening of all hardware is emphasized to secure the side bars firmly to the vehicle, preventing any movement or rattling during operation.
Maintaining the ARIES Big Step™ 4" round side bars is relatively simple, focusing on ensuring their longevity and appearance. For black finishes, the recommended cleaning method involves using mild soap. This gentle approach helps to remove dirt and grime without damaging the finish, preserving the aesthetic quality of the side bars. Regular cleaning is important to prevent the buildup of corrosive materials that could degrade the material over time. Beyond cleaning, periodic inspections are a critical aspect of maintenance. The manual explicitly states that "periodic inspections should be performed to ensure all mounting hardware remains tight." This is a crucial step to ensure the safety and stability of the side bars. Over time, vibrations from driving, changes in temperature, and general wear and tear can cause bolts and nuts to loosen. Regularly checking and re-tightening all mounting hardware—including hex bolts, flat washers, lock washers, and nuts—will prevent the side bars from becoming loose or unstable. This proactive approach helps to avoid potential hazards and extends the lifespan of the product. The torque wrench is listed as a required tool, indicating that specific torque values may be important for securing the hardware correctly, although these values are not provided in this document. Using the correct tools, as listed in the "Tools Required" section, ensures that maintenance tasks can be performed effectively and without damaging the hardware or the side bars. Following these maintenance guidelines will help to keep the ARIES Big Step™ 4" round side bars in optimal condition, providing reliable service and maintaining their appearance for years to come.
| Product Type | Car Cover |
|---|---|
| Brand | Aries |
| Model | AL235041 |
| Size | Universal |
| Weather Resistance | Water Resistant |