This document describes the Ariston Daily Reference Guide, providing comprehensive information on the product's features, usage, and maintenance.
Product Description
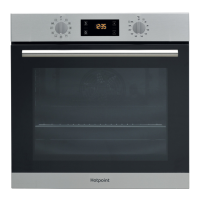
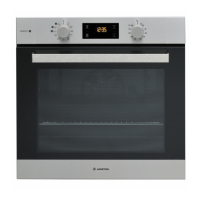
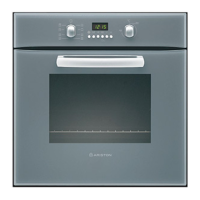
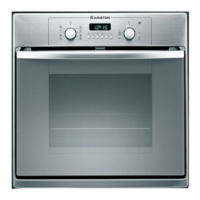
The Ariston oven features a user-friendly control panel, a fan for even heat distribution, and an interior lamp for visibility. It includes multiple shelf guides, indicated on the cooking compartment wall, allowing for flexible placement of accessories. The oven door is equipped with a lock for safety. Internally, it houses an upper heating element/grill, a non-visible circular heating element, and a non-visible bottom heating element. An identification plate, which should not be removed, is also present.
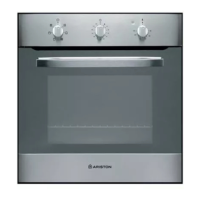
Control Panel
The control panel consists of a selection knob, a light button, time setting controls, a display, adjustment buttons, and a thermostat knob.
The Selection Knob is used to switch the oven on by choosing a specific function. Turning it to the "0" position switches the oven off.
The Light Button allows users to turn the oven compartment lamp on or off when the oven is switched on.
The Time Setting feature provides access to cooking time settings, delayed start, and a timer. It also displays the current time when the oven is off.
The Display shows various settings and information during operation.
The Adjustment Buttons are used to change cooking time settings.
The Thermostat Knob is used to select the desired temperature when activating manual functions. For automatic functions, it should be set to the "0/A" position.
Accessories
The oven comes with a wire shelf and a baking tray. The number of accessories may vary by model, and additional accessories can be purchased separately.
To insert the wire shelf, tilt it slightly upwards, rest the raised rear side (pointing upwards) down first, and then slide it horizontally along the shelf guide as far as possible. Other accessories, such as the baking tray, are inserted horizontally, sliding them onto the shelf guides. The shelf guides can be removed to facilitate oven cleaning by pulling them from their seats.
Functions
The Ariston oven offers a variety of cooking functions:
Conventional: Ideal for cooking any type of dish on a single shelf.
Forced Air: Suitable for cooking different foods that require the same temperature on multiple shelves (up to three) simultaneously. This function prevents odor transfer between foods.
Maxi Cooking: Designed for cooking large joints of meat (over 2.5 kg). It is recommended to turn the meat over during cooking for even browning and baste it to prevent drying out.
Pizza: For baking various types and sizes of pizza and bread. It is advisable to swap the position of baking trays halfway through cooking.
Grill: Used for grilling steaks, kebabs, sausages, au gratin vegetables, and toasting bread. When grilling meat, a drip tray with 200 ml of drinking water should be placed on a lower shelf to collect juices.
Turbo Grill: For roasting large joints of meat (legs, roast beef, chicken). A drip tray with 200 ml of drinking water should be used on a lower shelf to collect cooking juices.
Rising: Helps sweet or savory dough rise effectively. Activated by turning the thermostat knob to the rising icon.
Eco Forced Air: For cooking roasts and stuffed roasting joints on a single shelf. This function prevents food from drying out with gentle, intermittent air circulation. The oven light remains off during this function but can be switched on by pressing the light button.
Bread Auto: Automatically selects the ideal temperature and baking time for bread. It should be activated when the oven is cold, and users should follow the recipe carefully.
Dessert Auto: Automatically selects the ideal temperature and baking time for cakes. It should be activated when the oven is cold.
Automatic Cleaning (Pyro): Eliminates cooking spatters using a very high-temperature cycle (over 400 °C).
Usage Features
Setting the Time
Upon first use or after a power outage, press the time setting button until the clock icon and hour digits flash. Use the adjustment buttons to set the hour, then press the time setting button to confirm. Repeat for the minutes.
Reheating the Oven
A new oven may emit odors from manufacturing. Before cooking, heat the empty oven to 250 °C for about one hour using the "Maxi Cooking" function to remove any odors. Remove all protective materials and accessories first. Air the room after this initial use.
Daily Use
Selecting a Function: Turn the selection knob to the desired function symbol. The display will light up, and an audible signal will sound.
Activating a Function (Manual): To start a selected function, turn the thermostat knob to the desired temperature. The function will not start if the thermostat knob is at "0." During cooking, functions and temperatures can be adjusted. Cooking time, end time, and a timer can also be set.
Activating a Function (Automatic): For "Bread" or "Dessert" functions, set the thermostat knob to "0/A." To finish cooking, turn the selection knob to "0."
Rising Function: Turn the thermostat knob to the rising symbol. The function will not start if a different temperature is set. Cooking time, end time, and a timer can be set.
Preheating: Once a function starts, an audible signal and a flashing icon indicate preheating. When the oven reaches the set temperature, a fixed icon and audible signal will indicate completion. Food should then be placed inside. Placing food before preheating is complete may affect cooking results.
Programming Cooking
Duration: Press the time setting button until the clock icon and "00:00" flash. Use the adjustment buttons to set the cooking time, then press to confirm. Activate by setting the thermostat knob to the desired temperature. An audible signal will sound when cooking is complete. To cancel, press the time setting button until the clock icon flashes, then use the adjustment buttons to reset to "00:00." This includes a preheating phase.
End Cooking Time/Delayed Start: After setting a cooking time, press the time setting button until the clock icon and current time flash. Use the adjustment buttons to set the desired end time, then press to confirm. Activate by setting the thermostat knob to the desired temperature. The function will pause and start automatically to finish cooking at the set time. To cancel, turn the selection knob to "0."
End of Cooking: An audible signal and "End" on the display indicate completion. Turn the selection knob to a different function or "0" to switch off. If the timer is active, "END" will alternate with the remaining time.
Setting the Timer
Press the time setting button until the timer icon and "00:00" flash. Use the adjustment buttons to set the time, then press to confirm. An audible signal will sound when the timer finishes. To cancel, press the time setting button until the timer icon flashes, then use the adjustment buttons to reset to "00:00." This function does not interrupt or program cooking but allows the display to be used as a timer.
Automatic Cleaning Function (Pyro)
Do not touch the oven during the Pyro cycle. Keep children and animals away from the oven during and after the cycle until the room is aired. Remove all accessories, including shelf guides, before running the function. If the oven is installed under a hob, ensure all burners or electric hotplates are off. For optimal results, remove heavy soiling with a damp sponge beforehand. Only run the Pyro function for heavy soiling or bad odors.
To activate, turn the selection knob and thermostat knob to the Pyro icon. The function will activate automatically, the door will lock, and the oven light will turn off. The display will show the remaining time, alternating with "Piro." The duration is automatically set to 120 minutes. The end time can be programmed. After the cycle, the door remains locked until the oven cools to a safe temperature. Air the room during and after the cycle.
Cooking Table
The cooking table provides recommended functions, accessories, and shelf levels for various foods. Cooking times are approximate and depend on food quantity and accessory type. Start with lower settings and adjust as needed. Dark-colored metal tins and baking trays are preferred. Pyrex or stoneware can be used, but cooking times may be longer.
When using "Forced Air" to cook different foods at the same temperature on multiple shelves, remove foods with shorter cooking times first.
For the "Bread Auto" function, follow the recipe for 1000g of dough: 600g flour, 360g water, 11g salt, 25g fresh yeast. For optimal rising, allow 90 minutes at room temperature or 60 minutes in the oven using the "Rising" function. Place the dough in the cold oven, pour 100cc cold drinking water into the bottom, and activate "Bread Auto." After cooking, let the dough cool on a wire shelf.
Maintenance Features
General Maintenance and Cleaning
Safety Precautions: Do not use steam cleaning equipment. Wear protective gloves during all operations. Perform cleaning when the oven is cold. Disconnect the appliance from the power supply. Do not use wire wool, abrasive scourers, or corrosive cleaning agents, as they can damage surfaces.
Exterior Surfaces: Clean with a damp microfiber cloth. For heavy dirt, add a few drops of pH-neutral detergent and finish with a dry cloth. If corrosive or abrasive products come into contact, clean immediately with a damp microfiber cloth.
Interior Surfaces: After each use, let the oven cool and clean it while still warm to remove deposits. To dry condensation from high-water-content foods, let the oven cool completely and wipe with a cloth or sponge. For stubborn dirt, run the automatic cleaning function. Clean the door glass with a suitable liquid detergent. The door can be removed for easier glass cleaning.
Accessories: Soak accessories in a washing-up liquid solution after use. Handle hot accessories with oven gloves. Remove food residues with a washing-up brush or sponge.
Removing and Refitting the Door
- Removal: Open the door fully and lower the catches to the unlock position. Close the door as much as possible. Hold the door firmly with both hands (not by the handle). Continue closing it while pulling it upwards until it releases from its seating. Place the door on a soft surface.
- Refitting: Move the door towards the oven, aligning the hinge hooks with their seating, and secure the upper part. Lower the door and open it fully. Lower the catches to their original position, ensuring they are fully down. Close the door to check alignment with the control panel; if not, repeat the steps.
Click & Clean - Cleaning the Glass
- After removing the door and resting it on a soft surface with the handle downwards, simultaneously press the two retaining clips and remove the upper edge of the door by pulling it towards you.
- Lift and firmly hold the inner glass with both hands, remove it, and place it on a soft surface for cleaning.
- Refit the intermediate pane (marked "1R") before the inside pane. Ensure the "R" mark is in the left-hand corner. Insert the long side of the glass indicated by "R" into the support seats, then lower it into position. Repeat for both panes.
- Refit the upper edge. A click indicates correct positioning. Ensure the seal is secure before refitting the door.
Troubleshooting
Oven not working:
- Possible cause: Power cut or disconnection from mains.
- Solution: Check for mains electrical power and oven connection. Turn off and restart the oven.
Display shows "F" followed by a number:
- Possible cause: Software problem.
- Solution: Contact Client After-sales Service, stating the number following "F."
Useful Tips
The manual also provides information on how to obtain the Use and Care Guide and contact After-sales Service, including product fiche and commercial codes.