OPERATING INSTRUCTIONS
AU104488 C6B 28
Dry Boring
283L93
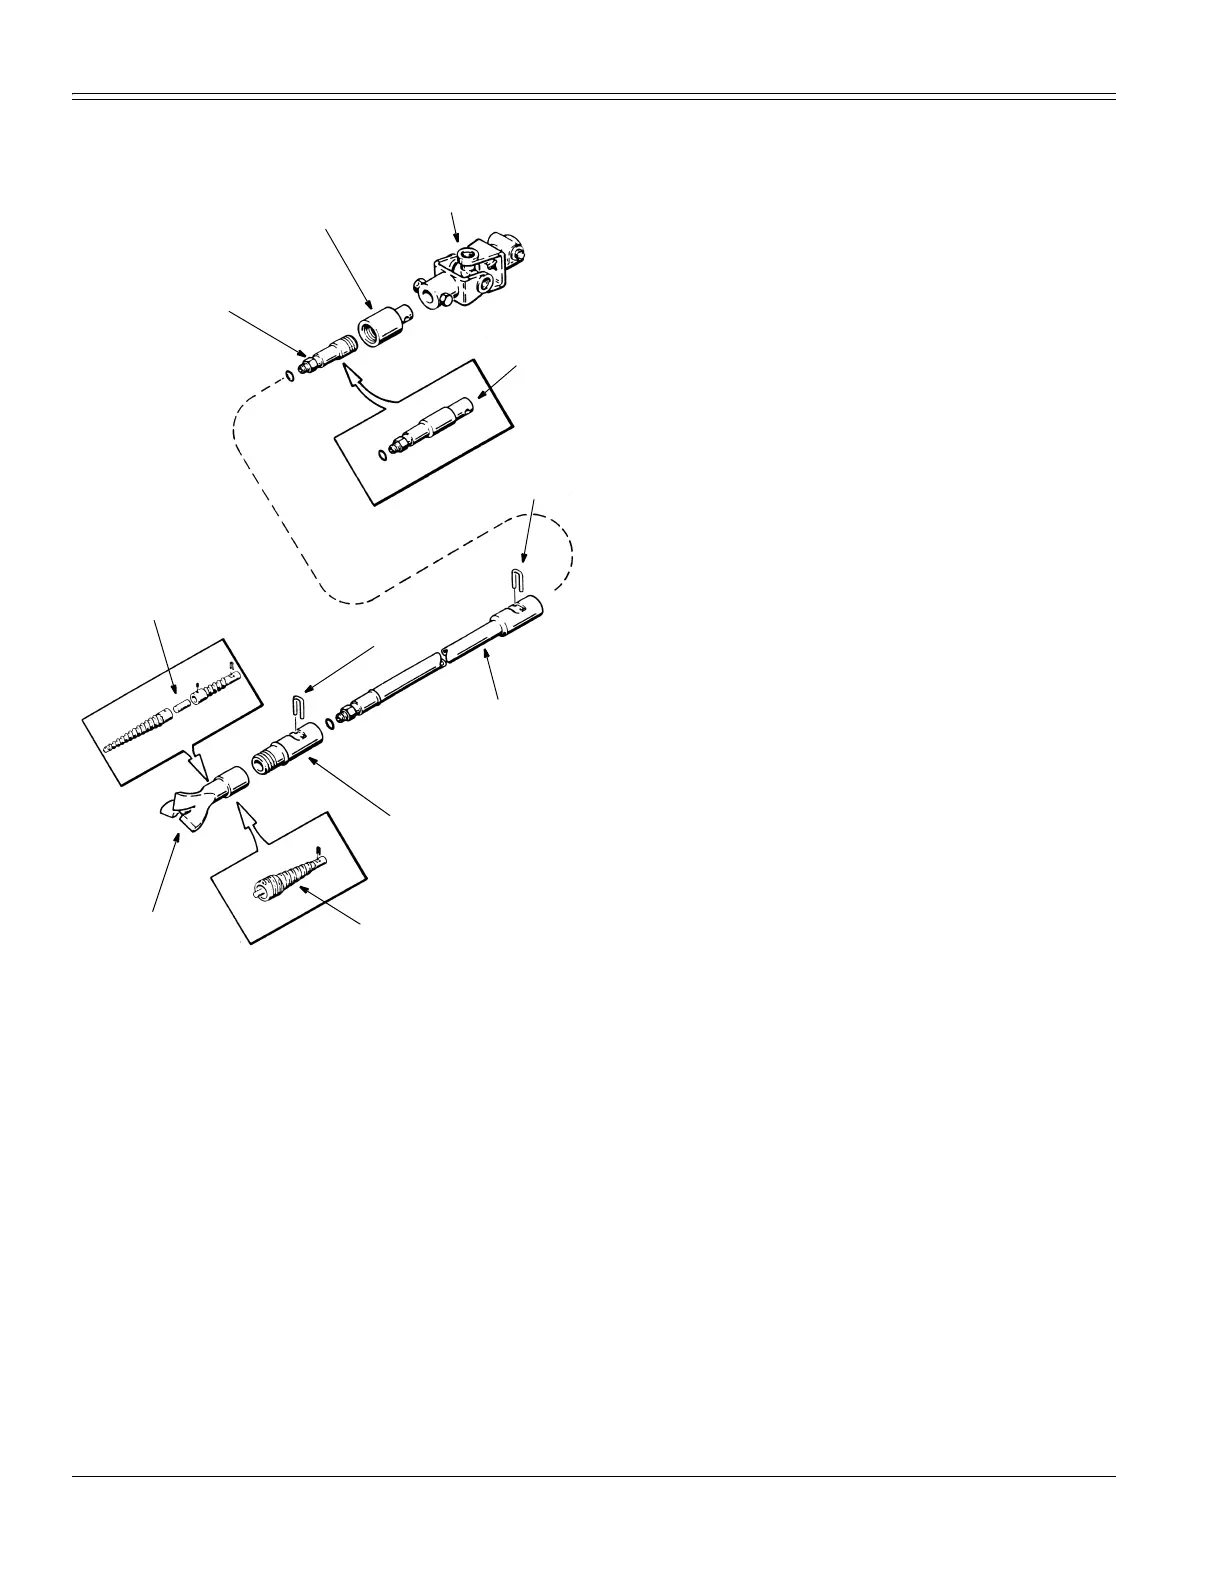
1. Attach a 1 inch male adapter (2) and a male quick
lock adapter (4) or a male quick lock adapter (3) to
the Hydra-Borer universal joint (if using standard 1
inch drill pipe only (2) is required.
2. Attach a maximum of three drill stems outside the
hole being bored. When one stem length is under
ground, another can be added before boring
operations continue. Minimize the number of drill
stems outside the hole. Excess lengths tends to bow
or whip unless restrained by the guide anchors.
IMPORTANT:
Be sure to use the correct retainer (5).
Make sure that the retainer DOES NOT protrude through
the drill stem.
NOTE:
If standard 1 inch pipe is used, it may be left in
hole to act as a conduit for wire, etc.
3. Begin operations by boring a pilot hole. Use a fishtail
bit (9) for tightly compacted soil or a compaction bit
(10) for soils which are loose or granular. Attach the
drill bit to the drill stem using a female quick lock
adapter (8). If using standard drill pipe the drill bit
will thread directly into the drill pipe.
4. Start the engine, See Starting The Engine in this
manual. When the engine is warm, move the throttle
to full throttle.
5. Move the hydra-borer valve control lever to the BORE
position.
6. Push the hydra-borer lever forward to BORE position
to rotate the hydra-borer shaft clockwise. Move the
lever to REVERSE to rotate the hydra-borer shaft
counterclockwise. The lever will return to the STOP
position automatically when released to stop rotation
of the hydra-borer shaft.
7. Use the creep lever to control the forward/reverse
direction and the machine speed during boring
operations. The machine speed should be sufficient to
allow the bit to work freely while boring. DO NOT
FORCE BORE THE HOLE.
NOTE:
You MUST pull the trigger control on the joystick
before you can move the machine.
8. After the target hole is reached you may wish to
change the bit and use another accessory to
backream and enlarge the hole. If you do, STOP THE
MACHINE, TURN OFF THE ENGINE AND
REMOVE THE KEY. Make sure that the drill stem is
not turning before you attempt to change or remove
the bit.
5. RETAINE
5. RETAINER
7. DRILL STEM
11. COMPACTION REAMER
9. FISHTAIL DRILL BIT
10. COMPACTION BIT
1. UNIVERSAL JOINT
8. FEMALE QUICK
LOCK ADAPTER
3. MALE QUICK
LOCK ADAPT
2. MALE
ADAPTER
4. MALE QUICK
LOCK ADAPTER