17
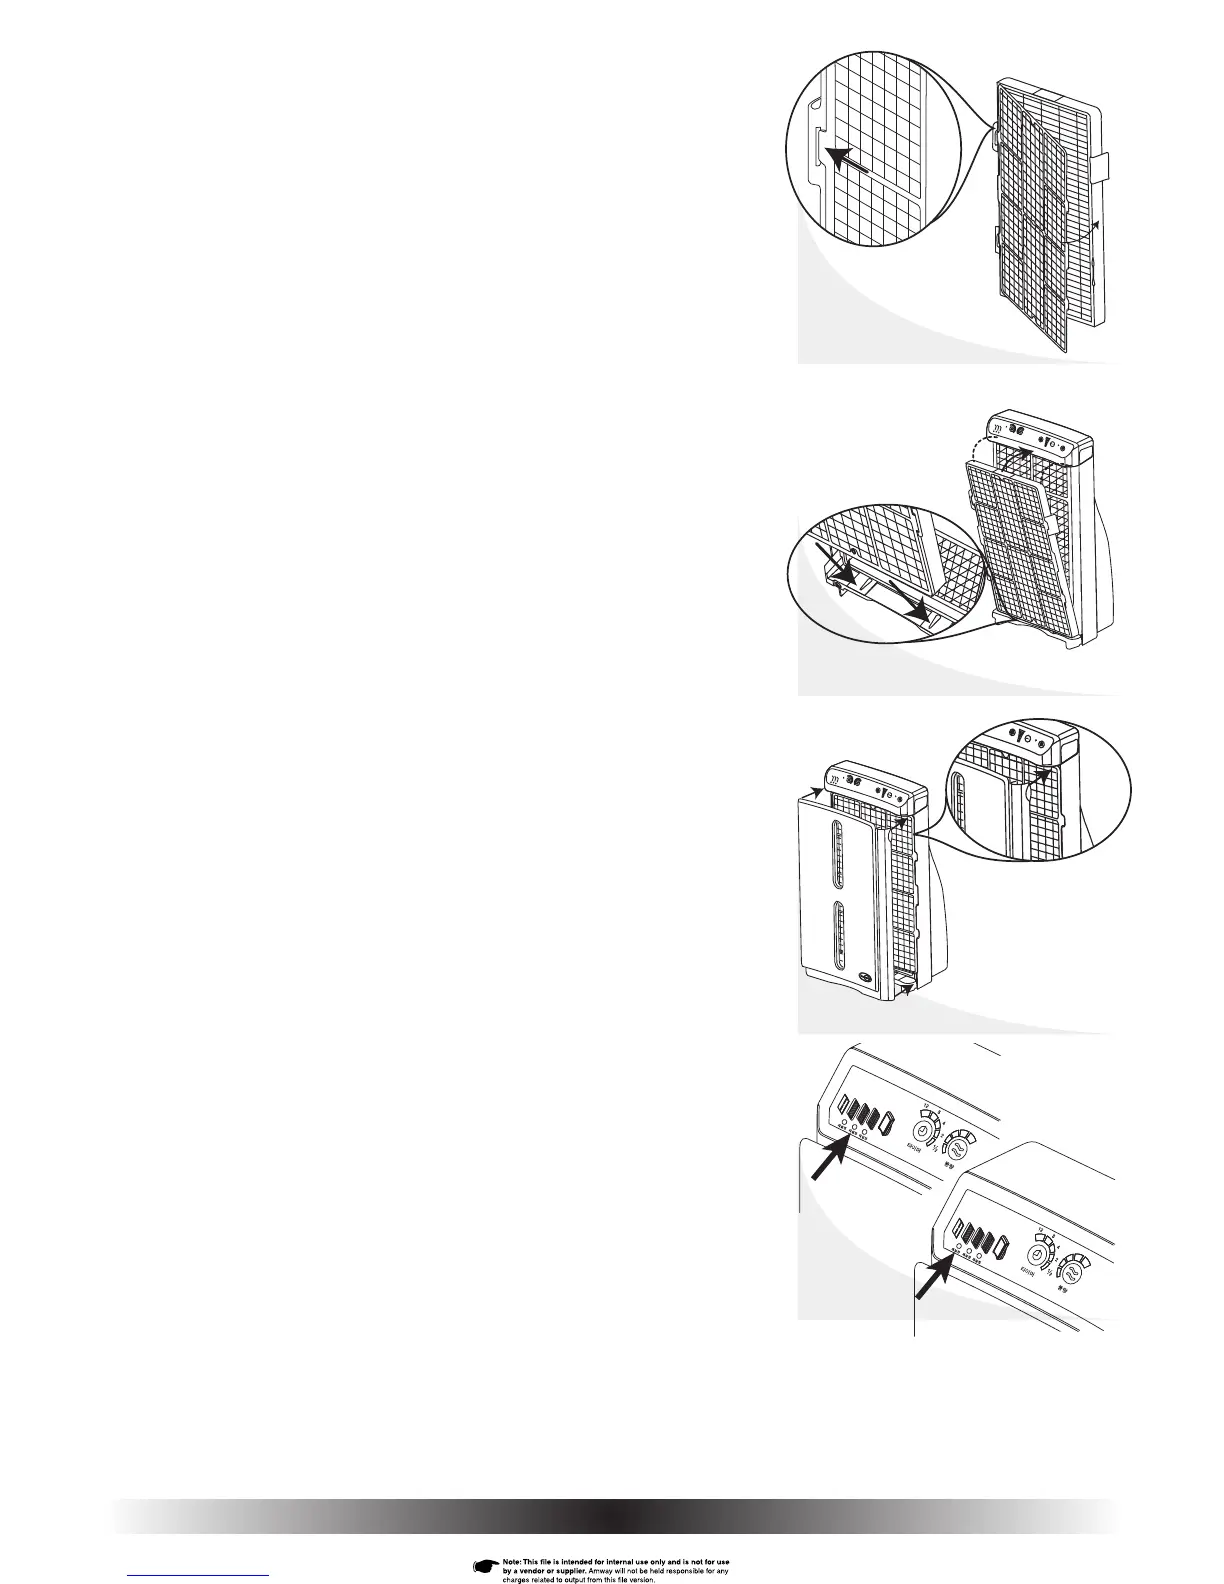
7. Slide the right two tabs into the slots in the frame of the new HEPA fi lter
(Fig. 36). Reattach the pre-fi lter by sliding the left two tabs into the slots in
the frame of the new HEPA fi lter (Fig. 36a).
8. With the pre-fi lter facing out, reinstall the combined fi lter assembly by
fi rst placing the bottom of the frame into the slots at the bottom of the
housing (Fig. 37a).
9. Swing the fi lters in place making sure the two tabs on the frame fi t into
the slots on each side of the housing (Fig. 37).
10. Reattach the front cover by aligning the four black pegs on the back of the
cover with the four corresponding holes on the housing. Starting with the top
two, push the four black pegs into the holes (Fig. 38).
11. Plug-in air purifi er and turn-on power.
12. Reset the HEPA fi lter monitor using the tip of a ballpoint pen or the
end of a paper clip (Fig. 39). Press and hold the HEPA fi lter reset
button until it beeps. The HEPA fi lter replacement light will turn from
red to green.
13. Reset the pre-fi lter monitor (Fig. 40).
Fig. 36
Fig. 36a
Fig. 37
Fig. 37a
Fig. 38
Fig. 38a
Fig. 40
Fig. 39


 To Next Page