18
Replacing the Remote Control Battery
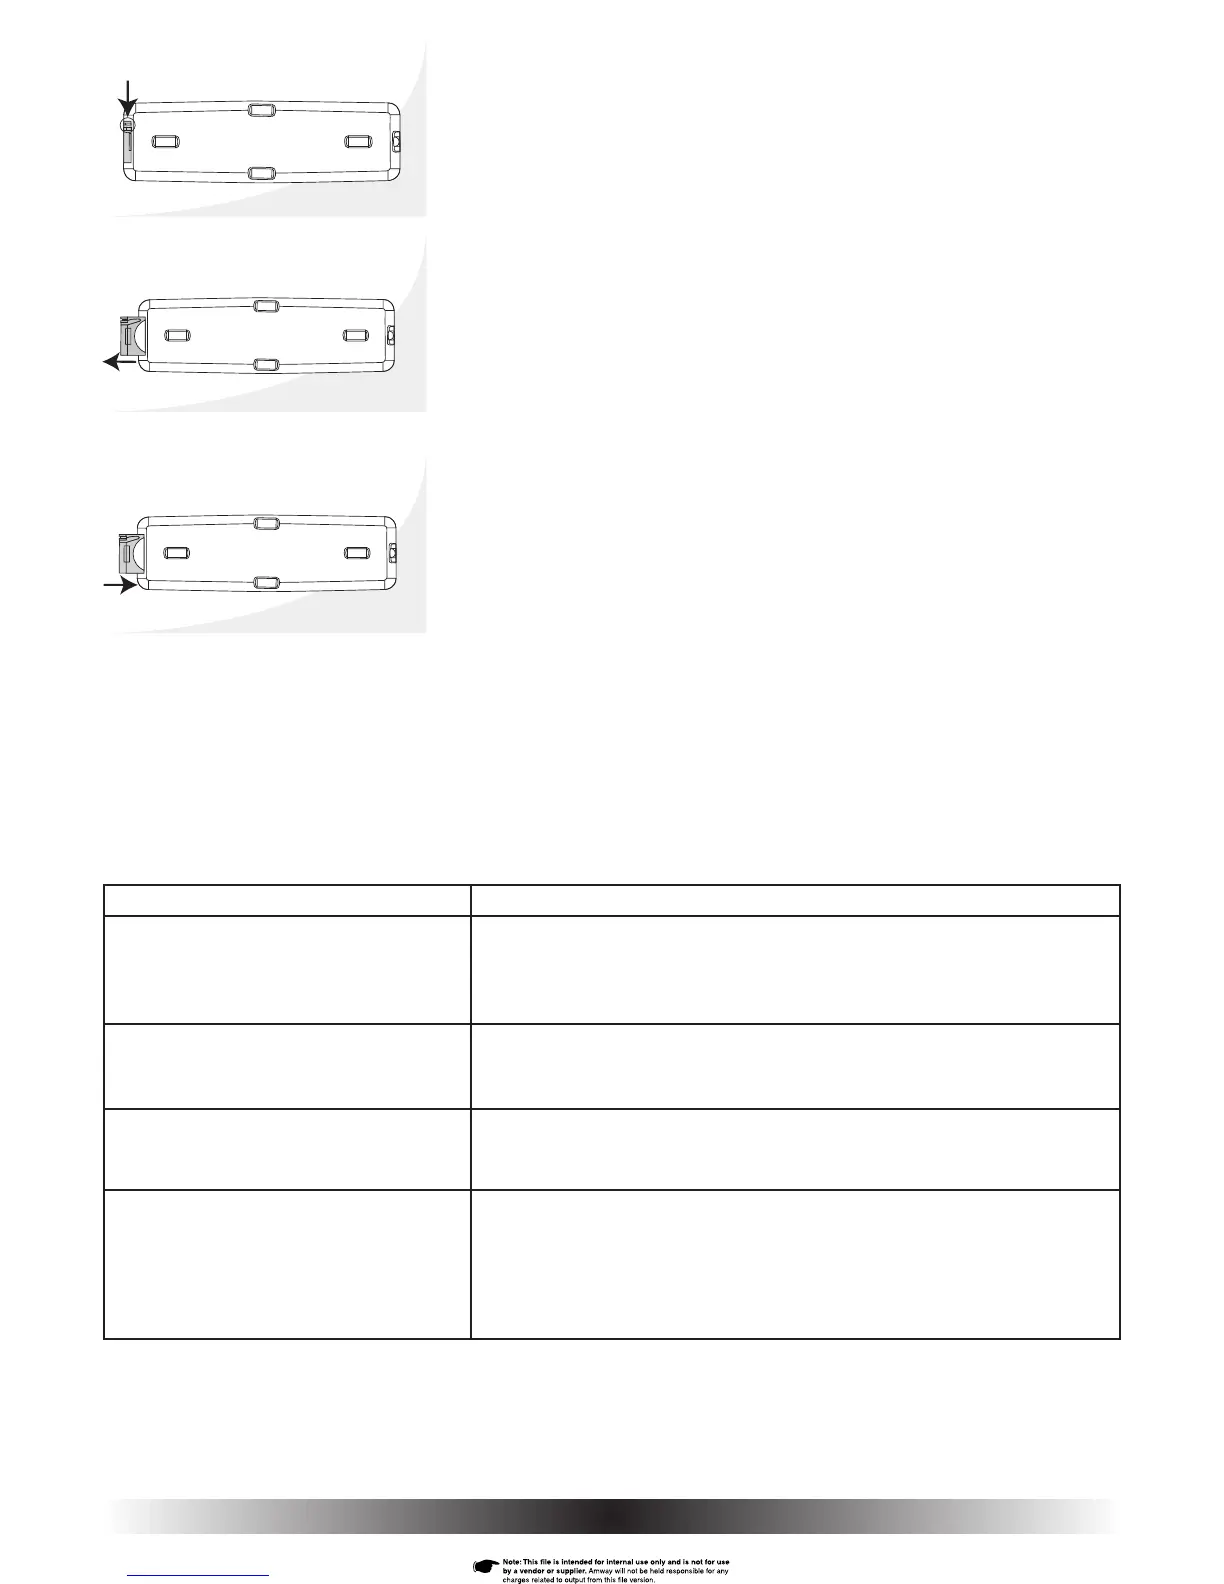
1. Slide tab on the bottom of the remote (Fig. 41).
2. While tab is down, pull battery sleeve out (Fig. 42). Remove old battery.
3. Place a new lithium battery (type CR2032) in the battery holder with
the smaller-diameter section facing down.
4. Snap the battery sleeve back into the remote (Fig. 43).
NOTE: If the sleeve will not go in the battery was installed upside down. Flip the bat-
tery over and snap the battery sleeve closed.
Troubleshooting
Condition
The operation light is on, but air does not come
out of the air purifi er.
The volume of air coming out of the air purifi er is
high enough, but it doesn’t seem to be removing
any dust or odours from the room.
After the HEPA fi lter was replaced, the light is still
blinking and the air purifi er beeps three times
every time I press a button.
The TURBO button was pressed mistakenly, or the
timer was set for the wrong length of time.
Solution
Check whether the shipping bags have been removed from the fi lters inside the air
purifi er. (See INSTALLATION AND SETUP, page 4.) Also, build-up of dirt and/or hair
on the pre-fi lter might be the cause. In this case, clean the pre-fi lter (See CLEANING
THE PRE-FILTER, page 12).
Check to be sure both the odour fi lter and HEPA fi lter are installed inside the air
purifi er. (See INSTALLING THE FILTERS, page 5).
Reset the HEPA fi lter monitor, using a ball point pen or the end of a paper clip. Press
and hold its RESET button until it beeps.
You can stop Turbo mode by pressing the TURBO button once. You can disengage the
timer by pressing the TIMER button repeatedly until all the timer lights are off.
Another solution is to turn the air purifi er off, then on again. The air purifi er restarts
in continuous operation mode, with the same fan setting from before the unwanted
buttons were pushed.
Fig. 41
Fig. 43
Fig. 42


 To Next Page