12
A
B
C
D
E
Filter Monitor Reset
Always be sure to reset the fi lter monitor after cleaning the pre-fi lter or
replacing either the odour or HEPA fi lters. Press and hold the appropriate
reset button (located on the left side of the front display panel) with a
pointed object for about 3 seconds until the system beeps to confi rm reset.
The monitor will begin to blink when you press the button.
Using the Remote Control
The remote control has a lithium battery (type CR2032) already installed. To
use the remote, simply point it toward the air purifi er and press the desired button
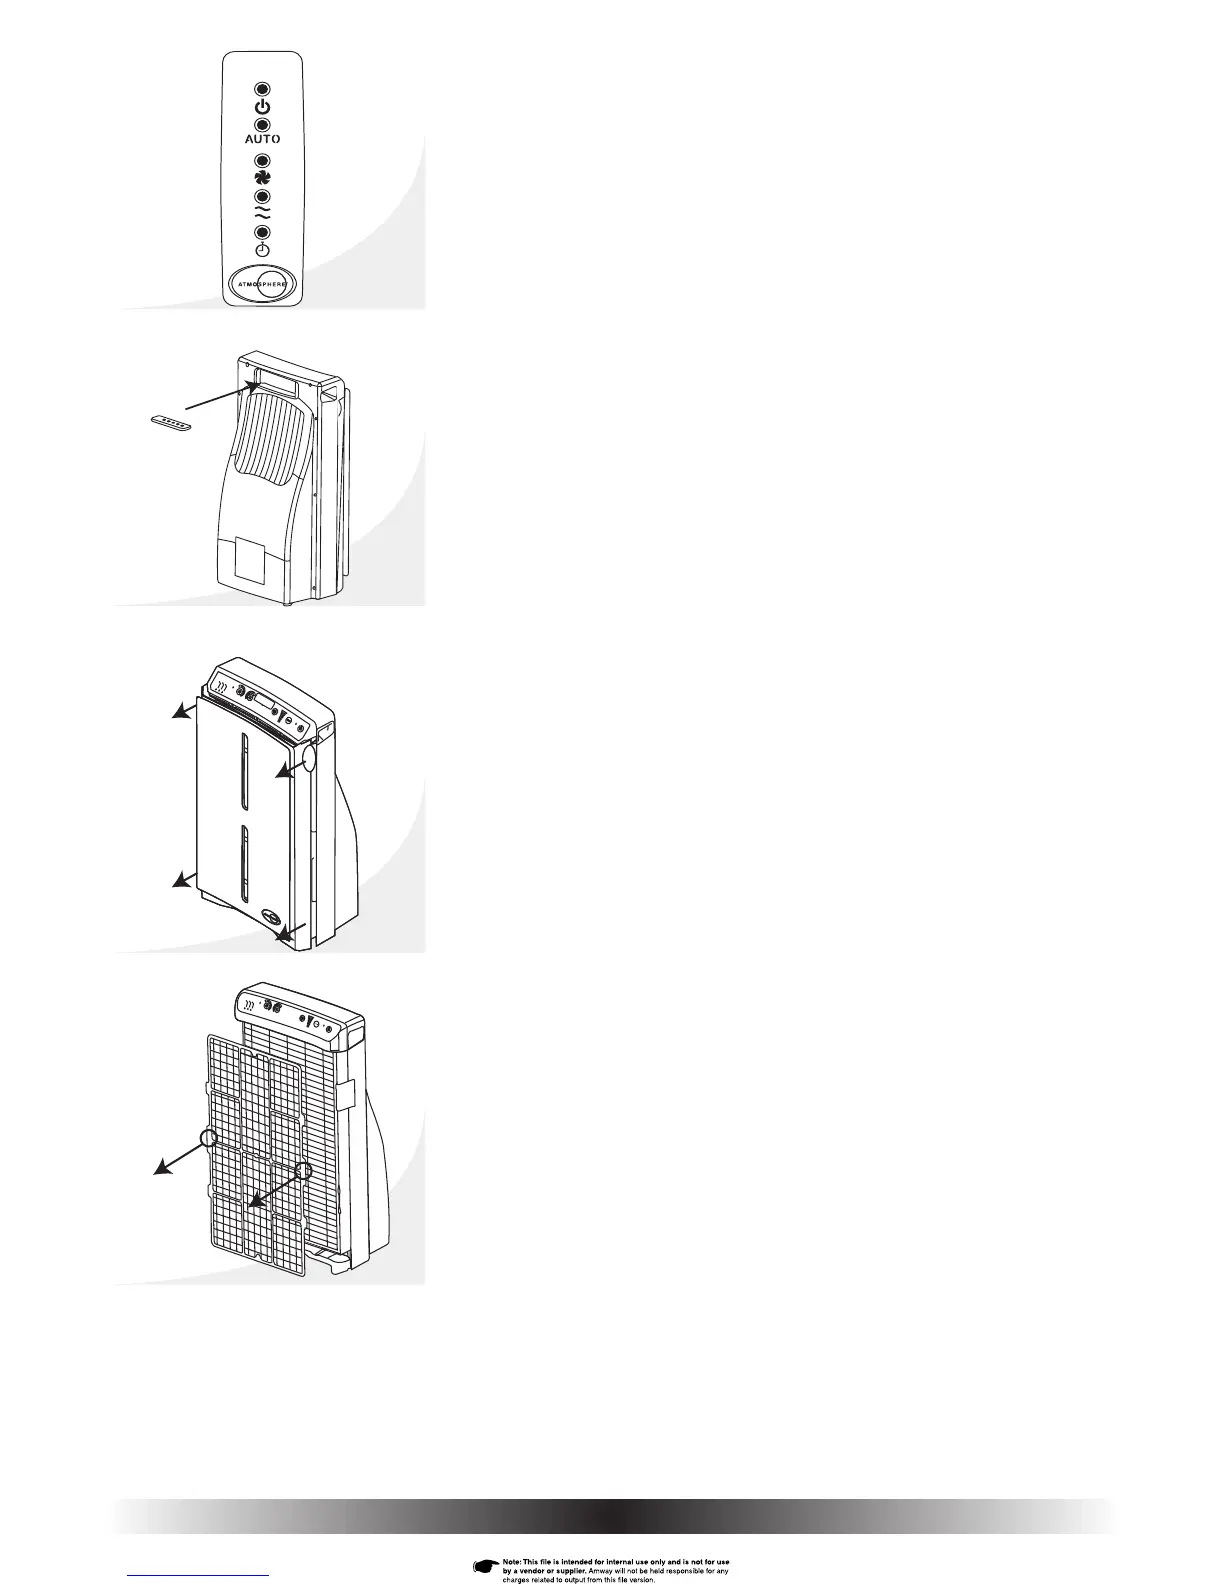
(A – Power, B – Auto, C – Turbo, D – Speed, E – Timer) (Fig 16).
NOTE: The buttons on the remote control have the same effect as those on the control panel.
For convenience the remote control can be stored in the slot on the back of
the air purifi er (Fig. 17).
Maintenance
Your ATMOSPHERE™ Air Purifi er should be cleaned and maintained regu-
larly for optimum performance.
As Needed
Wipe the housing exterior with a damp cloth and dry. If very dirty, use a
mild detergent, such as L.O.C.™ Multi-Purpose Cleaner. Do not use clean-
ers containing ammonia, alcohol, or paint thinner. These cleaners will
damage the surface.
Cleaning the Pre-fi lter and Particle Sensor Filter
1. Turn power off and unplug the air purifi er.
2. Remove the front cover from the air purifi er using the fi nger tabs located
on each side of the Air Purifi er – near the top (Fig. 18). Steady the air
purifi er by fi rst placing your thumbs on the outside edges of the control
panel. Remove the front cover by gently pulling on the tabs with your
fi ngers. Then, pull off the bottom of the cover.
3. Pull on the side tabs to remove the Pre-fi lter from the HEPA fi lter. (Fig. 19).
NOTE: Pull tab gently to minimize spread of accumulated dust.
Fig. 16
Fig. 19
Fig. 18
Fig. 17


 To Next Page