AUDIO LOOP-BACK
Now simply set your left and right output to Audio Loop-back 1 (L) and
Audio Loop-back 2 (R). Now any audio played back from your Mac will be
sent through the Audio Loop-back Output Channel, ready to be recorded
or streamed.
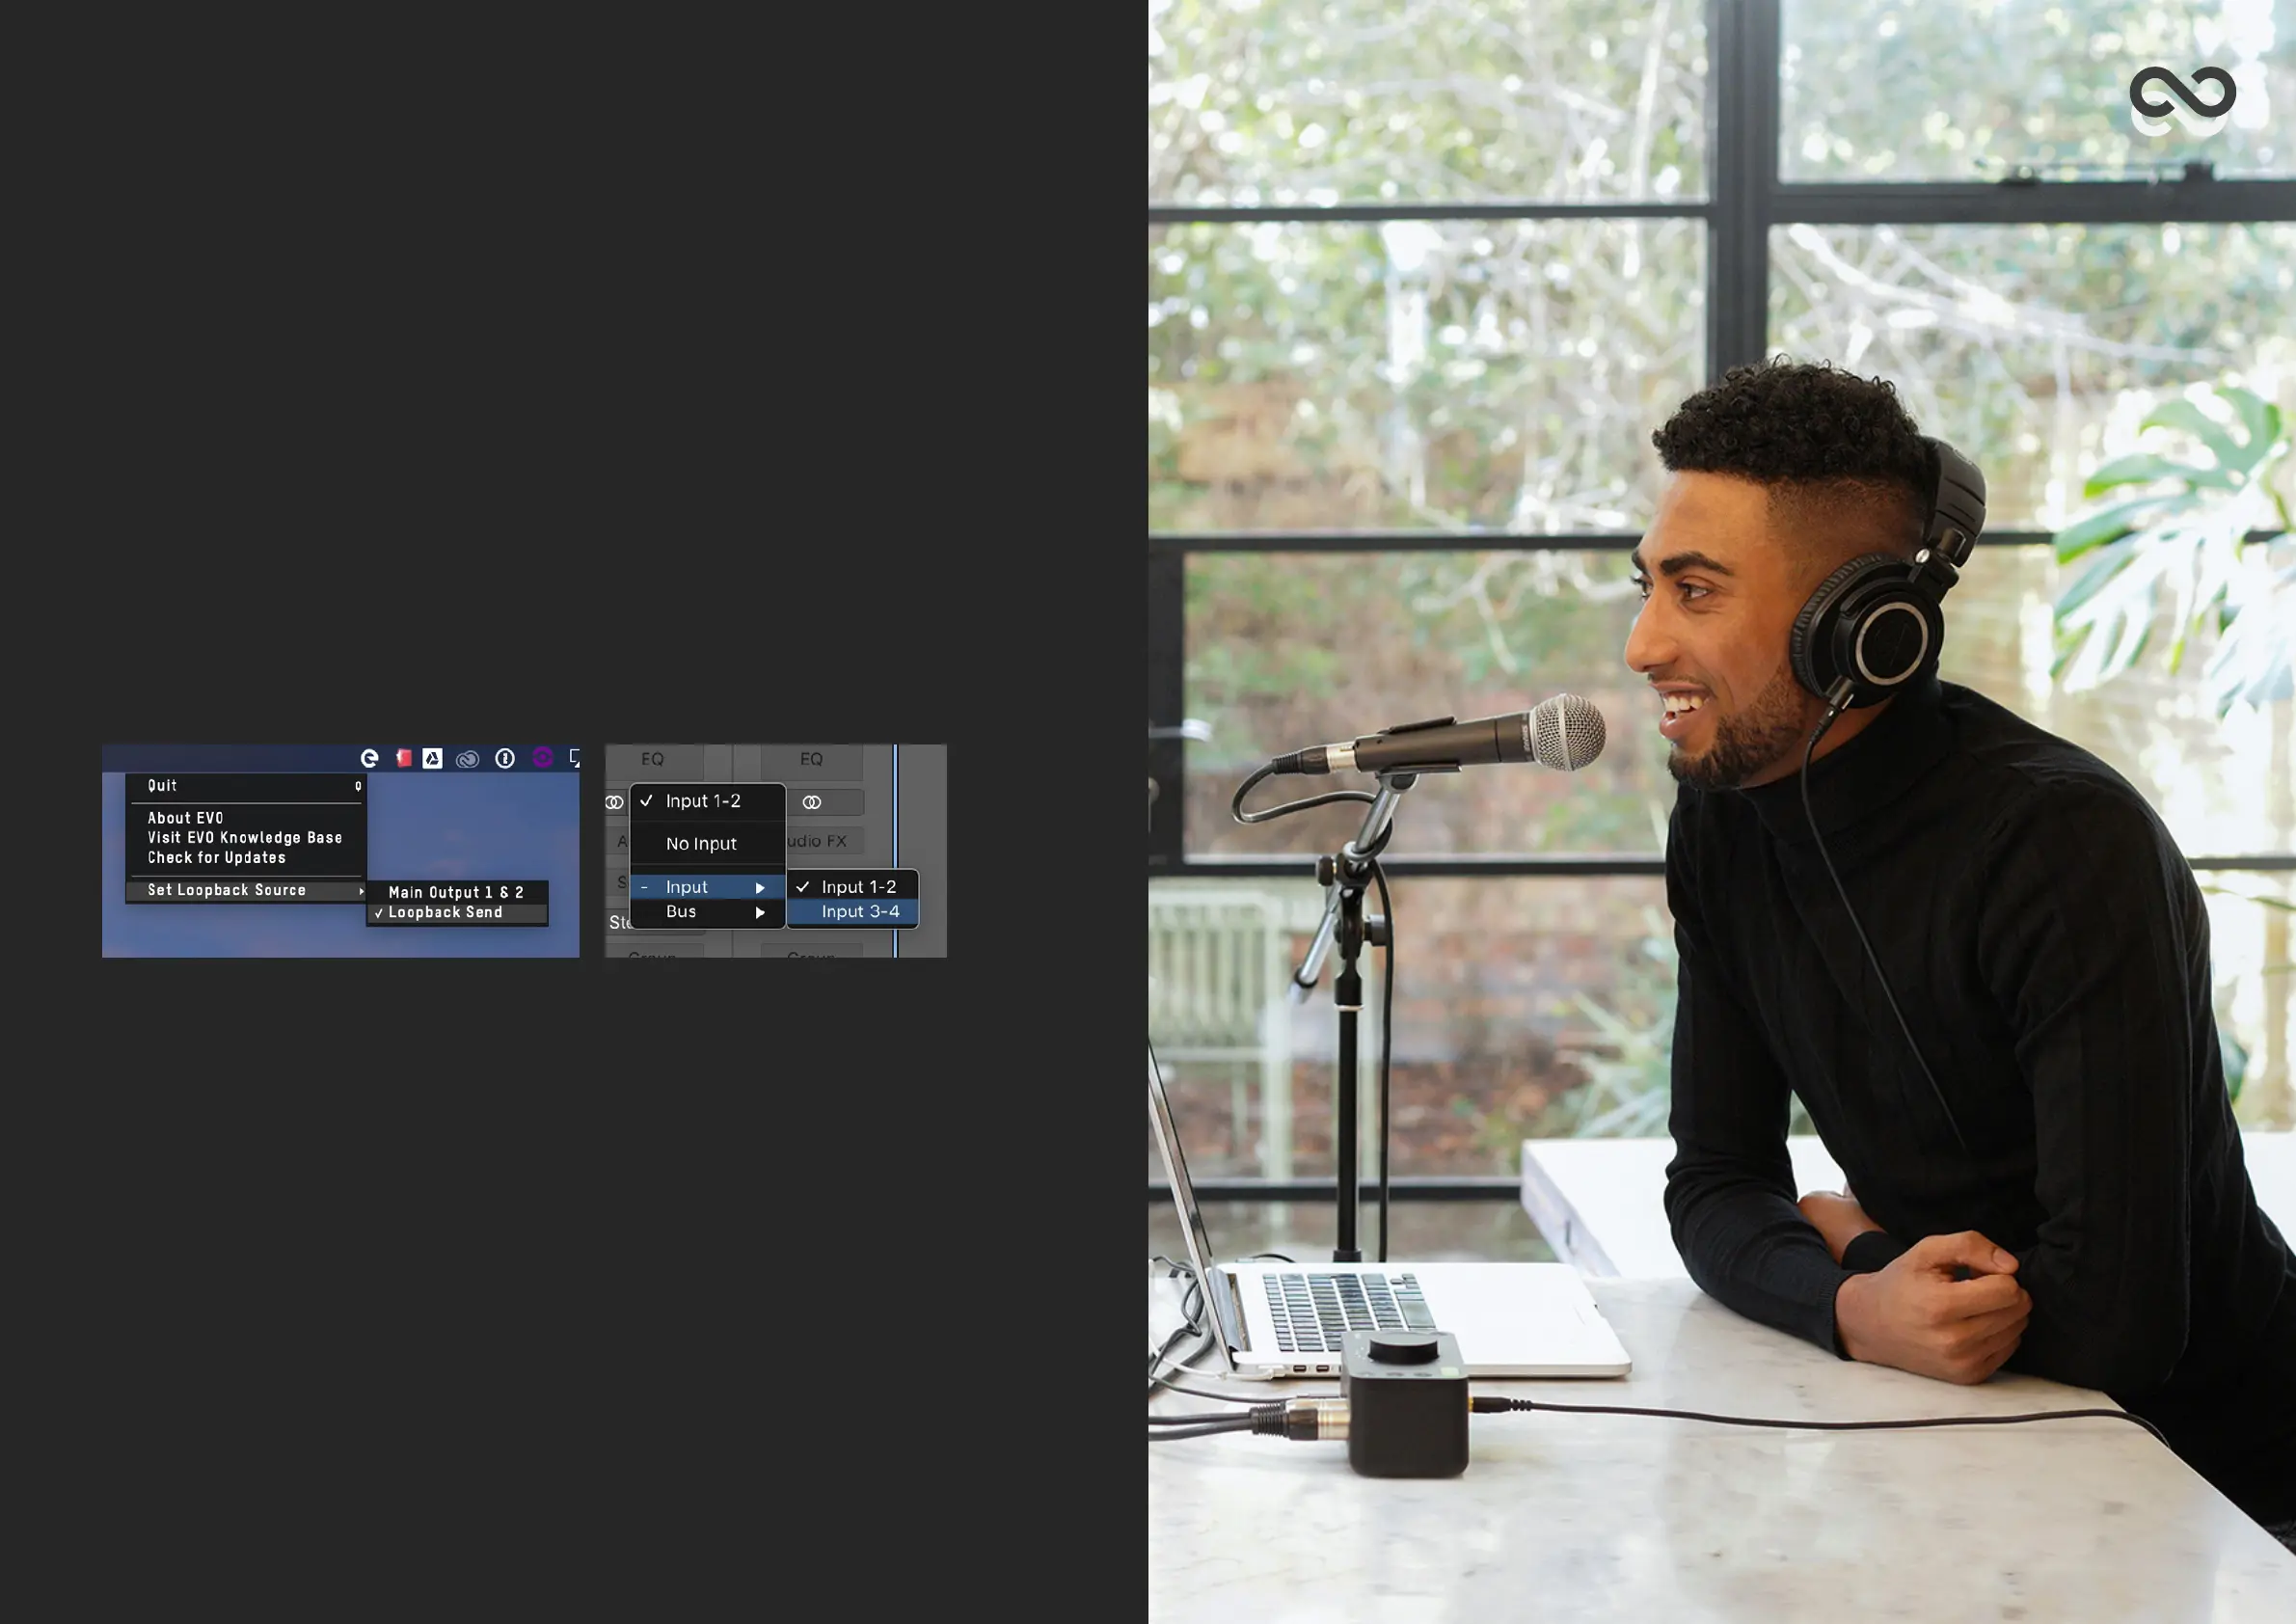
We need to tell EVO 4 to send the Audio Loop-back outputs to the
Audio Loop-back Inputs. To do this, we go to the EVO app menu in the
menu bar and click Set Audio Loop-back Source. Now select Audio Loop-
back Send as your Audio Loop-back source.
Now that the Audio Loop-back output is set up, you need to open the
software you will be using to capture or stream the audio and set your
audio input to the Audio Loop-back inputs.
Depending on your software, this may appear as Audio Loop-back 1+2 or
just as Input 3+4. So you can hear yourself, make sure you setup your
recording or streaming software to monitor the inputs.
AUDIO LOOP-BACK