Changing Fusing Arrangement
To change from one fusing arrangement to the other: j
1. Remove the AC power cord from the AC Mains Connector.
2. Open the cover of the connector/fuse block/voltage selector
assembly with a small blade screwdriver or similar tool.
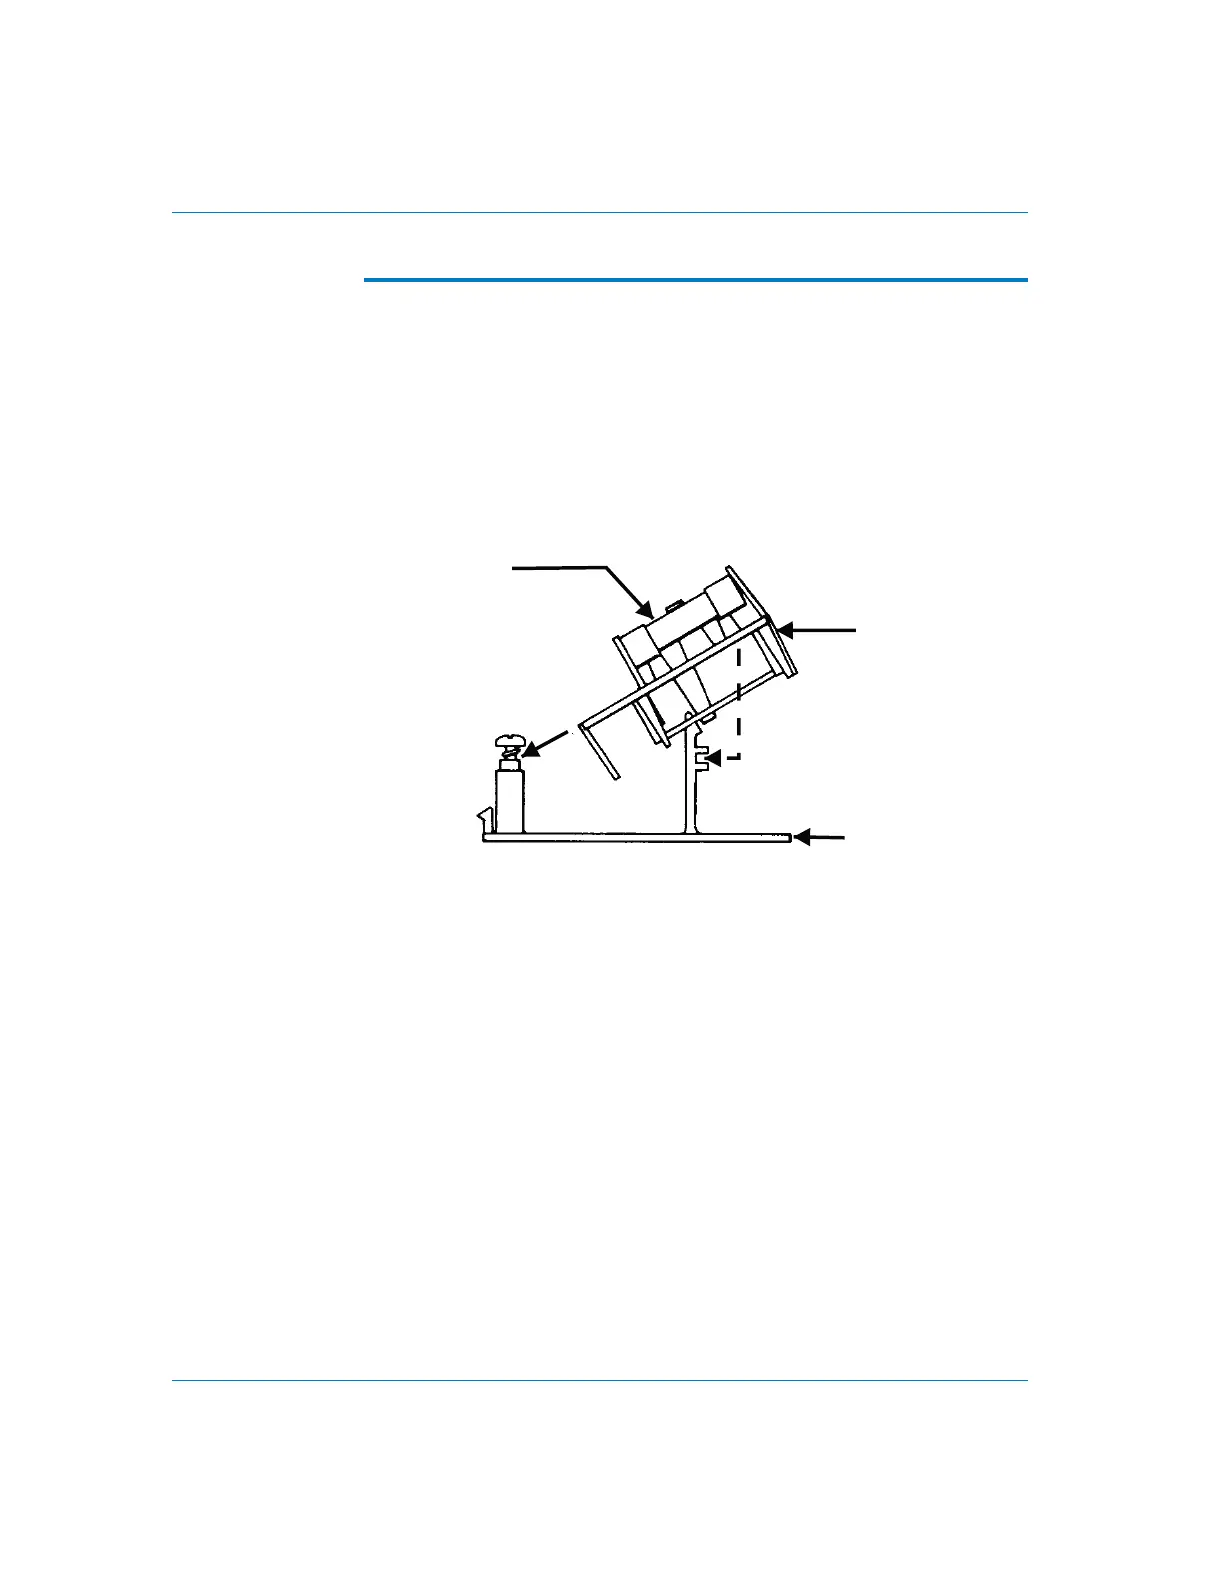
3. On the back of the cover, loosen the Philips screw two turns, then
remove the fuse block by sliding up, then away from the screw and
lifting from pedestal at the other end (refer to Figure 8).
4. Invert the fuse holder and reassemble it on the Philips screw and
pedestal, and tighten the screw.
5. Change or add the correct fuses as necessary (again, refer to rear
panel for the correct fuse current rating).
6. Confirm the line voltage setting as described in the previous
section, then replace the cover.
Changing Fusing Arrangement Installation
Page 14 DCX-127 Multifunction Module User’s Guide
Cover
Fuse block
Fuse
Figure 8. Changing fuse types