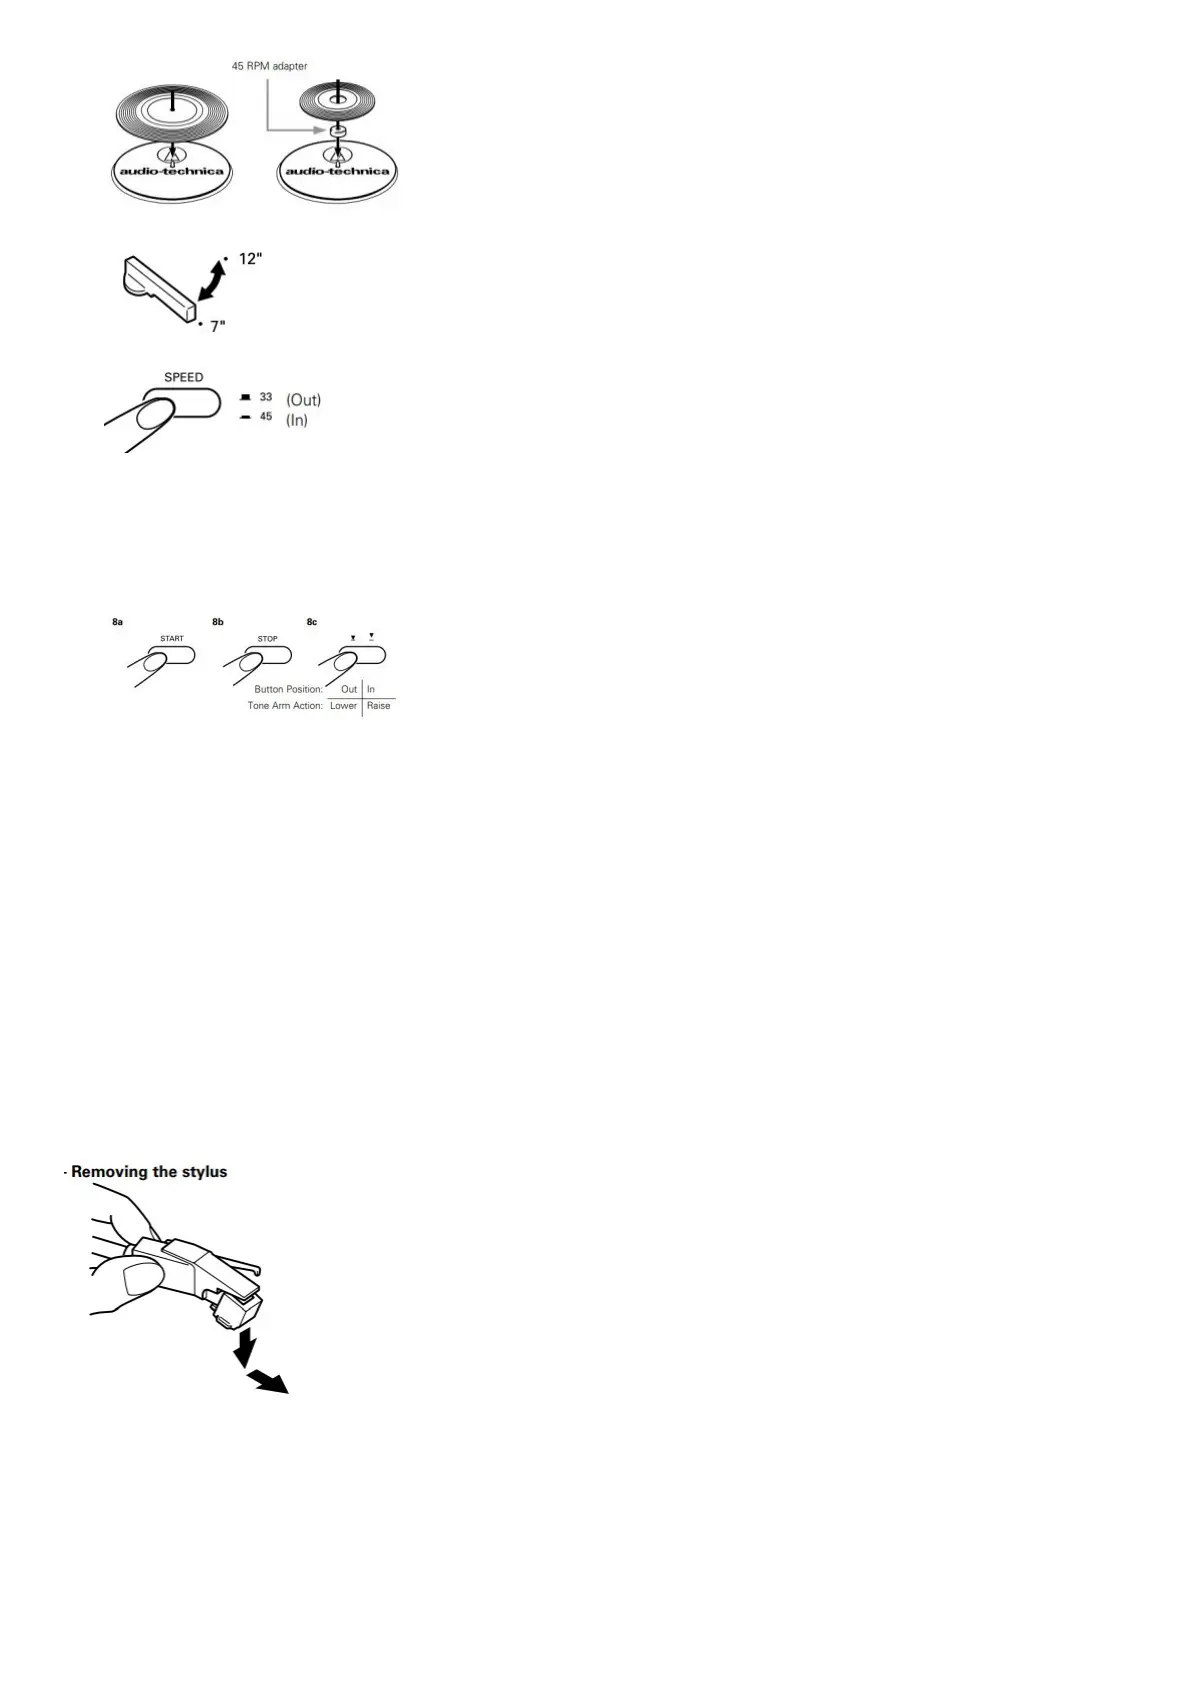
3. Select the size of record: 12″ or 7″
4. Select the speed: 331 /3 RPM or 45 RPM .
5. Start: Gently push the START button . The turntable will start and the tone arm automatically will move to the leading groove. When the
record has finished playing, the tone arm automatically will return to the tone arm rest and the turntable
will shut off.
6. Stop: To stop playing the record before it reaches the end, press the STOP button. The tone arm will lift and
return to the tone arm rest, and the turntable will shut off.
7. Pause: To pause the record before it has completed playing, press the tone arm Lift button. Press the Lift button again to continue
playing the record.
Caution:
When the tone arm reaches the end of the record, it will lift and return to the tone arm rest automatically. When this happens, do not interfere
with the tone arm’s motion, or damage to the mechanism may occur. If the tone arm does not return automatically to the tone arm rest after
the record has finished playing, simply press the STOP button to complete operation.
Manual Operation
1. Remove the stylus guard from the stylus assembly .
2. Put a record on the turntable. If needed, use the 45 RPM adapter.
3. Select the size of record: 12″ or 7″.
4. Select the speed: 331 /3 RPM or 45 RPM .
5. Press the Lift button IN to raise the tone arm .
6. Gently move the tone arm so the stylus is over the point on the record where play is desired to begin.
7. Press the Lift button again to gently lower the tone arm and play record.
Replacing the Stylus
While holding the head of the tone arm, rotate the front of the stylus assembly in a forward and down motion to remove it.
(As you remove the old assembly, note its position and “feel,” to aid in properly installing the new one.) Install the new stylus assembly as
shown in Figures 10a/10b, being careful not to touch the actual stylus. Make certain that the projection at the back of the assembly is fully
seated in the cartridge body first ,

 Loading...