28
21.
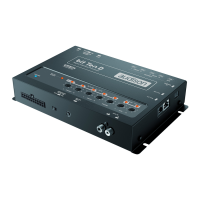
Software Startup.
The settings selected during the guided procedure are transferred to
the processor main memory.
Once this operation is complete, a message confirming that the update
has been done will be displayed.
Press OK.
We recommend that you finalize the product and avoid losing data stored
during calibration
(see 8.5.3)
with the FINALIZE TO bit Ten D function, from the
main FILE menu.
22.
Amplifiers sensitivity calibration.
Once the bit Ten DinputcalibrationorDe-Equalization(ifany)proceduresarecomplete,youcancalibrate
amplifier’s sensitivity. If you proceed according to the following procedure, you will achieve the best acoustics
results, also eliminating any possible background noise.
1.
Connect the different amplifiers channels to the speakers.
2.
Connect the bit Ten D PRE outputs (OUTPUT: Front - Rear - Sub / CHI -> CH5) to the amplifiers inputs
using high quality RCA cables.
3.
Set the amplifiers sensitivity of the various channels to about 4.0 Volts.
Then proceed according to either of the two following procedures:
A. Amplifiers sensitivity calibration by listening.
•Placetheheadunitvolumewherethebit Ten D inputs were calibrated and play a highly dynamic track.
•Workontheamplifierssensitivitycontrolsslowlybringingthemtohighersensitivity(lessthan4.0Volts).
Once the first distortion symptoms show you should stop. This is easier if you work on one channel (stereo)
at a time by disconnecting the other channels / amplifiers inputs.
•Oncetheamplifiersarecalibrated,reconnectallthesystemchannelsand,ifnecessary,reducethe
sensitivity (back to 4.0 volts) of those channels that may have excessive volume.
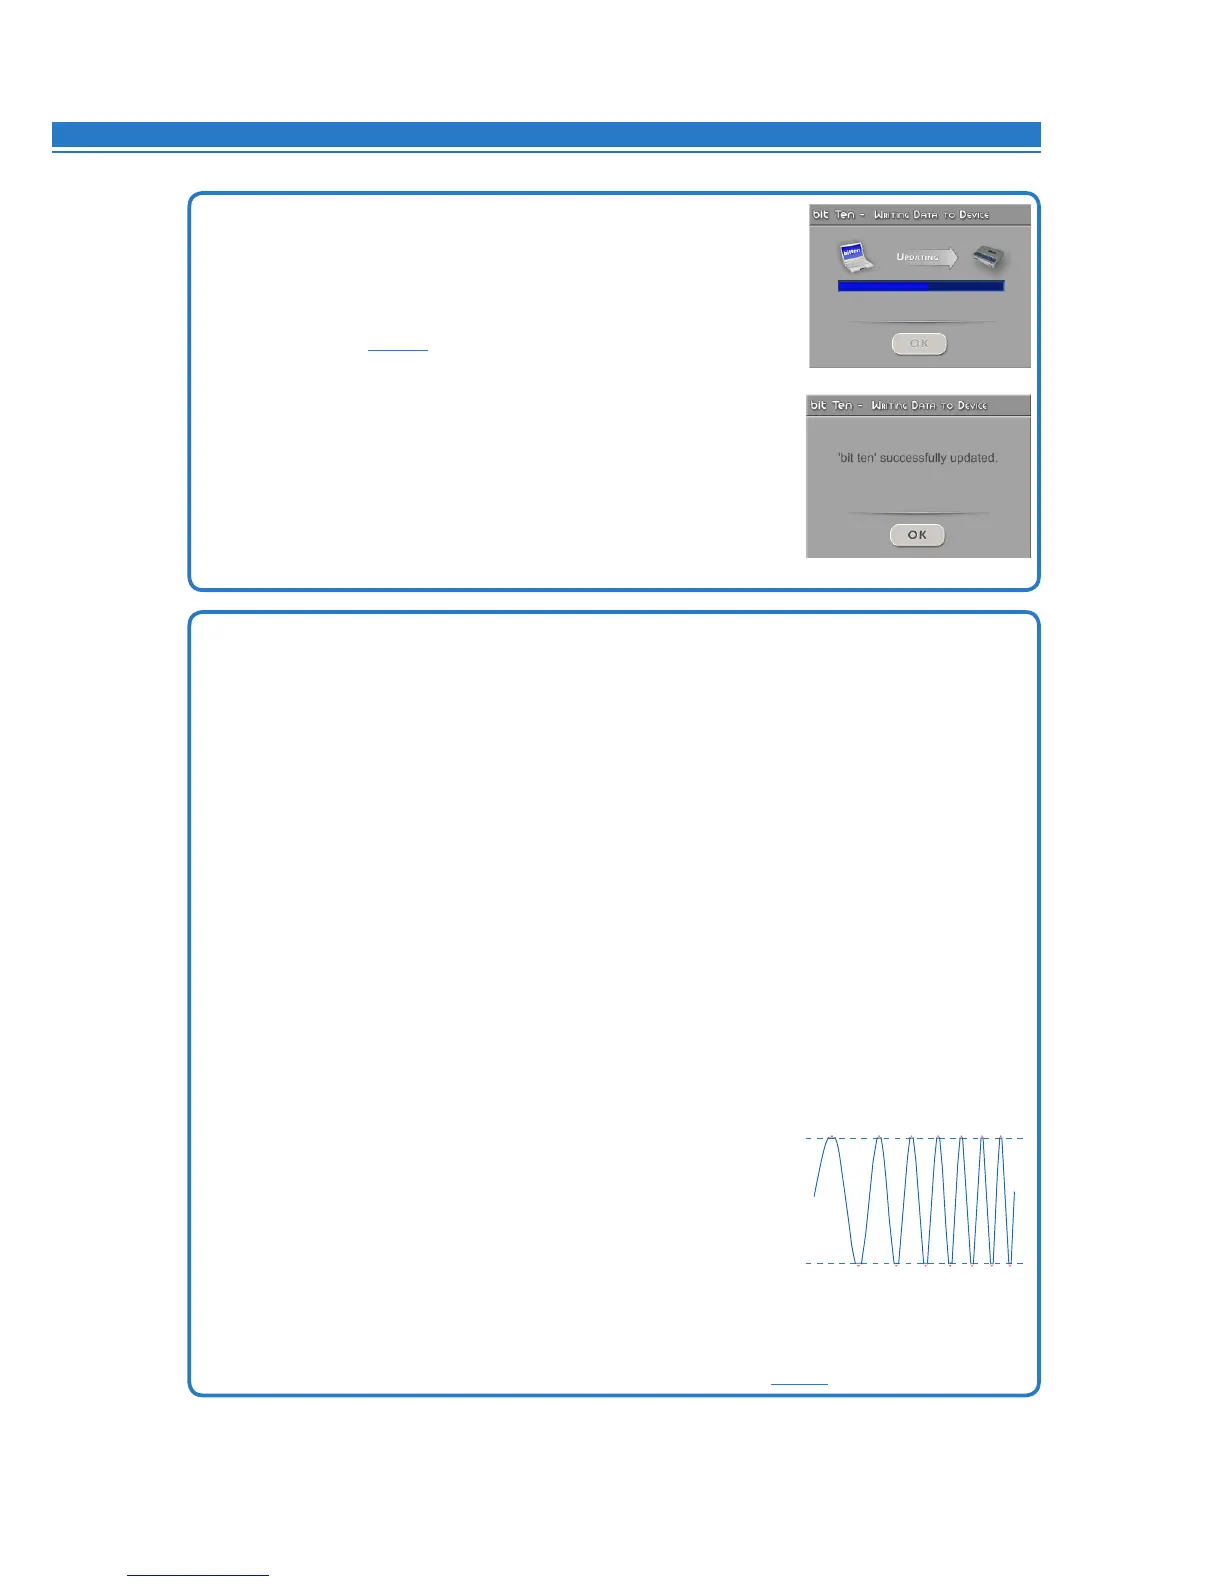
B. Amplifiers sensitivity instrument calibration.
For instrument analysis, you will need an oscilloscope
.
•Disconnect all speakers from the amplifiers if already connected
.
•Playtrack1ofthebit Ten D CD. All source controls must be flat (0).
The volume control should be placed on the bit Ten D input calibration level.
•Connecttheoscilloscopetoanamplifieroutputchannel.Thevideowilldisplayasinewavewithvariable
frequency (sweep).
•Turnthesensitivitycontrolinbothdirectionsuntilthesine
wave looks slightly cut at both ends.
•Repeatforeachamplifierchannel.
•ReconnectthespeakersandinsertaCDwithamusictrack.
Reduce the sensitivity (by turning the knob toward 4.0 volts)
of those channels that may have excessive volume.
4.
The flattening of the functional groups acoustic intensity obtained through the amplifiers sensitivity
calibration is an approximate adjustment. The bit Ten D applies the standard settings by default. After the
acoustic settings described in the following paragraphs are performed, you will be able to refine the
functional groups acoustic flattening by acting on the bit Ten D outputs (see 8.13).
8
CLIP
CLIP