877. 250.7729 | feeder-robot.com877. 250.7729 | feeder-robot.com
12 13
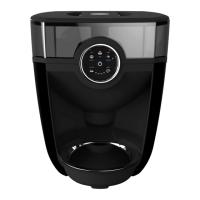
Setting Up Your Feeder-Robot
Your Feeder-Robot ships fully assembled and ready to use.
Get started by following the steps below.
Pre-Check
1. Remove the Feeder-Robot from its package.
2. Clean removable components that contact food. All parts
which contact pet food are made of BPA-free plastics. Wipe or
hand-wash with mild soap the following removable parts: the
Hopper, Hopper Insert, the Hopper Lid, the Rocker, and the
Bowl(s).
3. Hand-wipe non-removable parts that touch pet food: The
Chute, the Bowl Holder, and the Indicator Tower. Do NOT
submerge the Feeder-Robot Base or Control Panel in water.
4. Let all parts air dry completely before reassembling the
Feeder-Robot.
Placement
Place the Feeder-Robot in the same location as the previous
feeding device (at least during transition).
Make sure the unit is on a level surface. It can be placed on
hard flooring or carpet, as long as it is level.
Locate the unit near a power outlet.
To reduce the risk of electrical shock, do not place or store
the Feeder-Robot where it can fall or be pulled into a tub or
sink.
To avoid tripping, always position power cord out of the way
of foot traffic.
Do NOT use outdoors. FOR INDOOR HOUSEHOLD USE ONLY.
Check operation frequently to be sure the pet feeder is
dispensing properly.
Status Lights
● Solid Blue: Feeder is in Automatic Feeding Mode
● Flashing Red: Motor is jammed
● Solid Red: Hopper is critically low, less than 5%
● Solid Yellow: Hopper is low, less than 20%
● Solid Purple: Chute backed up for 12+ hours
(no action required)
Status Lights
Status Light