Home
Autoscript
Monitor
EPIC-IP19XL
Autoscript EPIC-IP19XL User Manual
5
of 1
of 1 rating
36 pages
Give review
Manual
Specs
To Next Page
To Next Page
To Previous Page
To Previous Page
Loading...
20
Installation
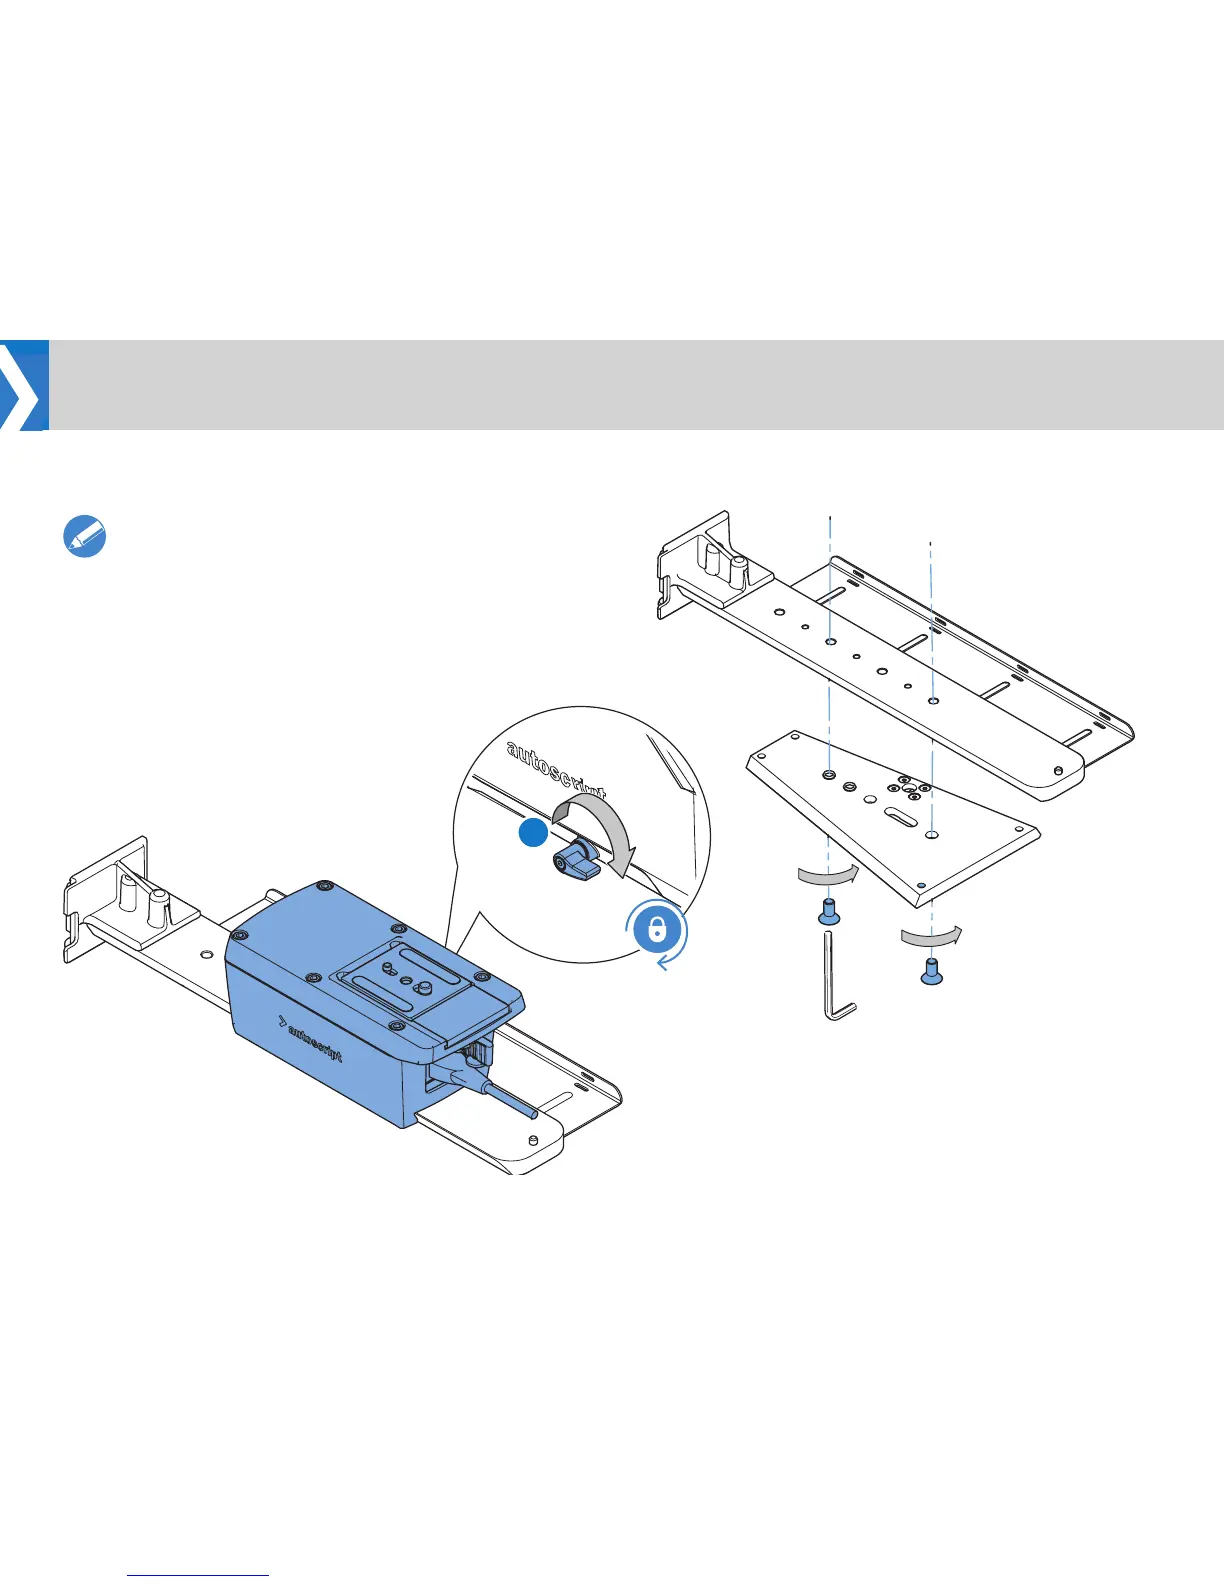
3.
Slide the carriage to the desired position and tighten the clamp
lever (3).
3
Note!
When sliding on the carriage without a payload
attached, apply an even downward pressure for smooth
movement.
4.
Screw the rail to the camera plate, choose the mounting holes
best suited to balance the payload.
21
23
Table of Contents
Table of Contents
3
Safety
4
About this User Guide
5
Prompt Monitor Connections
6
Mounting Kit
8
Robotic Upgrade Kit
9
Components and Connections
6
Fit CLOCKPLUS-IP to Talent Monitor
10
Monitor Setup
10
Fit a Talent Monitor to EVO-IP Prompt Monitor
11
Fit CLOCKPLUS-IP to EPIC-IP Prompt Monitor
12
Attach the Hood to Prompt Monitor
14
Removal and Fitting of Glass for Replacement or Cleaning
15
Prompt Monitor Control Panel
16
Monitor Configuration
16
Connecting the Prompt Monitor
19
Video Connections
19
Monitor Troubleshooting
20
Assemble the Rail and Carriage Assembly
21
Attach Hood & Monitor Assembly Onto the Rail
24
Mounting the Camera
26
Installation
21
Technical Specification
28
Maintenance
32
General Notices
33
5
Based on 1 rating
Ask a question
Give review
Questions and Answers:
Need help?
Do you have a question about the Autoscript EPIC-IP19XL and is the answer not in the manual?
Ask a question
Autoscript EPIC-IP19XL Specifications
General
Brand
Autoscript
Model
EPIC-IP19XL
Category
Monitor
Language
English