avaya.com
|
76
|
avaya.com
Avaya Scopia XT Meeting Center | Quick Setup Guide
Avaya Scopia XT Meeting Center | Quick Setup Guide
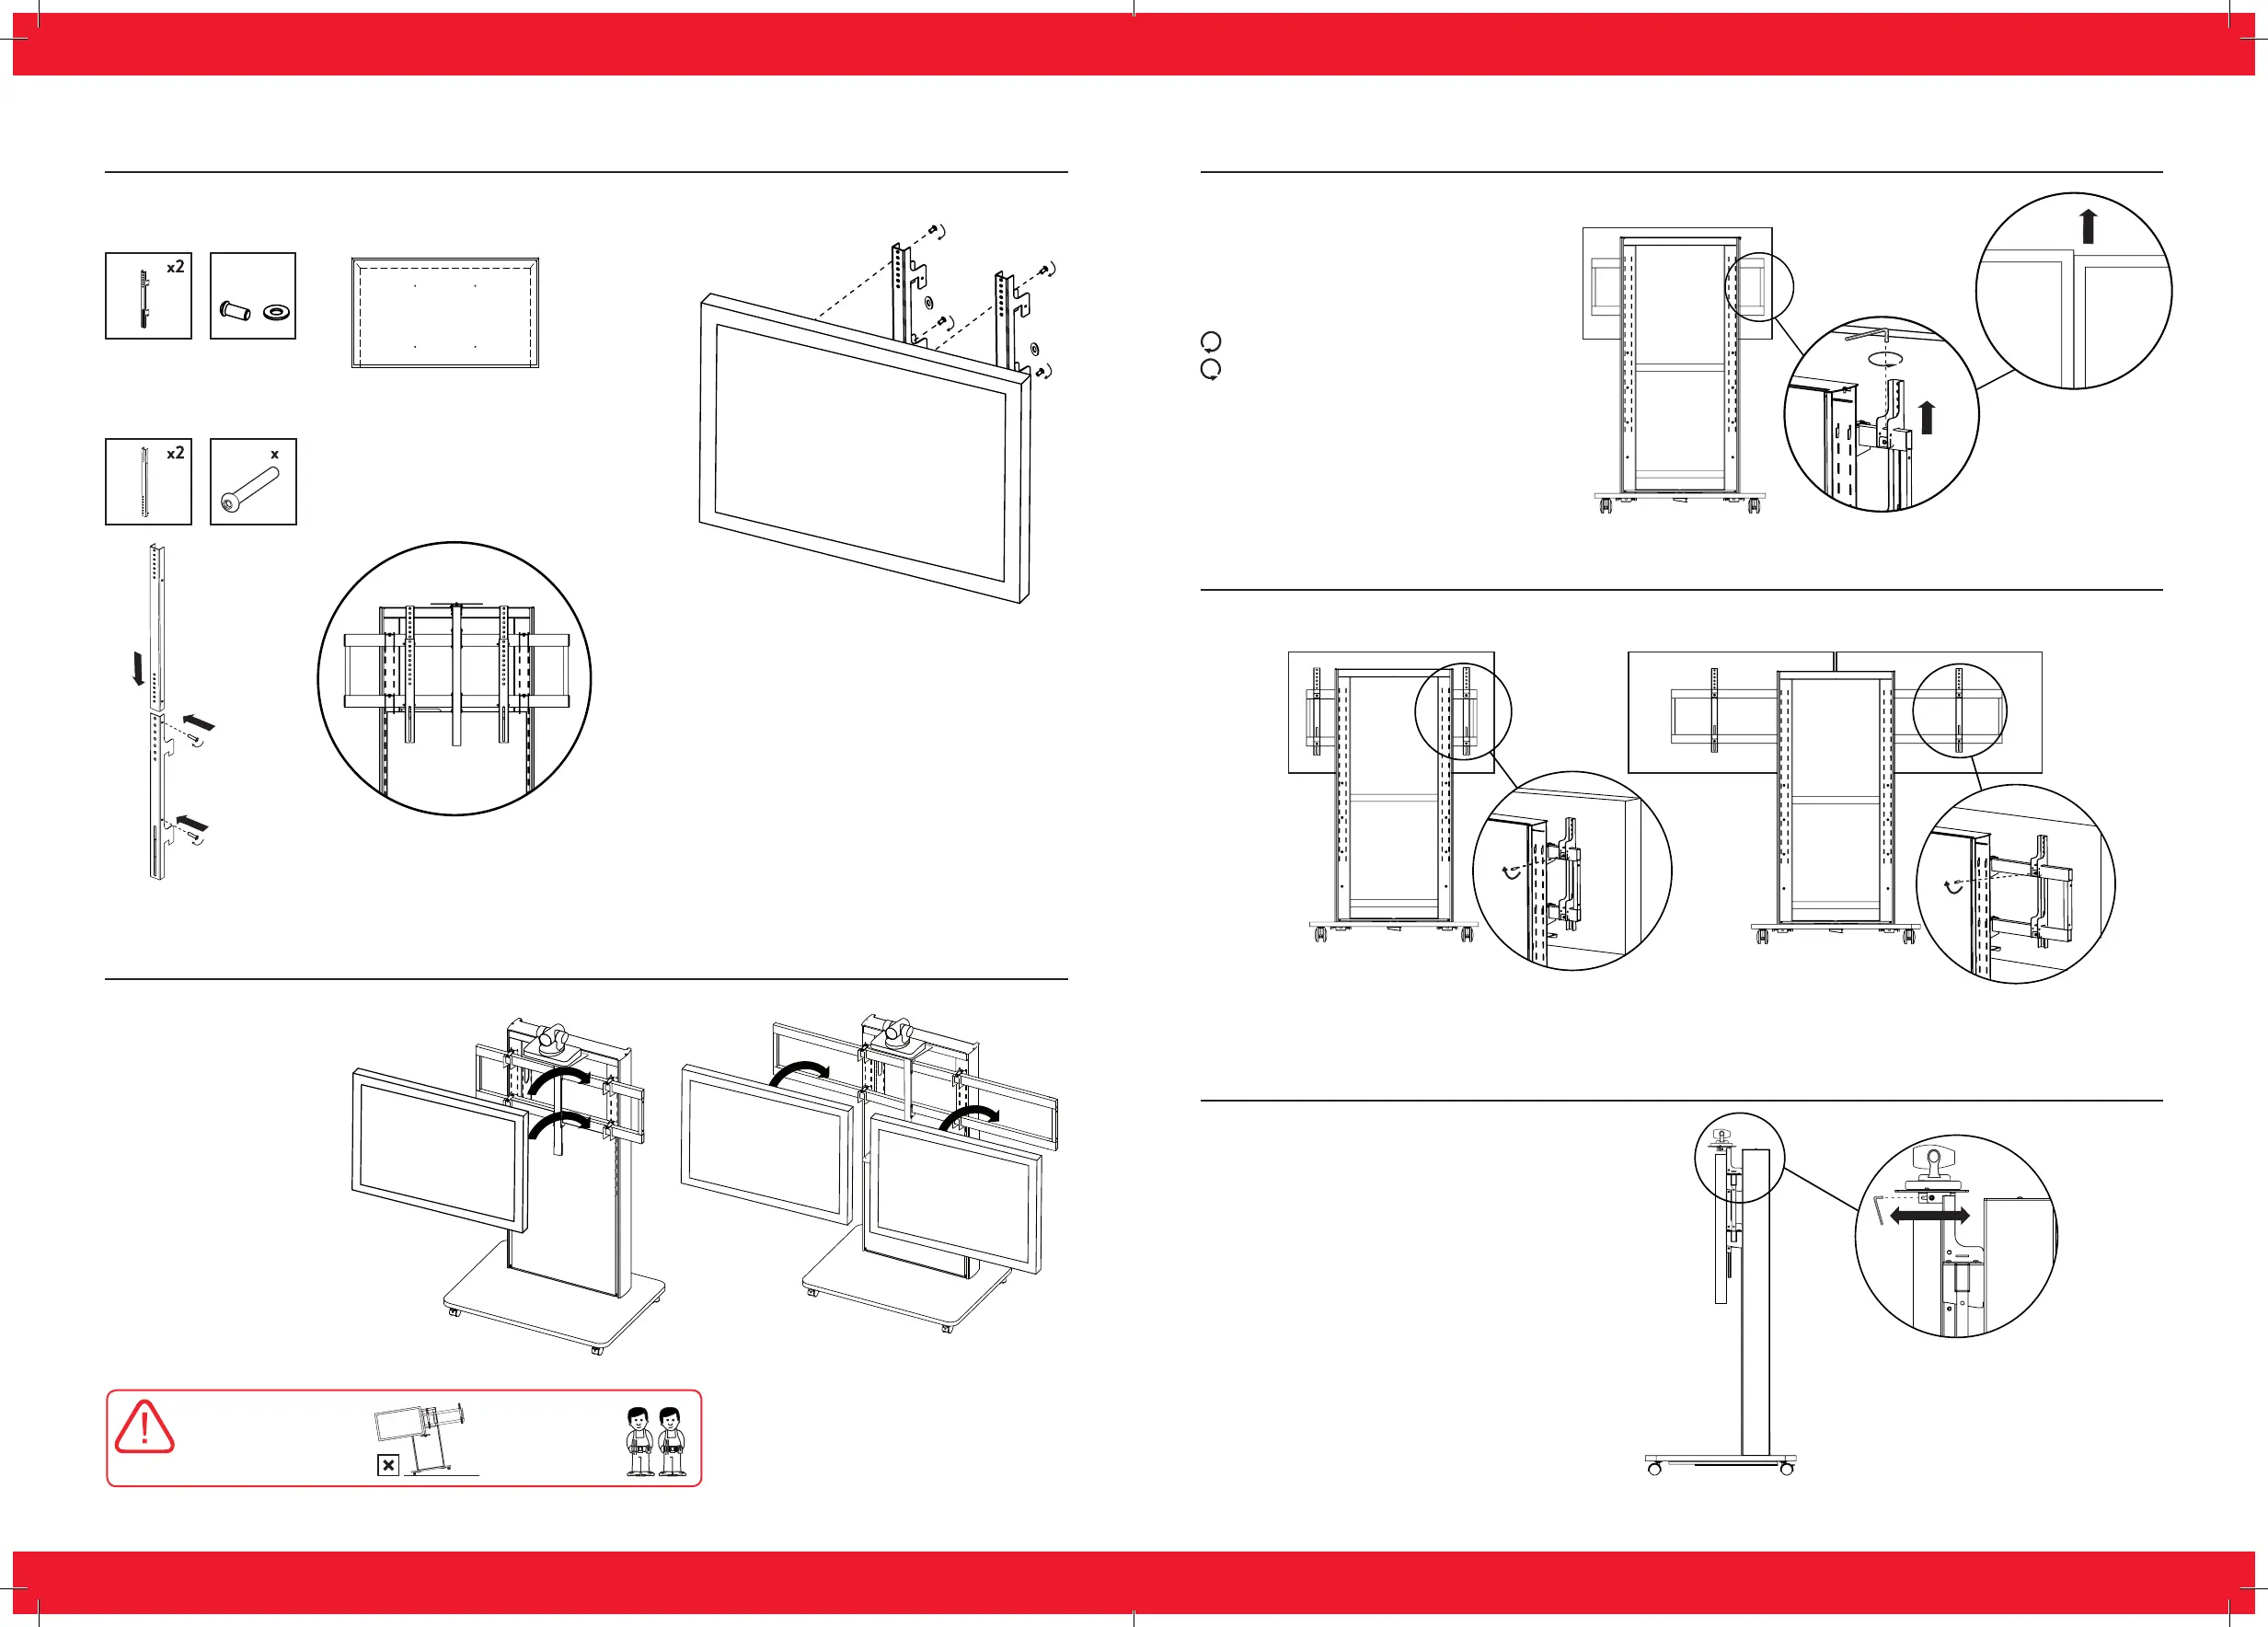
Step 12. Secure Screen Brackets In Place
Step 13. Adjusting The Camera Position
Use screws provided
Adjust the camera mount
Set horizontal position of the camera
using the provided Allen key.
Clockwise to adjust downwards from bracket
Anti-Clockwise to adjust upwards from bracket
Step 11. Fine Height Adjustment (Dual Only) For Screen Application
If screens are not aligned vertically,
adjust as required with 4mm allen key.
Step 10. Hang Screen Directly On to Mounting Frame
Once the brackets have
been affixed to the
screen, the whole fixing
can be lifted and hung
on both the screen
mounting beams.
x4 x4
Step 9. Attach Screen Mount Brackets
Attach the screen brackets to the back of
your chosen screen(s).
Install Extension Bracket
to Screen Mount Brackets
Back of screen showing
mount bracket location
Per screen
4
Extension bracket location
WARNING:
Support stand until both
screens are mounted
HEAVY LOAD:
2 people required
to mount screens
 Loading...