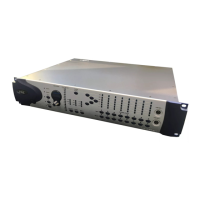
Chapter 3: Remote Operation 17
Setting the PRE MIDI Channel
To set the global receive/transmit MIDI channel:
1 On the PRE front panel, press the MIDI Chan
switch so the LED lights. The Gain/Param dis-
play displays the current MIDI channel (1–16).
2 Turn the Gain/Param control clockwise to in-
crement MIDI channel numbers, or counter-
clockwise to decrement channel numbers. (The
MIDI channel will be set once you stop moving
the control; you do not need to press an Enter
switch to set the channel.)
3 To exit MIDI Channel mode, press the MIDI
Chan switch again.
4 Repeat the above steps for additional PREs.
Installations with Multiple PREs
To control multiple PREs through a single MIDI
port, set each unit to a unique MIDI channel num-
ber. Keep in mind that if PRE units are set to the
same MIDI channel on a single MIDI port, their
controls will operate in a ganged fashion—chang-
ing a setting on one unit will change the setting on
all units.
With a multi-port MIDI interface, every unit must
be daisy-chained from a single port on your MIDI
interface. Connect the MIDI Out port of the MIDI
interface to the MIDI In port of the first PRE, then
connect the MIDI Out port of the first PRE to the
MIDI In port of the second PRE, and so on. Make
sure to connect the MIDI Out port of the last PRE
to the MIDI In port of the MIDI interface.
Powering Up a Pro Tools System
In order for Pro Tools to communicate properly
with audio interfaces and other peripherals, it is
important that you start up and shut down your sys-
tem in the following order:
Power up your system in this order:
1 Turn on your Pro Tools hard drives. Wait ap-
proximately ten seconds for them to spin up to
speed.
2 Turn on PRE.
3 Turn on synchronization or other MIDI periph-
erals or interfaces.
4 Turn on your Pro Tools audio interfaces.
5 Turn on your computer.
6 Turn on your speakers or monitor system.
Power down your system in this order:
1 Turn off your speakers or monitor system.
2 Quit Pro Tools.
3 Shut down the computer.
4 Power off your audio interfaces.
5 Turn off PRE.
6 Turn off any synchronization, MIDI, or other
peripherals or interfaces.
7 Turn off your drives.
With multiple PREs, it is easier to keep track
of each unit in Pro Tools by setting MIDI
channels in ascending order, in relation to
the physical position of the PREs (for exam-
ple, in the order they are stacked in a rack).