S6L Control Surface RAM Expansion 13
In the next step you will lift the Tray out of the chassis and hang it off the back edge of the console chassis. You should not need
to disconnect any cables before lifting the Tray out (other than S6L-24C LVDS as described previously), but you may need to guide
one or more cables away to allow the Tray to be lifted out of the chassis. If you find you do need more slack, note and/or label and
then disconnect any cable that isn't long enough to allow the Tray to be lifted out of the chassis.
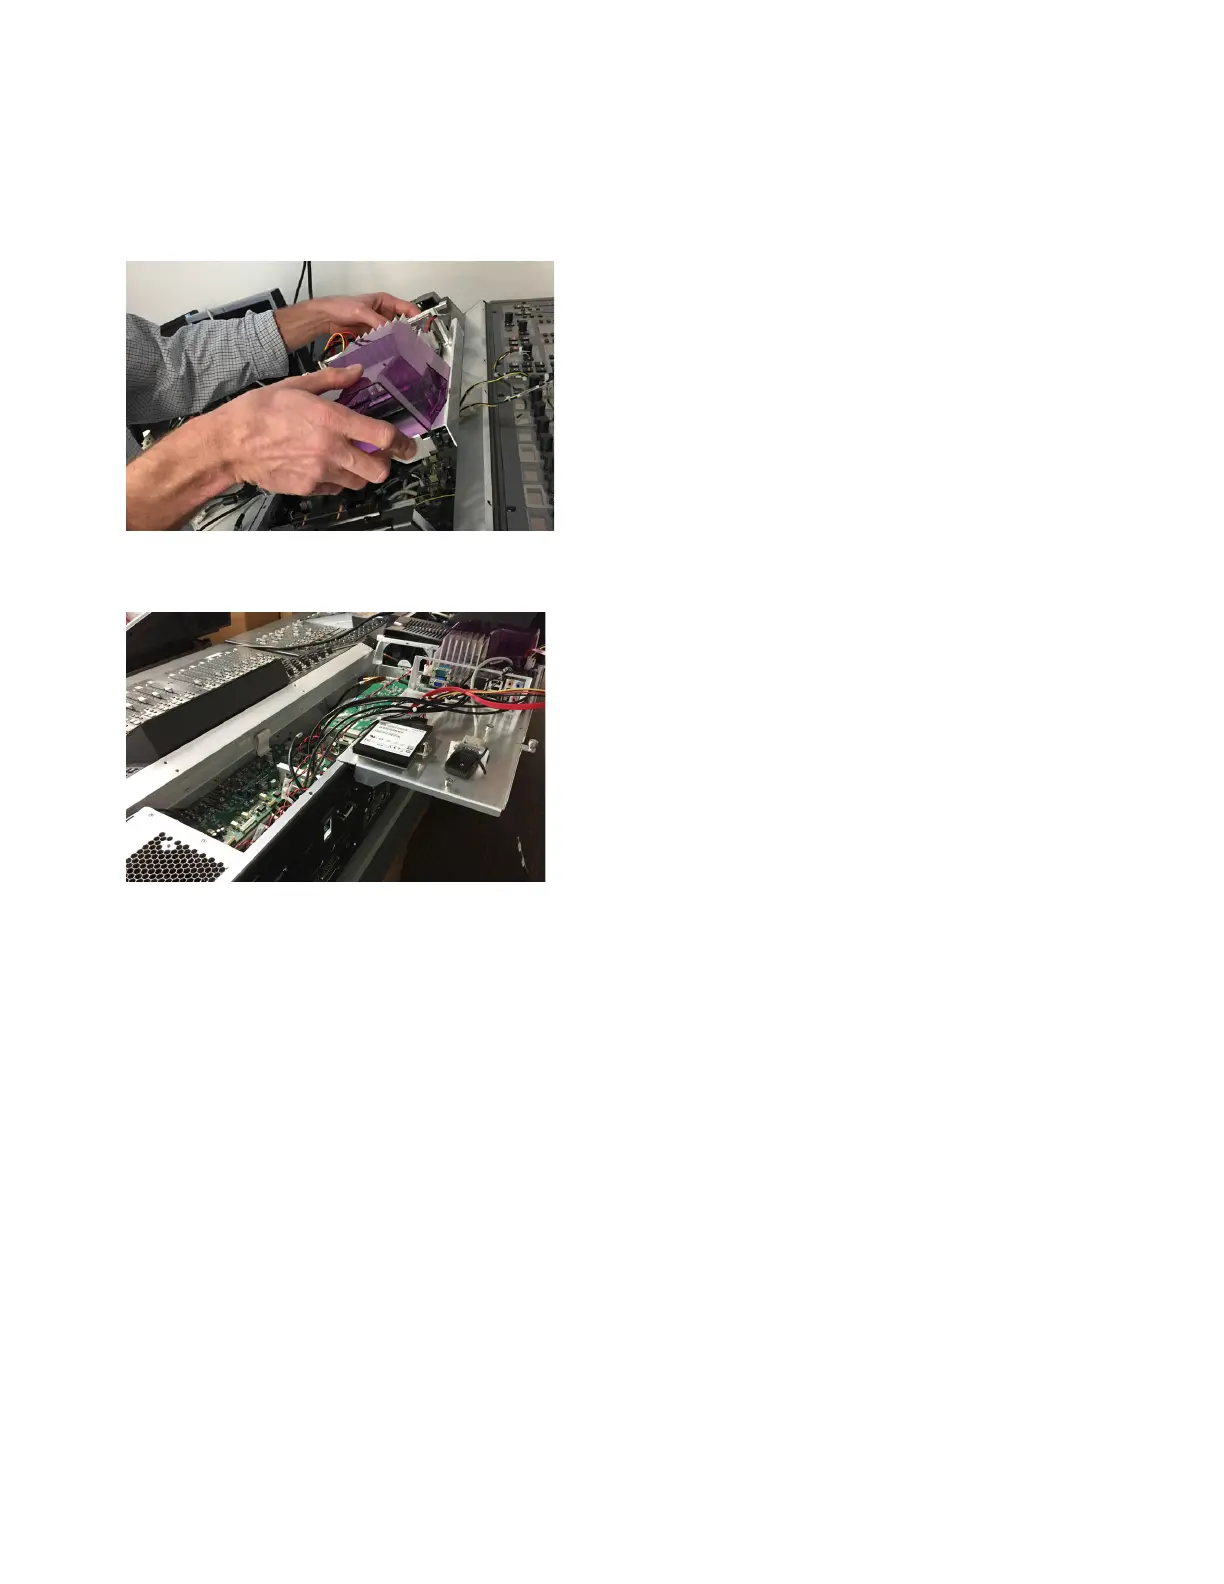
9 Being very careful to not stretch any cables, use two hands to lift the tray out of the chassis. Tilt the Tray as needed to clear the
chassis, and make sure no cables are caught or stretched.
10 Align the edge of the Tray with the edge of the chassis as shown in Figure 28 so that the Tray hangs off the chassis.
11 If any SBC cables are too short to let you position the SBC or its cables out of the way, photograph and/or label and then dis-
connect those cables (labeling the cables ensures you will be able to re-connect them to their correct ports after completing the
procedure).
12 Proceed to Install RAM.
Figure 27. Lifting the Tray out of the chassis (16C shown)
Figure 28. SBC Tray hung off the back edge of the chassis (24C shown)
 Loading...