Installation
It is paramount that installation is done correctly and the below instructions are followed. If the
mounting bracket is placed incorrectly, then there is a high likelihood that Gear will exhibit
degraded performance quality.
Additionally, an incorrect installation and mounting/dismounting technique of Gear and its
bracket can lead to degradation of the bracket itself. A degraded bracket negatively alters the
performance of Gear - sometimes to a large degree.
In addition to the instructions in this chapter, the AXIS app also provides an interactive tutorial.
To view this tutorial, open the AXIS app and navigate to “Installation” from the Menu.
POSITION GEAR
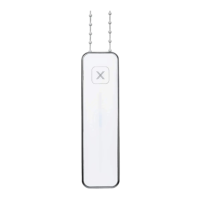
After selecting a place to install Gear, use the Positioning Tool to position the mounting bracket
below the chain or cord. Make sure to position the tool so the chain is tight and tensioned. Also,
make sure your chain or cord is not twisted and runs straight down.
Figure 8 Positioning Tool
INSTALLATION
A) Screws:
When installing Gear on drywall or wood, we urge you to use the mounting screws.
With plaster walls, use the recommended screws and anchors. When installing onto plaster
make sure to account for wall studs and/or electrical wires behind your wall. To locate