5
For step numbers indicated in red like
4
, the following precaution applies:
• If the key lock is set, the numerical value does not flash, and the value cannot be changed.
To change a numerical value, cancel the key lock first.
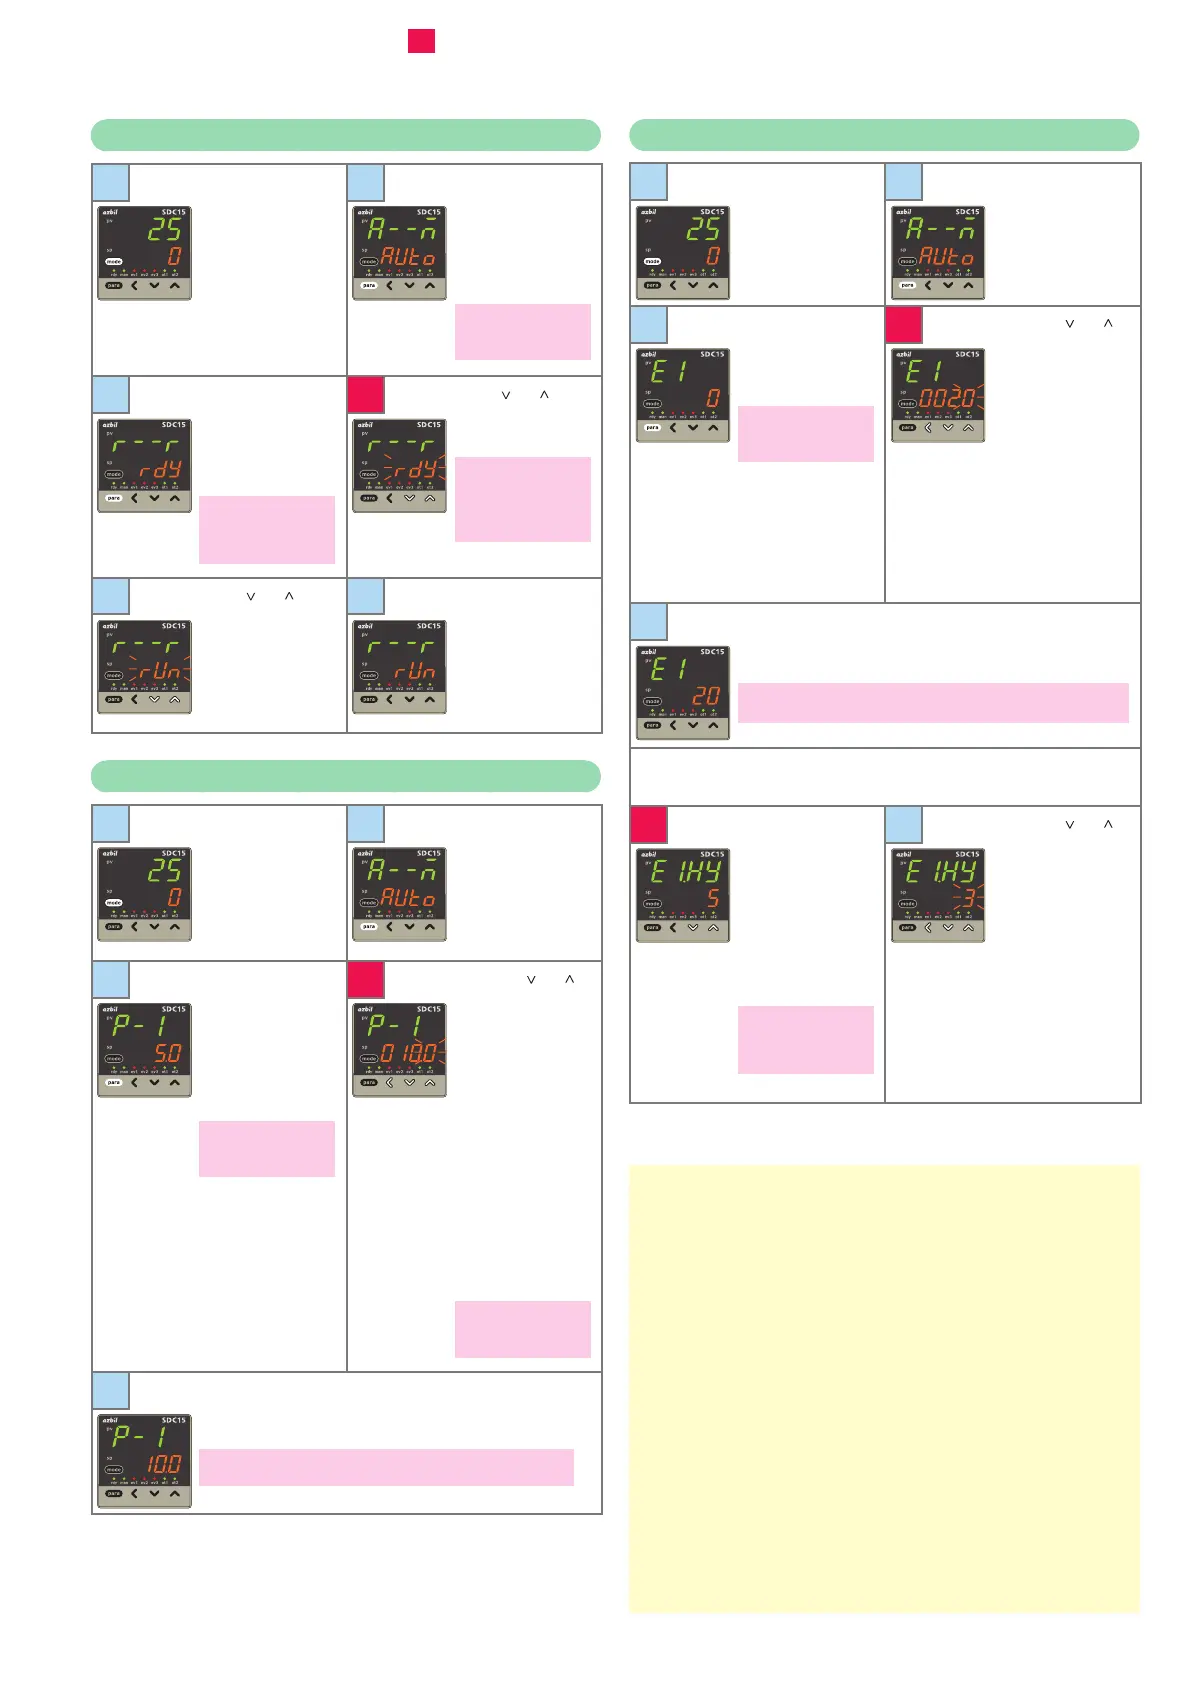
RUN/READY mode selection
1
Start from the opera-
tion display (if neces-
sary press [mode]
once to get the op-
eration display).
2
Press and hold [para]
for more than 2s to
get the parameter
setup display.
a--M
is shown on the
upper display.
In case of ON/OFF con-
trol,
r--
r appears on
the upper display.
3
Press the [para] key
once. The upper dis-
play says
r--r
and
the lower display
says
rdy
(or
run
).
The current mode is in-
dicated by
run
for RUN
mode or
rdy
for READY
mode.
4
When [ ] or [ ] is
pressed, the lower
display flashes.
If the DI assignment is
set to "RUN/READY se-
lection," the display does
not flash and no change
can be made.
5
When [ ] or [ ] is
pressed,
run
(or
rdy
) on the lower
display flashes.
6
If no key is pressed
for more than 2s, the
displayed value is
set and the display
changes from flash-
ing to continuously
lit.
Setup of PID value
1
Start from the opera-
tion display (if neces-
sary press [mode]
once to get the op-
eration display).
2
Press and hold [para]
for more than 2s to
get the parameter
setup display.
a--M
is shown on the
upper display.
3
Press [para] repeat-
edly to get
p-1
(for
proportional band)
on the upper display.
The value set for
p-1
is displayed on the
lower display.
If the control method is
"ON/OFF control," noth-
ing is displayed.
4
When [<], [ ] or [ ]
is pressed, the right-
most digit on the
lower display flashes,
and can be changed
to the desired value
for the proportional
band.
In this case, the flash-
ing of the numerical
value implies that it
is not yet set. A nu-
merical setting that
is being changed
flashes the same
way.
The proportional band
can be set in a range
from 0.1 to 999.9%.
5
If no key is pressed for more than 2s, the displayed value is
set and the display changes from flashing to continuously
lit.
If the [mode] key is pressed when the display is flashing, the status re-
turns to that of step 1.
Similarly, use
i-1
to set the integral time (0 to 9999s), and
d-1
to set
the derivative time (0 to 9999s).
Setup of event value
1
Start from the opera-
tion display (if neces-
sary press [mode]
once to get the op-
eration display).
2
Press and hold [para]
for more than 2s to
get the parameter
setup display.
a--M
is shown on the
upper display.
3
Press [para] repeat-
edly to get
e
1
on the
upper display. The
lower display says
0
.
0
on the lower display
indicates that the event
main set value is "zero."
4
When [<], [ ] or [ ]
is pressed, the right-
most digit on the
lower display flashes,
and can be changed
to the desired value
for the event.
In this case, the flash-
ing of the numerical
value implies that it
is not yet set.
A numerical set-
ting that is being
changed flashes the
same way.
5
If no key is pressed for more than 2s, the displayed value is
set and the display changes from flashing to continuously
lit.
If the [mode] key is pressed when the display is flashing, the status returns
to that of step 1.
Similarly, use
e2
to set a value for event 2, and
e3
to set a value
for event 3.
6
To set hysteresis as
well, press [para]
once (or twice,
depending on the
settings) to display
e
1.hy
on the upper
display.
The lower display
says
5
.
5
on the lower display
indicates that the cur-
rent set value for event
hysteresis is 5.
7
When [<], [ ] or [ ]
is pressed, the right-
most digit on the
lower display flashes,
and can be changed
to the desired value
for hysteresis.
If no key is pressed
for more than 2s, the
displayed value is
set and the display
changes from flash-
ing to continuously
lit.
Similarly, use
e2.hy
to set a hysteresis value for event 2, and
e3.hy
to set a hysteresis value for event 3.
Memo
 Loading...