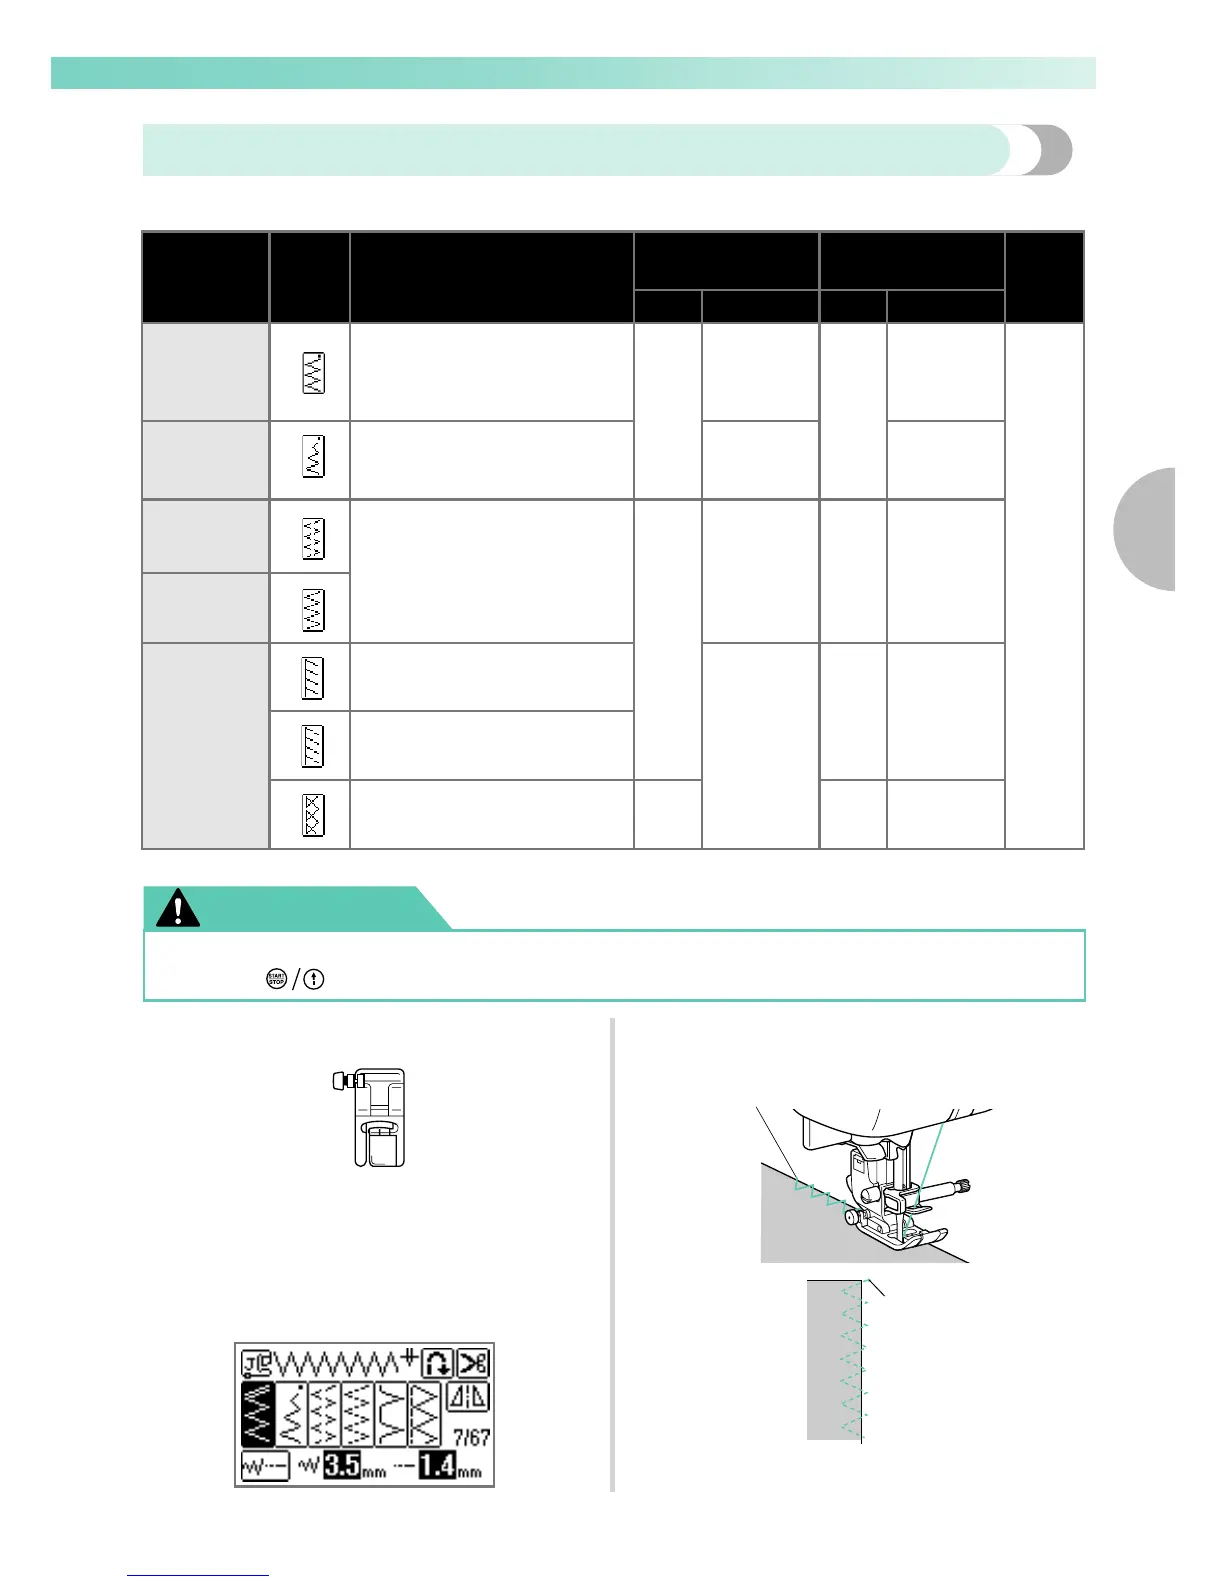
Overcasting Stitches 77
3
— — — — — — — — — — — — — — — — — — — — — — — — — — — — — — — — — — — — — — — — — — — — — — — — — — — —
Sewing overcasting stitches using zigzag foot "J"
Seven stitches can be used to sew overcasting stitches with zigzag foot "J".
CAUTION
Attach zigzag foot "J".
• For details on replacing the presser foot, refer
to "Replacing the presser foot" (page 41).
Sew along the edge of the fabric with the
needle dropping off the edge at the right.
a Needle drop point
Stitch Name Pattern Application
Stitch Width
[mm (inch)]
Stitch Length
[mm (inch)]
Presser
Foot
Auto Manual Auto Manual
Zigzag stitch
(center
needle
position)
7
Preventing fraying (center
baseline/reverse stitching)
3.5
(1/8)
0.0-7.0
(0-1/4)
1.4
(1/16)
0.0-4.0
(0-3/16)
J
Zigzag stitch
(right needle
position)
8
Preventing fraying (right
baseline/reinforcement stitching)
2.5-5.0
(3/32-3/16)
0.3-4.0
(1/64-3/16)
2-point
zigzag stitch
9
Preventing fraying in thick
fabrics and stretch fabrics
5.0
(3/16)
1.5-7.0
(1/16-1/4)
1.0
(1/16)
0.2-4.0
(1/64-3/16)
3-point
zigzag stitch
10
Overcasting
stitch
14
Preventing fraying in stretch
fabrics
0.0-7.0
(0-1/4)
2.5
(3/32)
0.5-4.0
(1/32-3/16)
15
Preventing fraying in thick
fabrics and stretch fabrics
16
Preventing fraying in stretch
fabrics
4.0
(3/16)
4.0
(3/16)
1.0-4.0
(1/16-3/16)
● Be sure to turn off the main power before replacing the presser foot. Otherwise, injuries may
occur if (Start/stop button) is accidentally pressed and the machine starts sewing.
J
a
a