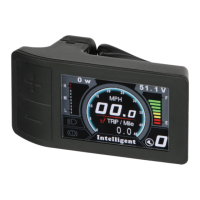
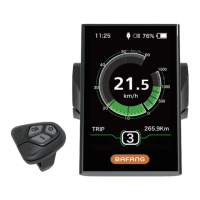
The EBIKE ESSENTIALS 500C Manual describes a display unit designed for electric bicycles, offering a range of functions to enhance the riding experience. This device serves as a central interface for monitoring and controlling various aspects of an e-bike, providing riders with essential information and customizable settings.
Function Description
The 500C display unit primarily functions as a comprehensive information and control hub for an e-bike. It provides real-time data and allows riders to adjust settings related to power assist, speed, and display preferences.
Key functions include:
- Multiple Power Assist Levels: Riders can select from various levels of motor assistance, allowing them to tailor the power output to their riding conditions and preferences. Increasing the PAS (Pedal Assist System) level provides more power and speed.
- Walk Assist Mode: This feature provides slow-speed motor assistance, typically around 4mph, to help riders push the bicycle when walking alongside it. It's designed specifically for walking and should not be used while riding.
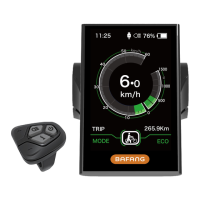
- Distance and Odometer: The display tracks both single-trip distance (TRIP) and total accumulated distance (TOTAL), giving riders a clear overview of their mileage.
- Backlight / Headlight Control: The unit allows for the control of the display's backlight and, if installed, the e-bike's headlight, enhancing visibility during different lighting conditions.
- Speed Monitoring: The display shows the current speed based on riding conditions, and can also track average speed (AVG) and maximum speed (MAX).
- Battery Gauge: Riders can monitor their battery capacity, with options to view it as a voltage reading or a percentage. Voltage is recommended for more accurate estimation.
- Error Codes: In the event of a system problem, the display will flash an error code, helping riders diagnose and troubleshoot issues. The motor will cease operation until the error is cleared.
- Power Meter: The display can show power consumption in Watts or Amps, providing insights into the motor's performance.
Usage Features
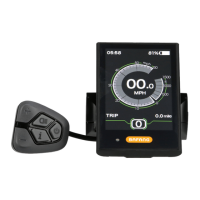
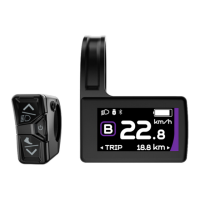
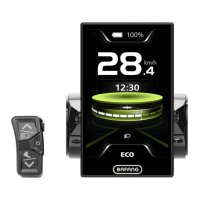
The 500C display is designed for intuitive use, with a simple three-button control pad and clear visual feedback.
- Installation: The display unit is installed on the handlebar and secured with a supplied bolt. It's crucial not to overtighten the bolt to prevent damage to the plastic bracket.
- Power On/Off: To turn the unit on, the power button is pressed and held. The same action is used to switch it off. It's important to ensure the e-bike's battery is also turned on. The display has an auto-shutdown feature after a period of inactivity.
- Pedal Assist Level Adjustment: The '+' and '-' buttons are used to increase or decrease the power assist levels. The default PAS level is 0 when the display is powered on.
- Speed & Mileage Mode Switch: A dedicated button on the underside of the display allows riders to cycle through different information data, including single-trip distance (TRIP), riding time (TIME), total distance (ODO), average speed (AVG), and maximum speed (MAX). If no operation occurs for 5 seconds, the display automatically returns to the TRIP view.
- Headlight/Backlight Control: Pressing and holding the mode button turns on the 500C backlight screen and any connected headlight. Holding it again turns them off.
- Walk Assist Activation: Pressing and holding the '-' button activates the walk assist mode, changing the displayed PAS level to 'P' and moving the bicycle at approximately 4mph. The button must be held down for the duration of desired walk assist, and releasing it deactivates the mode.
- Data Reset: By pressing and holding both the '+' and '-' buttons simultaneously while the power is on, temporary data such as AVG Speed, MAX Speed, TRIP, and TIME can be reset. This temporary data is not erased by powering off the unit. The Odometer (total mileage) remains intact.
- Settings Menu Navigation: The settings menu is accessed by pressing and holding the mode button for a few seconds. Within the menu, the '+' and '-' buttons are used to change selected options, and the mode button is pressed to save selections and move to the next setting. Pressing and holding the mode button again exits the settings menu. The display will also automatically exit the settings menu after 30 seconds of inactivity or if the e-bike is in motion for safety reasons.
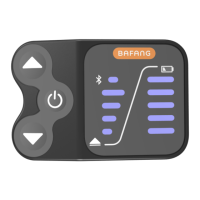
- Customizable Display Settings:
- Speed Unit: Riders can choose between Metric (Km/h) or Imperial (Mile/h) for speed display.
- Brightness: The backlight brightness can be adjusted, with more bars indicating a brighter display.
- Auto Off: This setting determines the period of inactivity (1-9 minutes or OFF) before the system automatically shuts down. The default is 5 minutes.
- Battery Indicator: The battery display can be set to show either Voltage or Percentage, with Voltage recommended for accuracy.
- Advanced Settings: Accessing advanced settings requires entering a password ("1919"). These settings include:
- Wheel Size: Crucial for accurate speed and trip information, riders can select their wheel size from a range of options (e.g., 12" to 31").
- Speed Limit: This allows adjustment of the maximum speed limit (10km/h to 60km/h), with a default of 25km/h. Riders are advised to check local laws regarding e-bike speeds and not exceed legal limits.
- Pedal Assist Levels: The number of pedal assist levels can be set to 3, 5, or 9. Setting it to 9 is recommended for more incremental and available power levels, as it divides the motor's total power among the selected number of levels.
- Password Settings (Lock Device): This option allows for locking the display with a 4-digit input password to prevent unauthorized access. However, changing this password is NOT recommended.
- Speed Poles and Start Poles: These settings are present but cannot be changed by the user.
Maintenance Features
While the manual doesn't detail extensive maintenance procedures for the display unit itself, it does provide crucial information related to its care and handling to ensure longevity and proper function.
- Environmental Protection: The unit is not water-resistant, so it must be protected from water and other liquids. This implies that exposure to heavy rain or submersion should be avoided.
- Physical Protection: Riders are cautioned to avoid collisions to prevent damage or malfunction. During installation, care must be taken not to overtighten the display bracket bolt, as this can break the plastic.
- Storage Conditions: The recommended storage temperature for the display is between 30% and 80% humidity.
- Operating Conditions: The display is designed to operate within a temperature range of -4°F to 158°F (-20°C to 70°C).
- IP Rating: The device has an IP65 waterproof rating, indicating protection against dust ingress and low-pressure water jets from any direction. While this offers some protection, it doesn't mean it's fully submersible or impervious to high-pressure water.
- Error Code Diagnosis: The display's ability to show error codes is a key maintenance feature. When an error code flashes, riders can refer to the provided list in the manual to identify the cause (e.g., Throttle fault, Low voltage cut-off, Hall sensor fault, Controller fault, Speed sensor fault, Battery communication fault, Communication fault). This diagnostic capability helps in quickly identifying issues that may require professional attention or simple troubleshooting. The motor will not function until the error is resolved, emphasizing the importance of addressing these codes promptly.