601–0443 /03 Balder 23
Image 2-3
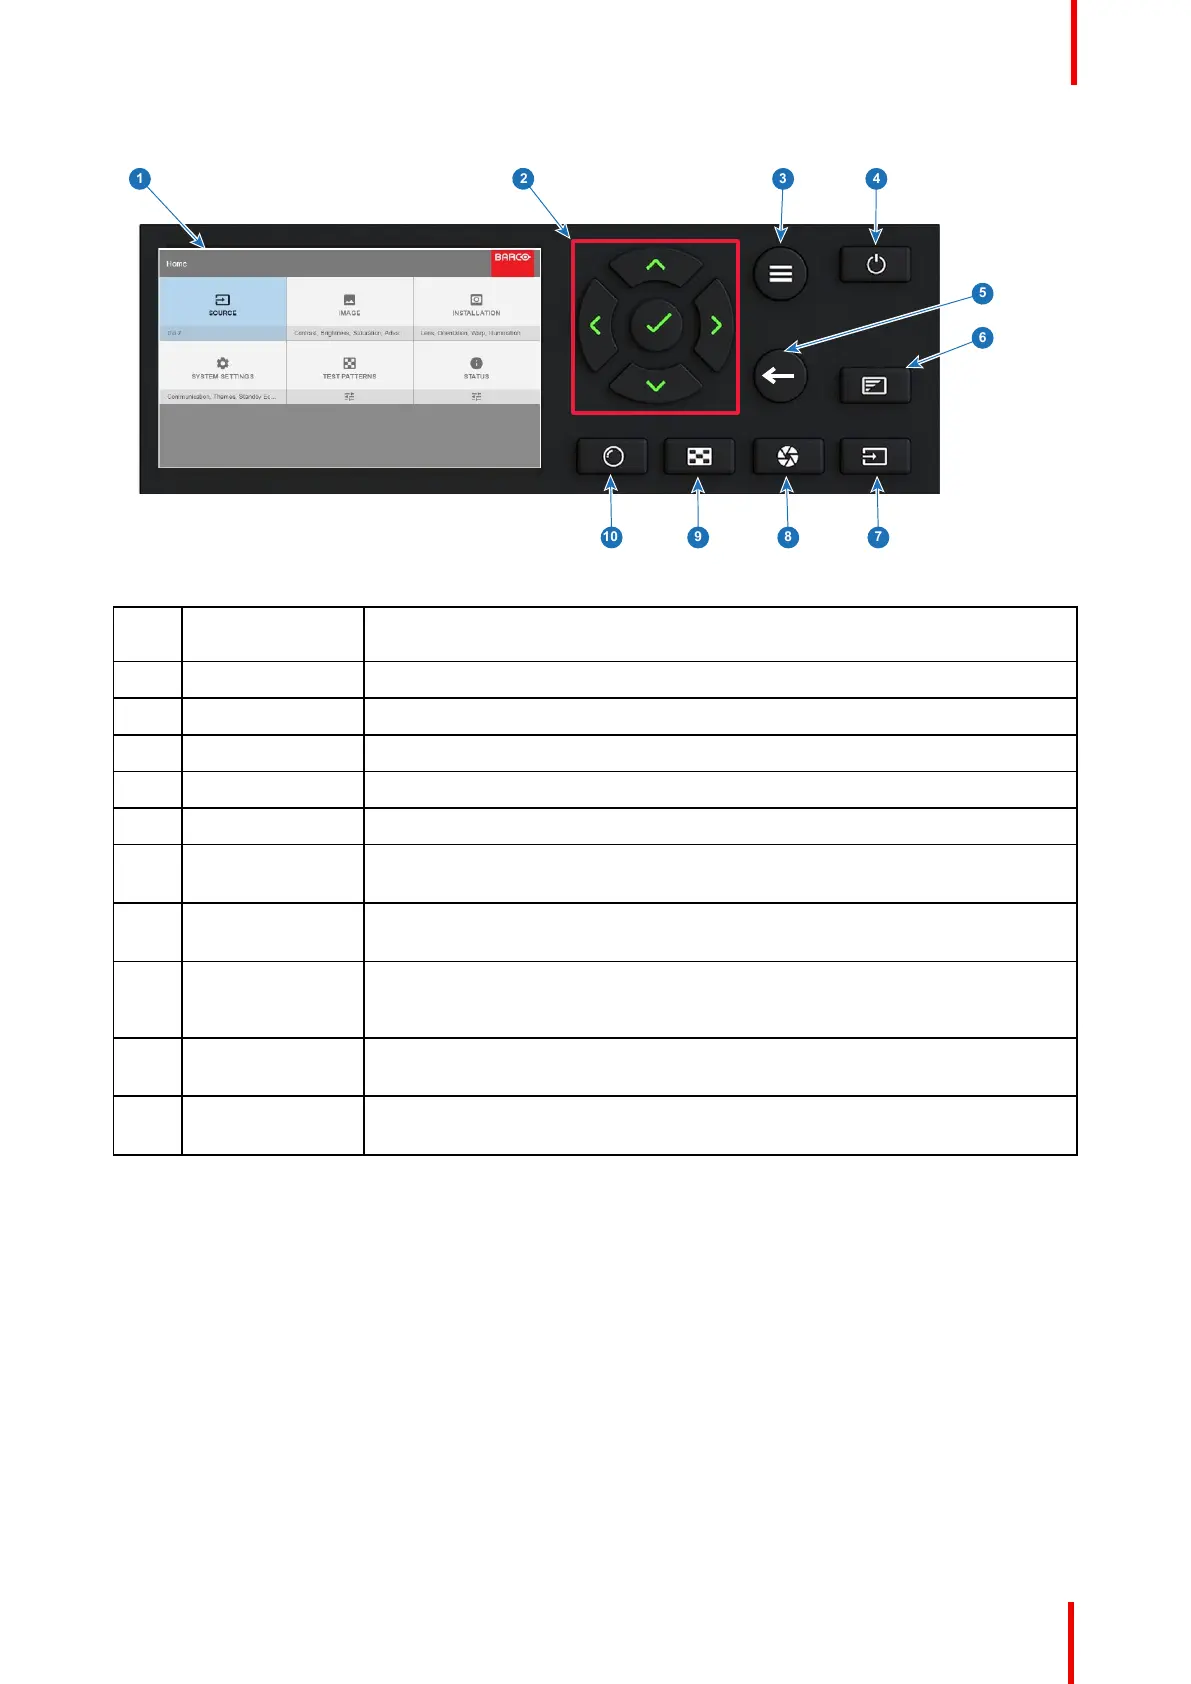
Item
No.
Name
Description
1 LCD Display Shows Projector status and navigation menu.
2 Navigation keys Navigation arrows (up, down, left, right), confirm selection (✓)
3 Menu button Toggle between OSD / Information menu.
4 Standby Power on / standby
5 Back Undo action / back to previous screen.
6 OSD ON/OFF Deactivate the On Screen Display (OSD). Only critical warnings will be
displayed.
7 Input Shortcut to input source menu on LCD. Use navigation keys to select and
enable input.
8 Shutter Enable and disable the lens shutter function. This is not a mechanical shutter,
but it toggles the laser source on and off. Backlight is red when the shutter are
enabled.
9 Test Patterns Shortcut to test pattern menu on LCD. Use navigation keys to select the desired
pattern.
10 Lens Shortcut to lens function. A test pattern displays on the OSD. LCD screen
displays the navigation keys to manage and confirm actions.
2.8 Remote Control
2.8.1 Remote control, Battery installation
Where to find the batteries for the remote control ?
The batteries are not placed in the remote control unit to avoid control operation in its package, resulting in a
shorter battery life time. At delivery the batteries can be found in a separated bag attached to the remote
control unit. Before using your remote control, install the batteries first.
How to install
1. Push the battery cover tab with the fingernail a little backwards (1) and pull, at the same time, the cover
upwards (2).
Getting to know the projector.

 Loading...


