R5905753 /17 DPxK-19B/23B/P48
WARNING: Always wear clean leather gloves with wrist protectors when handling xenon lamps.
This procedure assumes that the anode support assembly and the side cover are already removed
from the Lamp House due to the removal of the xenon lamp.
Required tools
• Torque wrench with a 2,5 mm Allen socket.
• Torque Allen key
• 1,5 mm Allen wrench.
• 22 mm open-end wrench.
• Torque wrench with a 22 mm hexagon socket.
• Torque wrench with a 5 mm Allen socket.
How to install the xenon lamp in the manual S/M Lamp House?
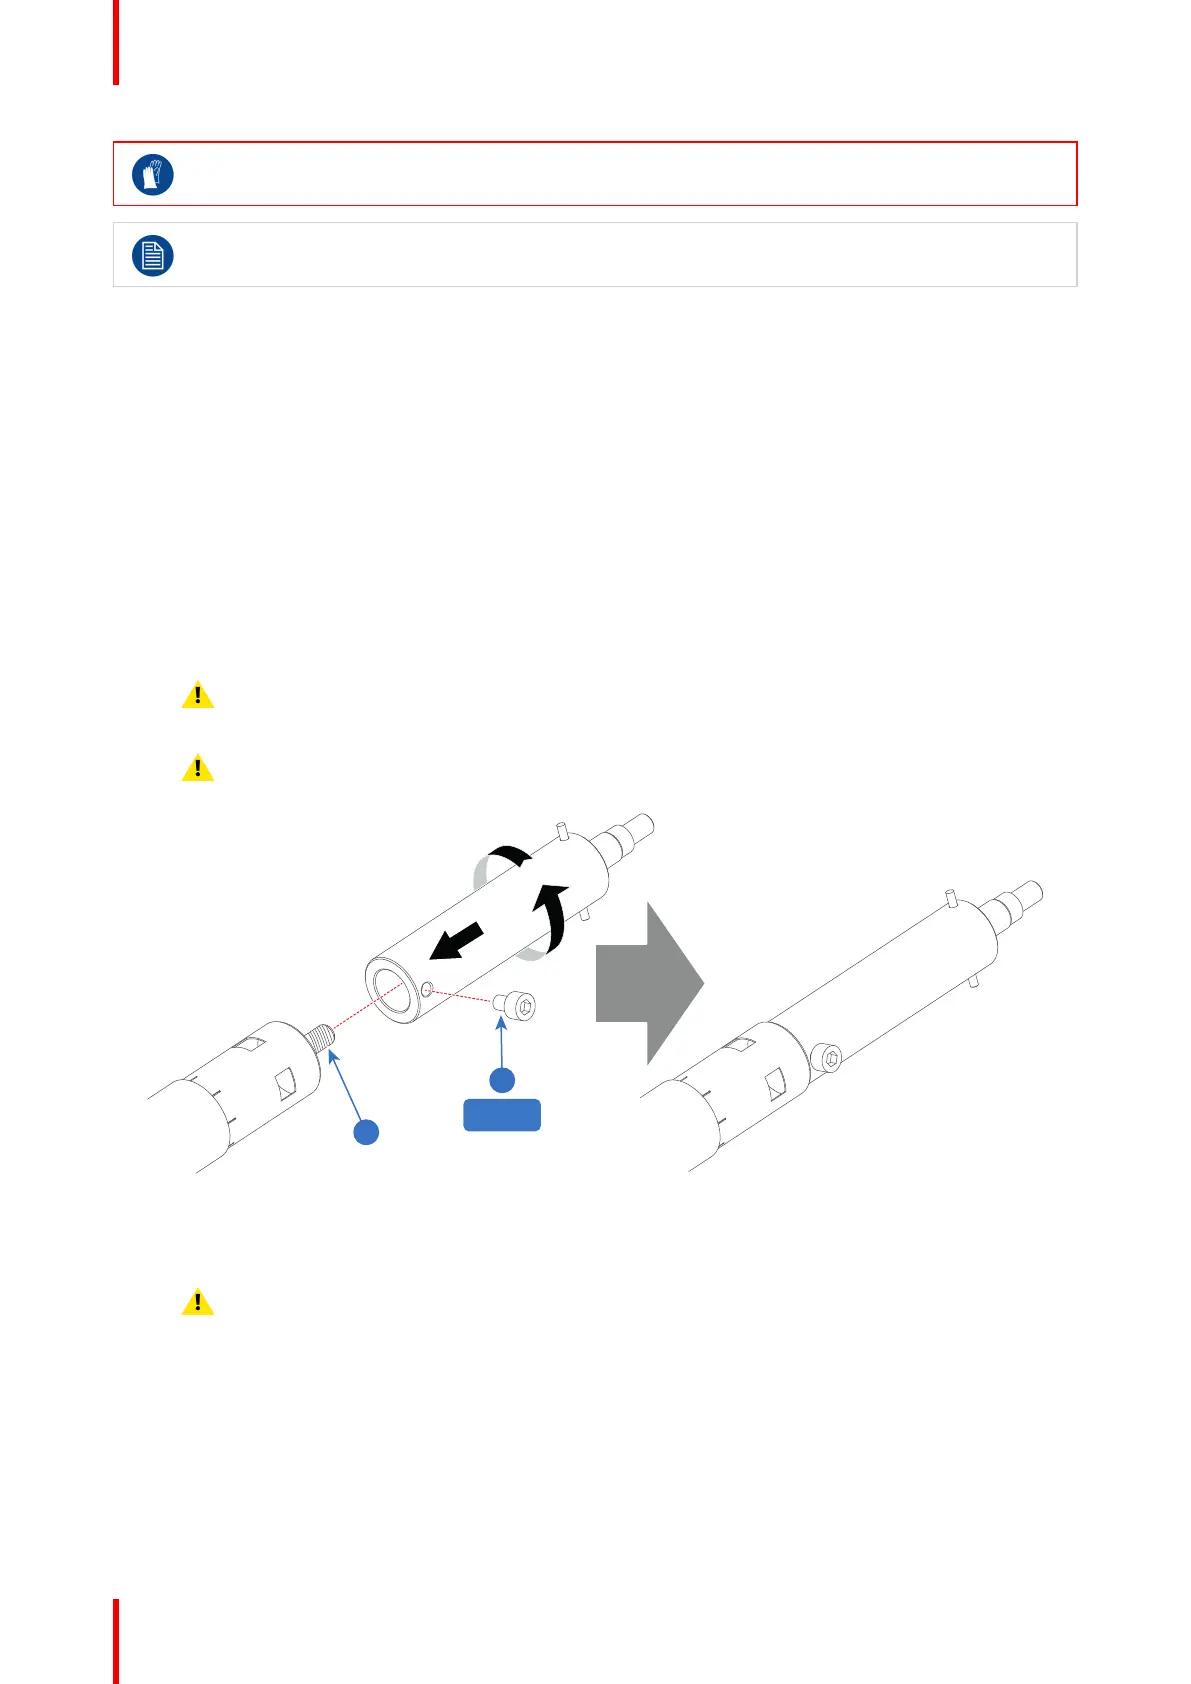
1. Install the lamp cathode adapter on the cathode of the xenon lamp. Note that some xenon lamps have a
cathode pin with screw threat (reference 10 Image 4–15). Screw the adaptor on the anode pin as far as
possible. Make sure that there is full contact between the adapter flat surface and the lamp base. Fasten
the set screw (reference 9 Image 4–15) of the cathode adapter with a torque of 2.5Nm (1.84 lbf*ft). Use a
torque wrench with a 5mm Allen socket.
Caution: Ensure that the adaptor is clean. Periodically clean the adapter. Remove oxide from
silver plated adaptor with standard household metal polish (E.g. Brasso).
Warning: Install the cathode adapter prior to removing the protective container or protective
cloth from the xenon lamp.
Image 4–15
2. Install the anode wire lug (reference 6 Image 4–16) upon the anode socket as illustrated. Use an 8mm
Allen torque key set to 9Nm (6.64lbf*ft) to secure the bolt (reference 8 Image 4–16). Place a flat washer
(reference 7 Image 4–16) between the bolt and the wire lug.
Warning: Make sure that there is no tension on the anode wire of the xenon lamp.
Lamp & Lamp House
 Loading...