R5905753 /17 DPxK-19B/23B/P50
Image 4–18
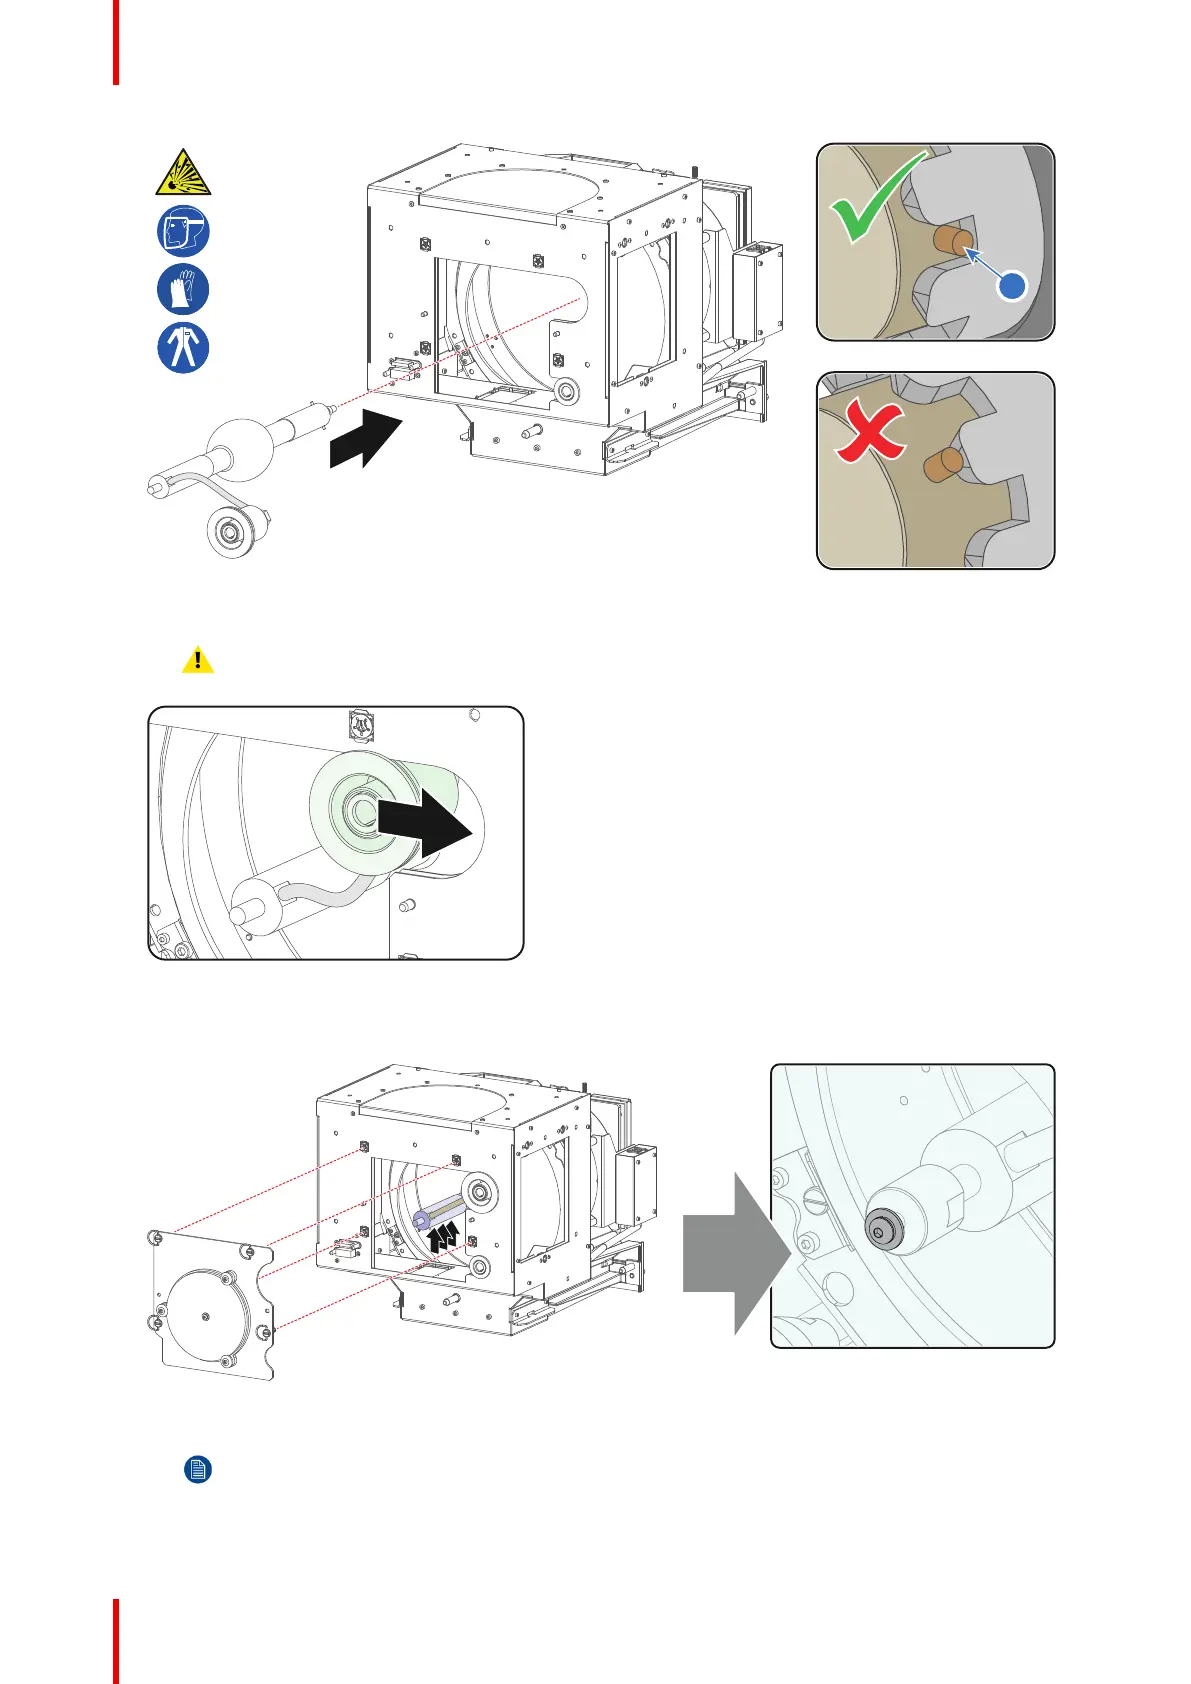
5. Slide the anode connector in its position on the Lamp House as illustrated.
Caution: Avoid any tension on the anode wire, ensuring there is no mechanical stress on the
lamp.
Image 4–19
6. Install the UV blocker assembly as illustrated. Use the opening at the side of the Lamp House to guide the
anode pin of the xenon lamp into the anode supporting mechanism of the UV blocker.
Image 4–20
7. Secure the UV blocker by fastening the four quarter turn screws (reference 5 Image 4–21) as illustrated.
Note: Ensure that the quarter turn screws turning wires are flush with the cover or interference
will occur while inserting the Lamp House into the projector.
Lamp & Lamp House
 Loading...