Do you have a question about the Barco HDX W18 and is the answer not in the manual?
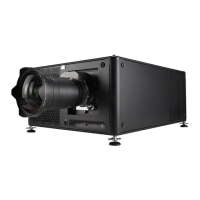
Manual for installation and user guidance.
General safety guidelines, instructions, warnings, and cautions.
Instructions to prevent electrical shock and personal injury.
Warnings related to stacking and transporting HDX rental flight cases.
Physical environment and safety area requirements for projector installation.
Procedures and tools for safely unpacking the projector from its packaging.
Introduction, overview, and battery installation for the remote control unit.
Overview of available lenses, selection process, and installation procedures.
Steps for connecting the projector to the local power network safely.
Procedure for aligning the projector when mounted on a table.
Description of the input and communication ports and modules available on the projector.
Details on connecting DVI, 3G/HDSDI, and optional 5-cable input sources.
Information on communication interfaces like DMX, RS232/RS422, USB, and Ethernet.
How to control the projector using the remote control unit and the local keypad.
Overview of the functionality of various keys on the remote control and local keypad.
Step-by-step instructions for powering on the projector.
Procedure for switching the projector to standby mode and its implications.
Function to switch on/off on-screen text boxes for adjustments.
Using the LENS key for quick zoom and focus adjustments.
Using remote control buttons for direct lens alignment (ZOOM, FOCUS, SHIFT).
Explanation of the adjustment mode and its available functions.
Information on using the remote control and local keypad for navigation and adjustments.
Steps to start up the adjustment mode using the remote control or local keypad.
Overview table detailing input selection, advanced settings, and locking options.
How to select the desired input source from the available options.
Overview of advanced input settings, including setup and configuration.
How to lock the output signal to an internal sync or an input source sync.
Overview table of image settings, aspect ratio, timings, and file services.
Steps to activate and access the image adjustment menus.
Overview of image settings like Contrast, Brightness, Saturation, and Phase.
How to set the aspect ratio for the projected image.
Overview table of layout options for main and PiP windows, and file services.
Explanation of layout files that determine window size and position on screen.
Settings for main window source selection, size, and position.
Configuration options for the Picture-in-Picture (PiP) window, including source, size, and position.
Overview table of lamp settings including power mode, auto dimming, and CLO.
How to switch between Normal, Economic, and Long Life lamp power modes.
Procedure for activating or deactivating the Hush Kit for quieter operation.
How to reduce the light output by adjusting the lamp power.
Overview table of alignment functions like orientation, lens adjustments, and warping.
How to set the physical installation orientation of the projector.
Adjusting the lens for zoom and focus to achieve a sharp image.
Adjusting the lens to shift the image horizontally and vertically.
How to return the lens to its mid position for calibration or reset.
Enabling or disabling the lens calibration procedure at projector startup.
Procedure for calibrating the lens for optimal performance.
Overview of warping functionality for image distortion compensation.
How to select the level of detail for warp adjustment.
How to select predefined or custom steps for warp adaptation.
How to make selections and perform adjustments within the warp interface.
Step-by-step guide for adjusting vertical and horizontal keystone correction.
Step-by-step guide for adjusting vertical and horizontal image linearity.
How to select and move specific anchor points for warp adjustment.
How to scale the entire image using the warp adaptation window.
How to shift the entire image using the warp adaptation window.
How to rotate the image around a predefined point.
How to reset the warping hardware if it becomes stuck.
How to adjust the opacity of OSD menus during warp adjustment.
How to load a predefined warp configuration file.
How to save the current warp settings to an active file.
How to save the current warp settings into a new file.
How to rename custom warp files.
How to delete a custom warp file.
How to delete all custom warp files.
How to perform a hard reset on the warping hardware board.
How to reset both the warping hardware and its current values.
How to use alternative side keystone correction for 3D sources.
Adjustments to frame the projected image and hide unwanted information.
How to adjust image contrast and intensity for optimal output.
Using gamma to enhance image quality by adjusting darker portions.
How to select internal patterns for measurement and alignment purposes.
How to select and adjust color space standards for color reproduction.
Overview of Scenergix for multi-channel setup and image blending.
Ensuring necessary adjustments are done before Scenergix setup.
How to activate or deactivate the Scenergix feature.
How to display an internal pattern to facilitate Scenergix adjustment.
Displaying border lines for blending areas during white and black level adjustments.
How to set up vertical and horizontal start positions for multi-projector displays.
Adjusting the white level for blending areas in Scenergix.
Adjusting black level and DLP leakage area for dark images.
How to reset all Scenergix values to their default settings.
Overview of settings related to 3D glasses synchronization.
Adjusting dark time for proper shutter synchronization with DLP mirrors.
Applying an adjustable time delay to the stereo emitter signal.
How to route incoming 3D sync signals to the output connector.
Overview table of projector control functions like address, network, and DMX.
How to set a unique address for individual projector control.
Setting a common address for group control of projectors.
Setup for serial communication using RS232 or RS422 protocols.
Overview of network connection options via wired or wireless interfaces.
Explanation of network connection concepts like DHCP, IP addresses, and gateways.
How to set up wired network connection using DHCP for automatic IP assignment.
How to manually set the IP address for a wired network connection.
How to activate the wireless network module for connectivity.
How to scan for and connect to wireless access points.
How to configure wireless DHCP for automatic IP address assignment.
How to manually set a fixed IP address for wireless network connection.
How to set the subnet mask for a wireless network connection.
How to set the default gateway for a wireless network connection.
How to activate or deactivate the projector's IR receivers.
Overview of DMX control features including address, universe, and mode.
How to enable or disable DMX control via Ethernet using Art-Net.
Enabling/disabling and setting the output voltage level for the front XLR connector.
How to display DMX settings per channel on an on-screen menu.
Forcing the projector into shutdown when no DMX signals are available.
Overview of standby button functions and shortcut key management.
How to change the on-screen menu and bar scale position.
How to adapt the local LCD backlight and set its time-out.
How to change the language of on-screen and local display menus.
Overview of the scheduler for automating tasks like layout changes and lamp control.
How to add a new task to the scheduler list.
How to edit an existing task in the scheduler list.
How to delete a task from the scheduler list.
How to switch the scheduler function on or off.
How to configure the projector software with an installed SIM card.
How to subscribe for SMS notifications from the projector.
Overview of FLEX technology for controlling projector light output.
Explanation of FLEX technology for light output control via Toolset, OSD, or SMS.
How to configure light output levels using the OSD menu with an activation code.
How to configure light output via SMS messages.
Overview of SMS services for notifications and information requests.
Overview table of service menu items like identification, diagnosis, and defaults.
How to display general projector information and status.
Overview of diagnosis functions for checking projector working status.
How to display an overview of reference and current software versions.
How to display measurements for voltages, temperatures, and fan speeds.
How to display the projector's log files for main controller and lamp power supply.
How to get an overview of module article numbers, serial numbers, etc.
How to display the list of warnings and errors logged by the projector.
How to check the tilt sensor status for allowed projector positioning.
How to select and display internal test patterns for measurement and alignment.
How to check and adjust the convergence alignment of red, green, and blue signals.
How to reset all projector settings to the original factory defaults.
How to save and load custom settings using a USB stick.
Necessity and procedure for resetting the formatter.
How to start the refill mode for the cooling circuit.
How to save current projector settings to internal backup.
Procedure for safely cleaning projector lenses to avoid damage.
How to clean the projector's housing using a damp cloth.
Procedure for inserting a new input module into the projector.
Procedure for removing the projector's lamp house.
Procedure for installing the lamp house into the projector.
Procedure for removing the projector's front cover.
Procedure for mounting the projector's front cover.
Procedure for removing the projector's lamp cover.
Procedure for mounting the projector's lamp cover.
Procedure for replacing the high density dust filter.
How to remove and clean the metal front filter.
Detailed dimensions and center of gravity points of the HDX projector.
Technical specifications for the HDX W12 projector model.
Technical specifications for the HDX W14 projector model.
Technical specifications for the HDX W18 projector model.
Technical specifications for the HDX W20 FLEX projector model.
Table listing standard image files pre-programmed in the projector with their timings.
Basic DMX channel functions, values, defaults, and actions.
Full DMX chart detailing channel functions, values, defaults, and actions.
Extended DMX chart with additional channel functions and actions.
How to mount the stacking points on the projector corners.
Cautionary notes and procedure for stacking HDX projectors.
How to align stacked projectors for optimal image display.
Information on proper disposal of the product and its batteries.
RoHS compliance information for China and other regions.
Contact and production addresses for Barco NV and Barco Visual (Beijing).
| Resolution | 1920 x 1200 |
|---|---|
| Brightness | 18, 000 lumens |
| Projector Type | DLP |
| Connectivity | DVI, HDMI |
| Lamp Life | 1, 500 hours |
| Power Consumption | 2, 400 W |
| Contrast Ratio | 2000:1 |