5. ICMP service procedure
1
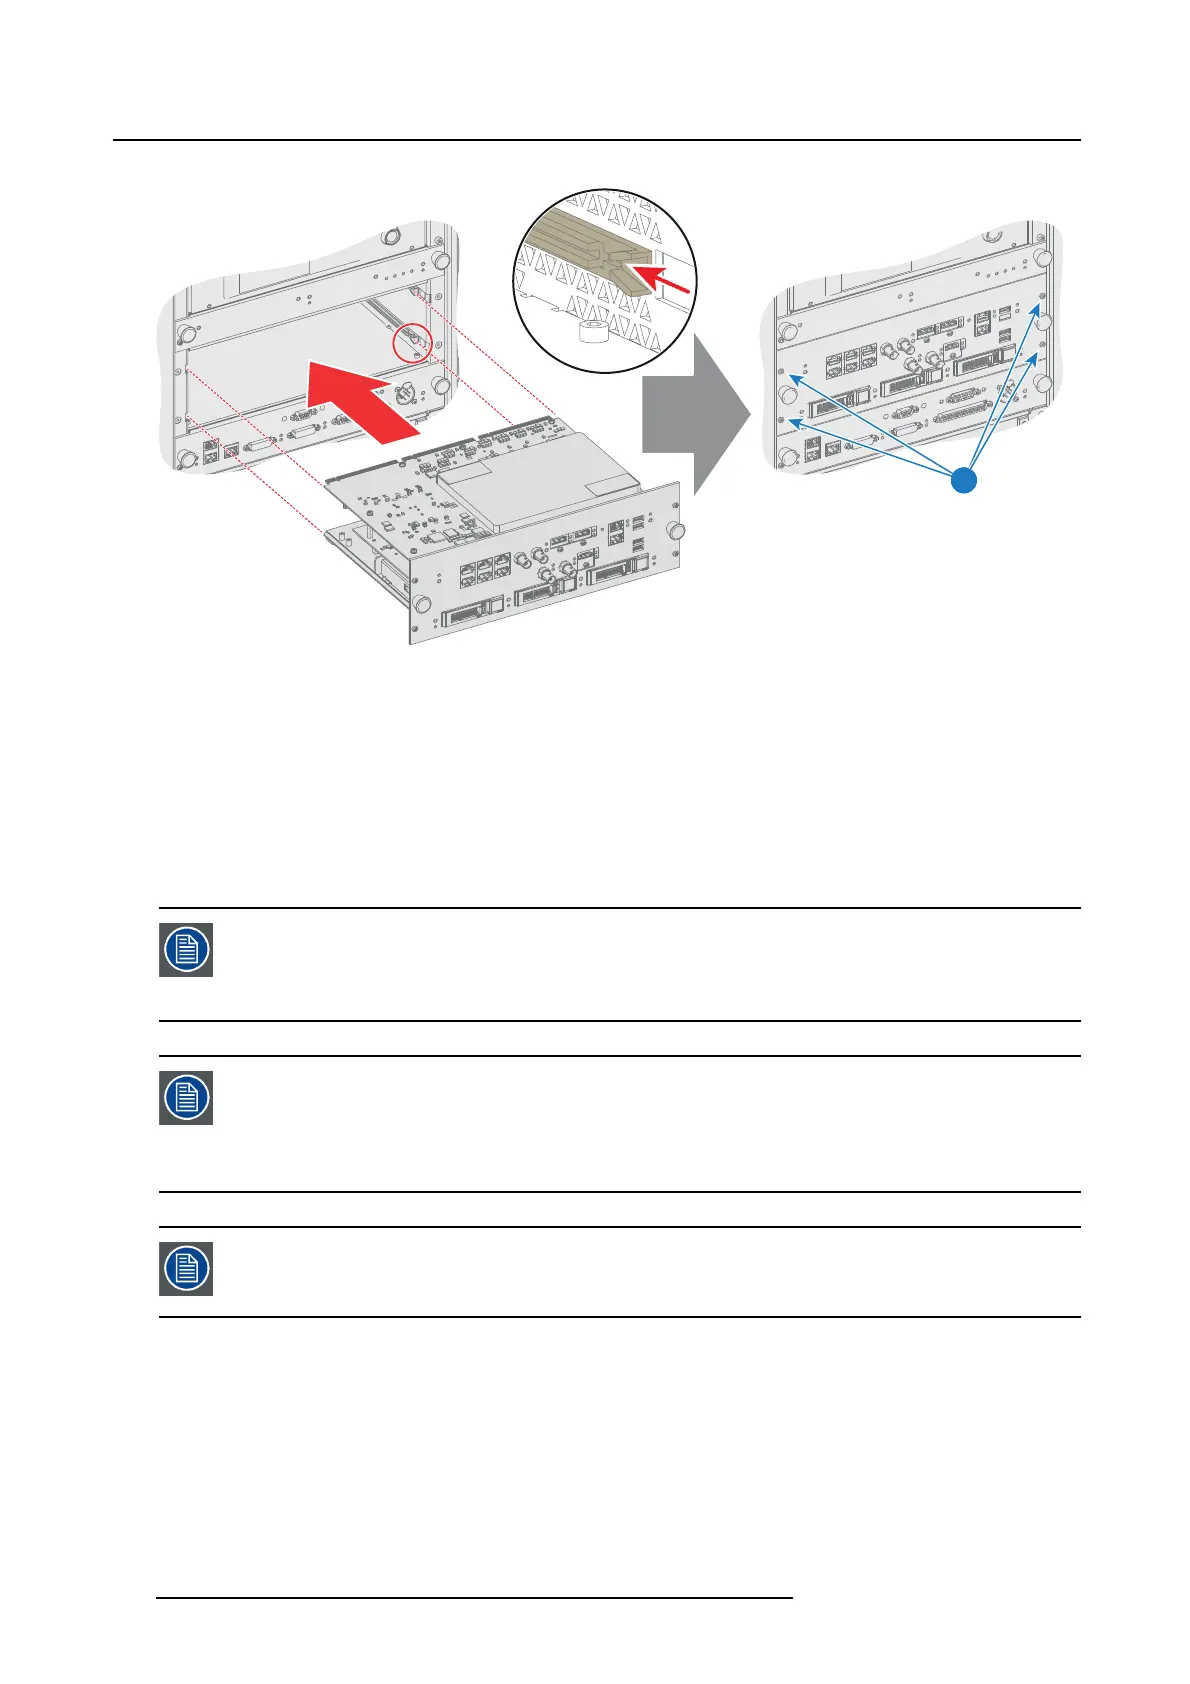
Image 5-4
4. Install the HDDs in case not yet installed. See procedure "Installing a HDD into the ICMP", page 72.
5. Install the cover of the Card Cage (not needed in case this is a DP2K S series projector). Use a 7 mm
flat screwdriver.
6. Reconnect the power cord and switch on the projector.
7. Proceed with retrieving the device certifi cate from the ICMP for ordering the correct KDMs to play Dig-
ital Cinema Packages (DCPs). For detailed instructions see user guide of the (WEB) Commander or
Communicator.
Replacing the ICMP in the Card Cage of the projector will result in tamper events (service
door tamper, insertion tamper). An a uthorization to clear the security warning on the
projector, after installation, wil l be needed. You will find in the installation manuals of
each projector the way to clear the security warnings.
In the ICMP, the content is stored on removable disks that allow fast recovery of this
content if you have to replace the ICMP. See chapters "Removing a HDD from the ICMP",
page 71, and "Installing a HDD into the ICMP", page 72. However, take into a ccount that
the matching KDM file mus t be ingeste d into the ICMP to play t he cinema c ontent (DCP
file) available on the HDDs.
A newly installed ICMP has the factory settings. The ICMP software offers the ability to
import setting parameters from a backup file. For detailed instructions see Communi-
cator user guide.
70 R5906594 ICMP 09/11/2016