5. ICMP service procedure
5.2 Installing t he ICMP
This procedure assumes that the projector has been made I CMP ready. In other words
the Card Cage slots wherein the ICMP has to be inserted are empty and the latest pro-
jector software package is installed.
CAUTION: Wear a w rist band which is connected to the ground while handling the elec-
trostatic discharge sensitive parts.
Necessary tools
•7mmflat screwdriver.
• PH2 Phillips screwdriver.
• ESD wrist band.
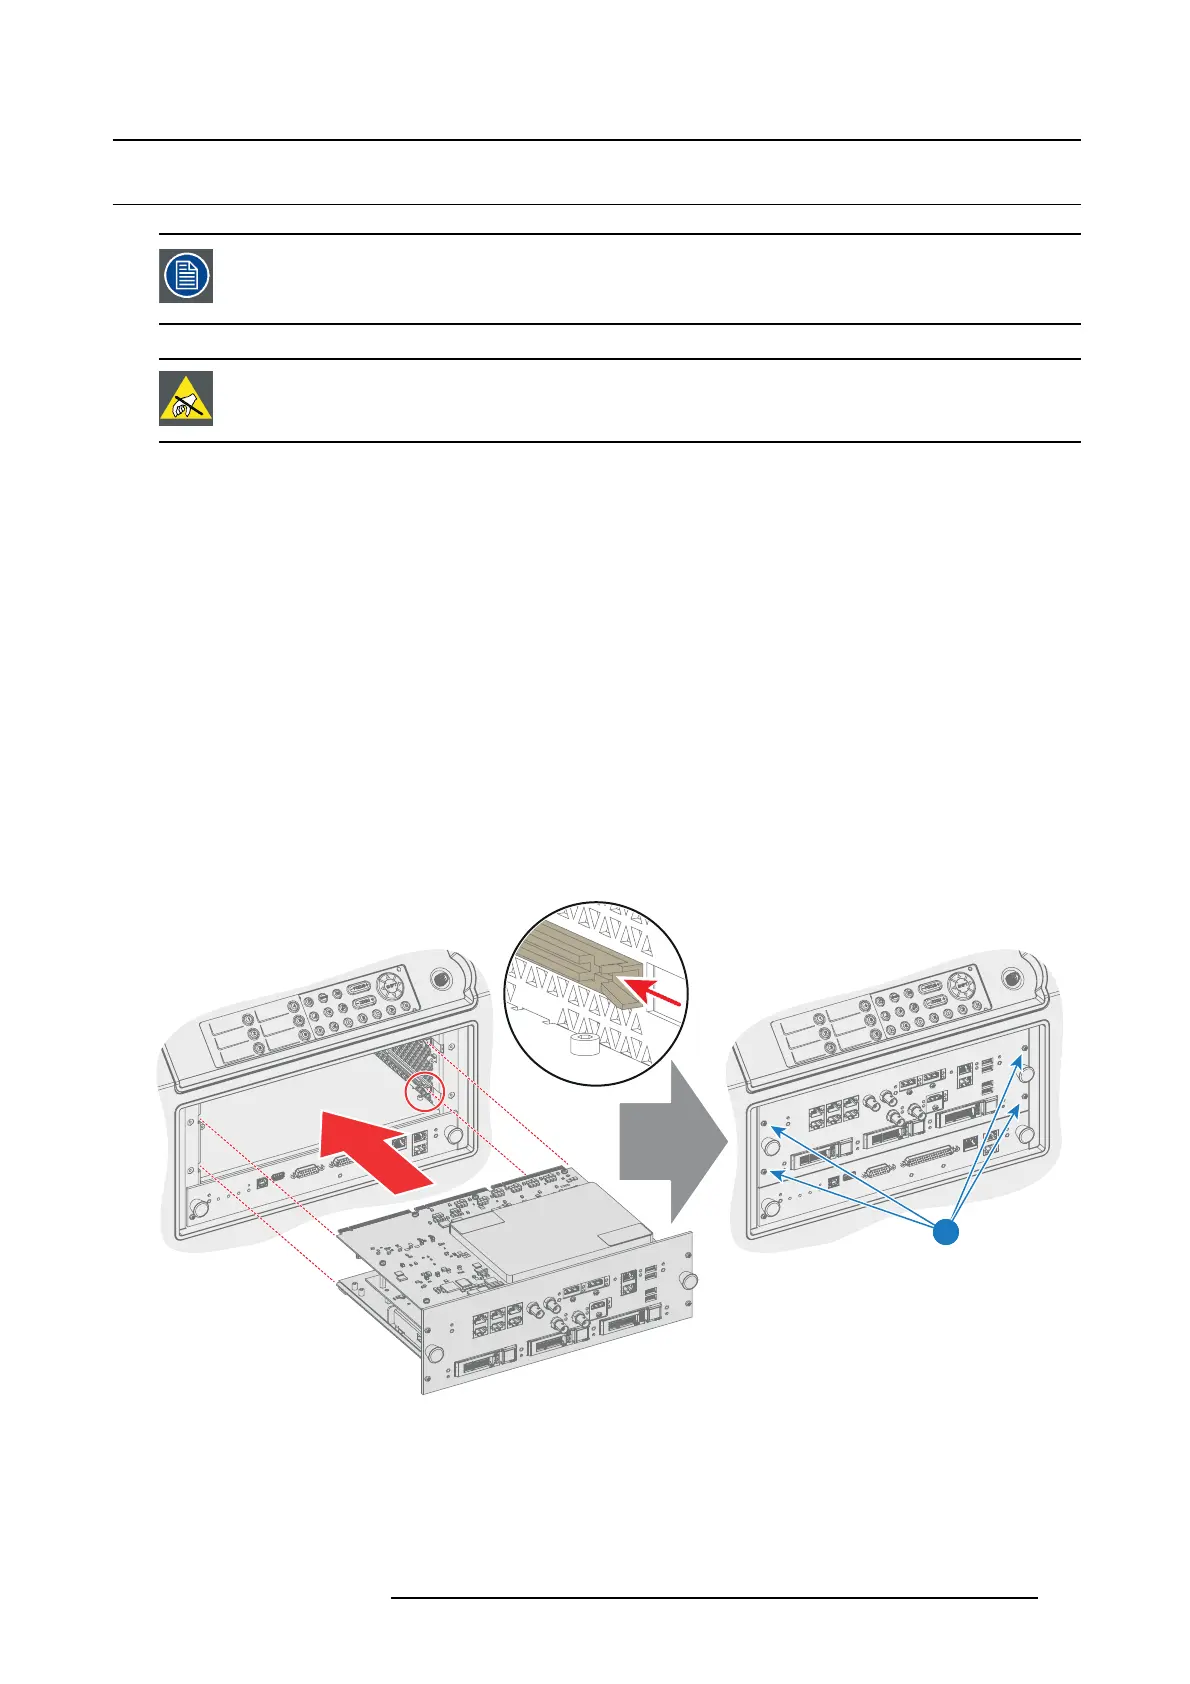
How to install the ICM P into the Card C age?
1. Gently insert the ICMP in the guides of the Card Cage as illustrated below.
Caution: Ensure that the both sides of the ICMP are captured by the guides inside the Card Cage
compartment. See detail in image below.
2. Push (apply a little pressure) on both handles until the ICMP is fully inserted and the connection is made
with the back plane.
Note: All connections are made via the board to board connection with the back plane.
3. Alternately fasten the four screws (reference 1) at the front side of the ICMP. Use a PH2 Phillips screw-
driver.
Caution: Ensure to tighten the screws alternately!
1
Image 5-3
R5906594 ICMP 09/11/2016 69