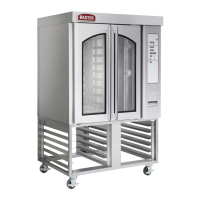
Fig. 15
6. Rack stopping position adjustment.
If rack is adjusted without customer's typical bake
product load weight on it, position rack
approximately 5° prior to being square with the
loading doors. Some under or over travel of rack
positioning should be expected depending on
product load. The rack rotation components are
located on top of the oven.
A. Put oven into operation and perform rack
operation test with customer's typical bake
product load weight on rack. If rack does not
stop in the proper rack load/unload position,
perform rack stopping position adjustment.
B. To adjust rack stopping position:
1) Open oven loading doors and verify
rack is square with the loading doors, if
not position rack so it is square.
2) Align the pointer switch actuator
sideways to align with pointer switch on
top of the rotation shaft.
NOTE: If rack stops to soon, move pointer switch
actuator away from pointer switch on top of the
rotation shaft.
3) Put oven into operation and check for
proper rack load/unload positioning.
4) Repeat the procedure until load/unload
rack position is achieved.
Fig. 16
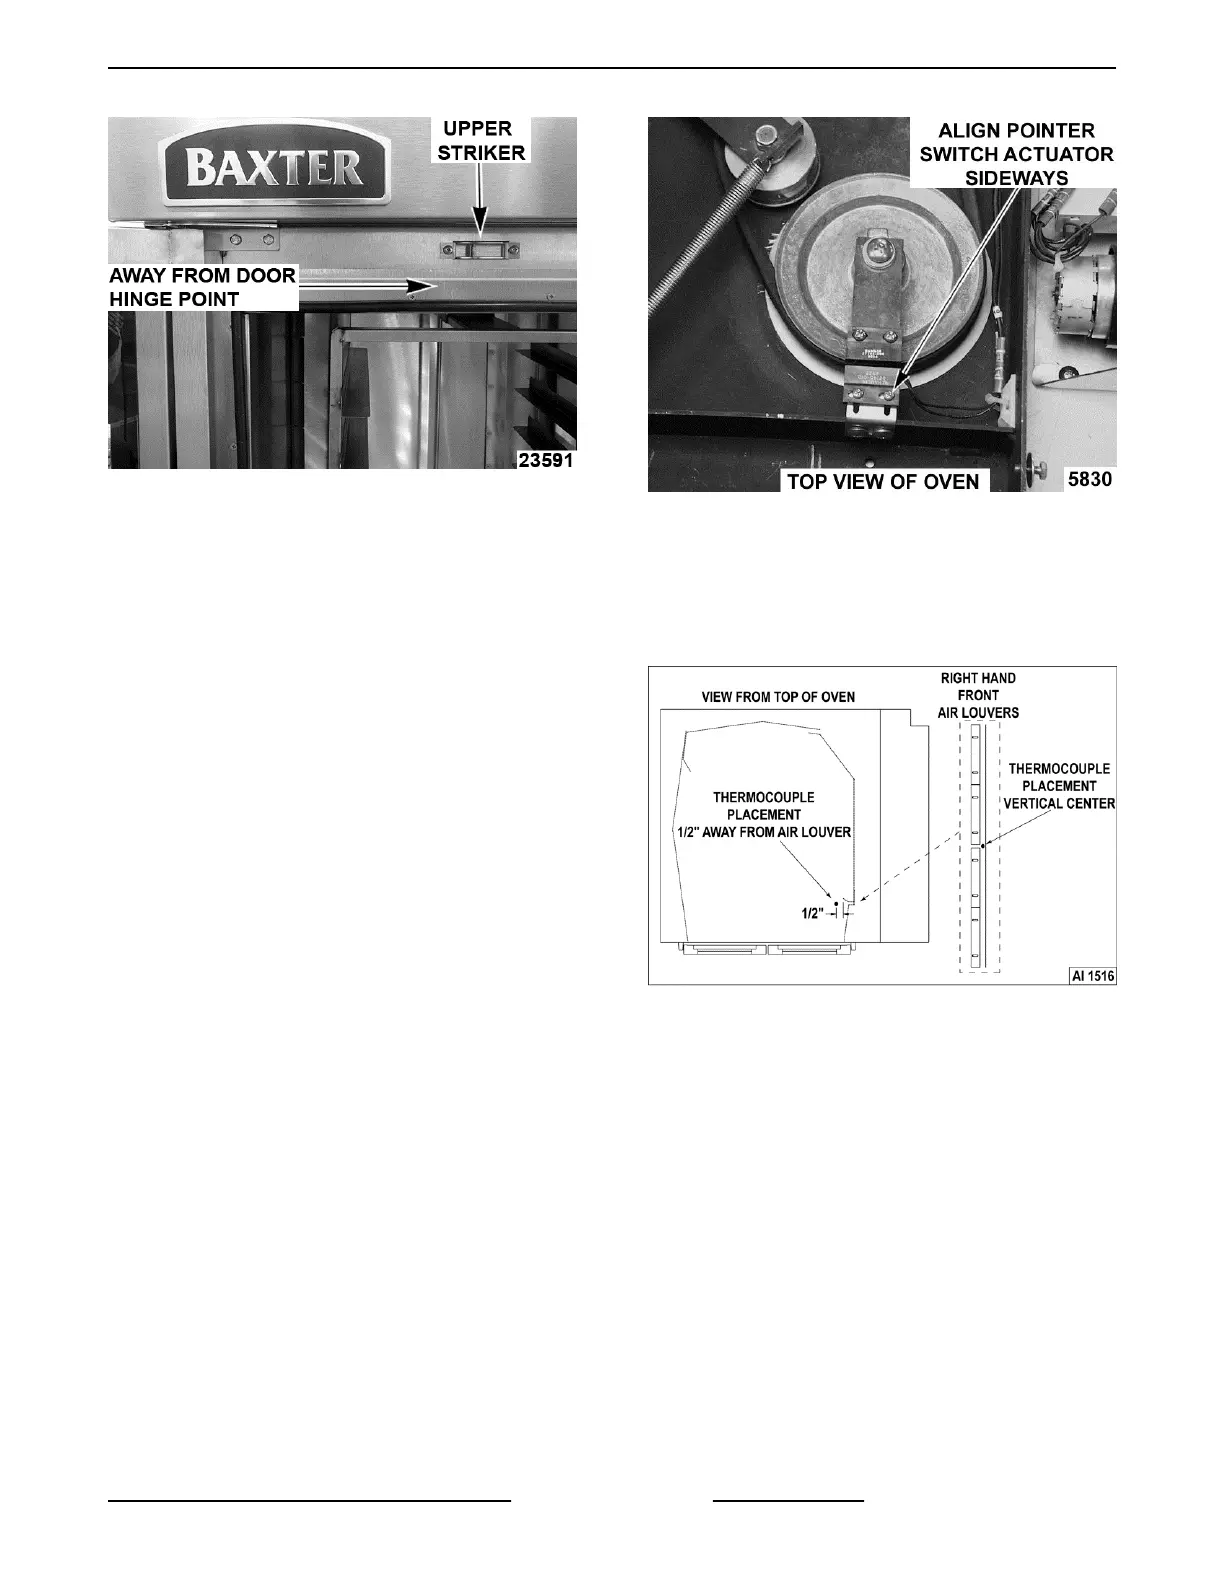
7. Initial heating of oven (All Ovens).
A. Place a thermocouple 1/2" away from air
louver and near the vertical center of right
hand front air louver inside the baking
compartment.
Fig. 17
B. Route thermocouple lead to the outside of
the oven. Make sure that the lead is kept
clear of the rack carrier.
C. Close the loading doors.
D. Set the control baking temperature to 300F.
(150C.) and bake timer for 30 minutes.
NOTE: Baking compartment circulation fan will run
continuously with time entered in the bake timer and
cycle on/off with heating circuit if no time is entered in
the bake timer.
E. After time elapses, press Stop key to silence
beeper.
F. Fully open loading doors to verify that
baking compartment circulation fan de-
energizes.
OV310 Series Mini Rack Oven Installation Instructions - INSTALLING OVEN
Page 13 of 16 F25422 Rev. B (0917)
 Loading...