INSTALLING OVEN
This manual is written for OV310 Mini Rack Ovens. Before installing oven, compare parts to packing list to ensure
all parts were received. Wait as long as possible before removing plastic protective covering from panels and doors.
Prior to installing oven, check facility floor or noncombustible surface being level within 1/8" per foot up to 3/4" in all
directions.
MOUNTING OVEN
Oven can be installed on a stand, MB300 proofer
cabinet, or noncombustible surface.
1. Mount oven:
A. Run a bead of sealant on mounting surface
around inside perimeter of the oven
footprint. Use NSF approved sealant, Dow
Corning 732 or GE RTV108.
B. Position oven onto mounting surface.
C. Secure the rear of the oven to the mounting
surface using tie-down brackets.
2. Position oven into final location.
LEVELING OVEN
1. Check oven to be level front to back side to side
by placing level on oven rack, shim if necessary.
A. If oven is installed on a stand with adjustable
legs, rotate the foot clockwise or counter
clockwise to level oven front to back and
side to side.
B. If oven is installed on casters, determine
which caster needs to be adjusted.
1) Ensure locks on casters are locked.
2) Use a block of wood to support
equipment near caster that needs
adjustment.
3) Loosen the bolt on the caster needing
adjustment and insert shim(s) between
the caster plate and bottom of stand
leg/proofer cabinet.
4) Re-tighten caster bolt and check oven
for being level.
VENTILATION
Ventilation requirements will vary with each
installation and must comply with applicable portions
of the National Fire Protection Association Standards
#96, #94 and with local codes.
Exhaust Fan Interlock
A connection point (maximum 5-amps) is provided for
Indirect Vent (Exhaust Hood) or optional Direct Vent
(Draft Hood). It is located behind the right side service
panel adjacent to the 120 V power connection.
Consult local codes for vent interlock requirements.
Indirect Vent (Under Exhaust Hood)
Locate the oven under an exhaust hood with adequate
overhangs and exhaust rates to completely capture
the byproducts of combustion discharged from the
flue. From the termination of the flue to the filters of
the hood venting system, a minimum clearance of 18"
must be maintained. The hood exhaust fan must be
electrically interlocked with the oven.
Direct Vent (Draft Hood)
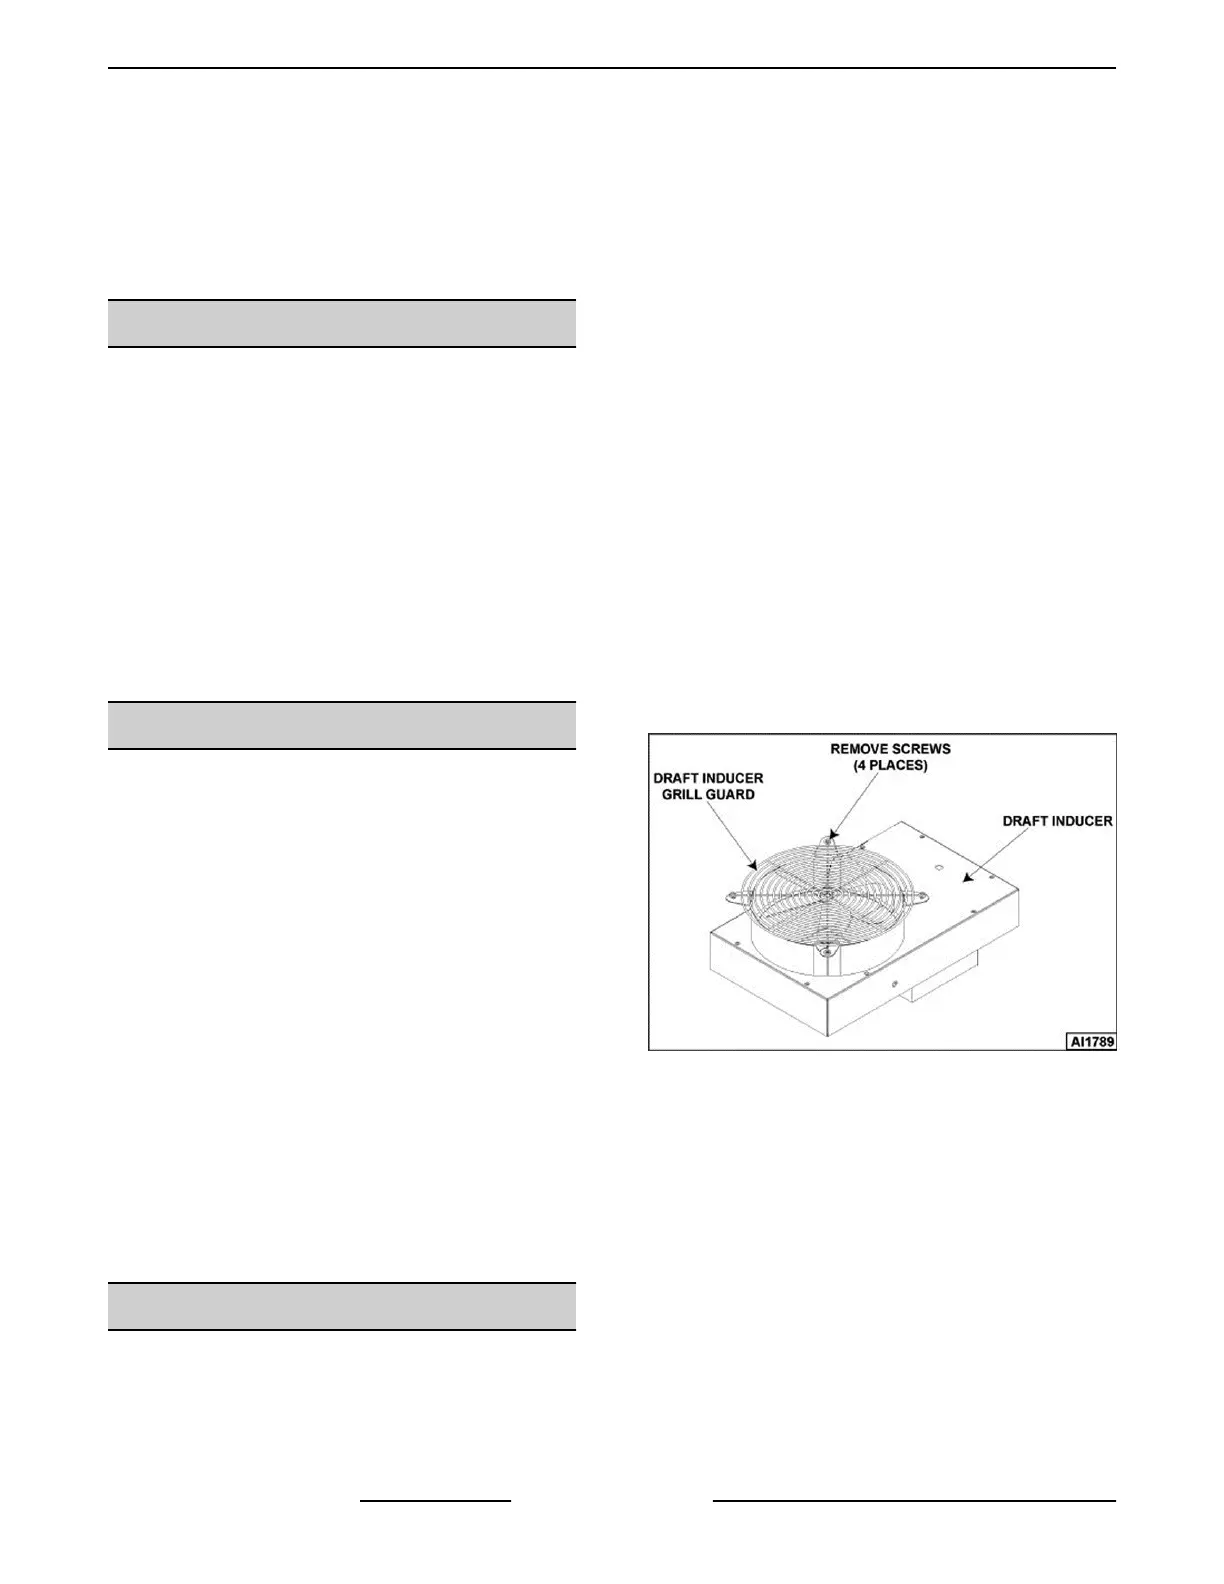
1. Remove four screws from the tabs securing fan
grille to top of draft inducer and lift grille off.
Fig. 2
2. Bend the four exposed oven flue collar tabs
vertically and secure the draft diverter to the oven
flue collar with four screws.
OV310 Series Mini Rack Oven Installation Instructions - INSTALLING OVEN
F25422 Rev. B (0917) Page 8 of 16
 Loading...