34
HOW TO CHANGE MONITOR
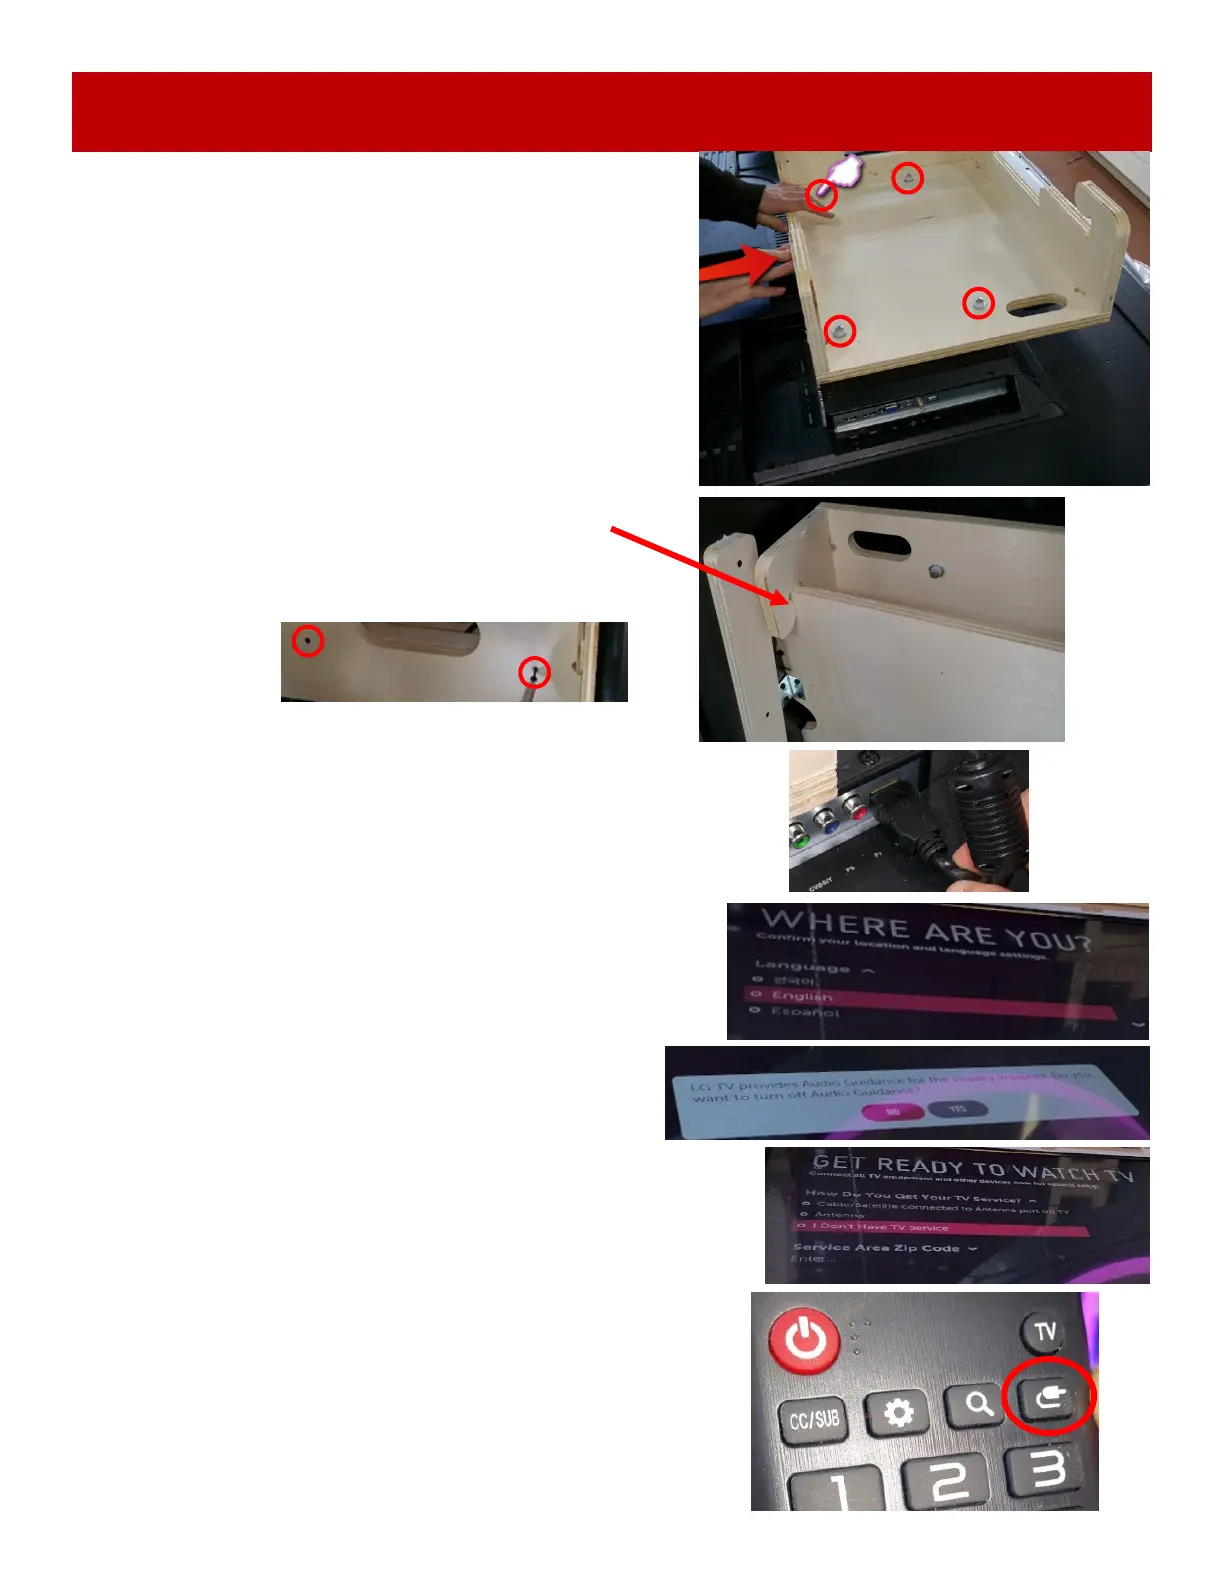
Place the new wood frame onto the back of the new
monitor as shown.
Press the monitor mount in the direction shown by the red
arrow as far as it will go and secure the monitor mount to
the back of the monitor using the included bolts/washers
using a Philliips screwdriver.
The monitor and wood can now be installed in the game.
Ensure the locking wood tab is fully engaged over the
wood as shown.
Re-install the 2 black bugle screws from the lower back of
monitor frame.
Re-install the white plastic surround.
Plug the monitor power back into the power strip and the HDMI 1
cable into the back of the new monitor.
Set up Monitor - Plug game into wall and power on.
Locate the remote control and install the batteries.
Press the power button to turn on the TV.
Select English
Navigate to “Time Zone” , select a city in your time
zone, press ok.
Select “NO” when prompted with this question.
Select “I don’t have a TV service”
Enter your zip code, press OK.
Press the “Input” button on the remote control.
Select “HDMI 1”
Update is complete - cycle power to the game and make sure
the game boots up ok.

 Loading...