EasyManua.ls Logo

Bay-Tek Willy Crash - User Manual

Bay-Tek Willy Crash
45 pages
Print Icon
To Next Page IconTo Next Page
Loading...
SERVICE MANUAL

Questions and Answers

  • W
    William HoodSep 12, 2025
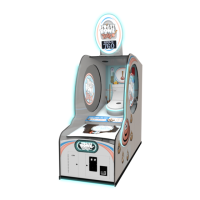
    Why is the colored player console lighting not working on my Bay-Tek Arcade Game Machines?
    • A
      Ariel GarciaSep 12, 2025
      If the Colored player console lighting is not working on your Bay-Tek Arcade Game Machine, check the power to the Light Board from the Power Distribution Board using Cable # AACE8016. Check the USB cable to the Light Board from the motherboard using Cable # A5CORD58. Check for proper connection from the Light board to the LED strips and check continuity. Refer to the “Light Board Wiring Diagram” (AACE8003, AACE8012, AACE8013). Verify 5 volts DC on cable AACE8000 from the Power Distribution board to the end of the AACE8013 cable. Replace the LED (AACE8013 or AACE8012). Replace the Light Board (AACB8001).
  • M
    Mary BrandtAug 23, 2025
    How to troubleshoot no power on Bay-Tek Arcade Game Machines?
    • A
      Albert ReyesAug 23, 2025
      If your Bay-Tek Arcade Game Machine has no power and no lights are on, check the wall outlet and reset the power strip breaker switch or building circuit breaker. Replace the Line Filter (Part # A5FI9010). Swap positions and replace if needed AACE8020. Refer to the wiring diagram. Check cables AACE8019 & AACE8020. Refer to the Power Supply diagnostic section.
  • K
    Katelyn SmithAug 25, 2025
    What to do if monitor is on, but everything else off in Bay-Tek Arcade Game Machines?
    • J
      jasonphillipsAug 25, 2025
      If the monitor is on but everything else is off on your Bay-Tek Arcade Game Machine (Power Supply not ON), ensure the unit is plugged into the power strip and the rocker switch is set to ON. See the power supply diagnostics to isolate the bad component. A bad motor or 12 volt short could cause this. See the Power Supply Diagnostic section. Replace the Power Distribution Board (AACB5156).
  • D
    Dylan SpencerAug 27, 2025
    Why is the monitor not working on my Bay-Tek Arcade Game Machines?
    • J
      Jacob TorresAug 27, 2025
      If the monitor of your Bay-Tek Arcade Game Machine is not working, check if the monitor HDMI cable is unplugged from the video card. Note that the game will not boot up with the monitor disconnected. Inspect for faulty or loose RAM on the motherboard, a large power connector unplugged on the motherboard AAMB10-HD, or a small power connector unplugged on the motherboard. Also, check for a faulty power supply (refer to the Power Supply diagnostic section), a faulty graphics card (replace Graphics Card A5CB8000), or a faulty motherboard (replace faulty board AAMB10-HD).
  • A
    Anthony HancockAug 27, 2025
    How to fix dollar bill acceptor on Bay-Tek Willy Crash Arcade Game Machines?
    • L
      Leah CardenasAug 28, 2025
      If the dollar bill acceptor on your Bay-Tek Arcade Game Machine is not functioning, it should cycle the stacker at game power up. If not, check the cable connections. Refer to “How to Clean Bill Acceptor” or clean with a bill reader cleaning card (A5CC9000). Check the wiring from the bill acceptor to the NewGen Board (AACE8004). Repair or replace the wiring harness. Check the J8 connector on the Main Board. Make sure wires are secure in connectors. Refer to the troubleshooting section of the dollar bill acceptor manual included with this game or the diagnostics label on the back of the unit.
  • J
    Jerry NelsonAug 29, 2025
    What to do if Bay-Tek Arcade Game Machines is not coining up?
    • L
      Laura FordAug 29, 2025
      If your Bay-Tek Arcade Game Machine is not coining up, refer to the “I/O Aux Board Issue” diagnostic Section. Check the coin switches—both should be wired normally open. If one switch is “closed,” the other will not work either. Check the wiring to the I/O Board (AACBL4A-DOORA, AACE8006). Check the Game Setup Menu and ensure Coins/Credits per Game is set. Default = 4.
  • K
    Kathleen HopkinsSep 19, 2025
    What causes I/O Aux Board issue in Bay-Tek Arcade Game Machines?
    • M
      Michael OwenSep 22, 2025
      If the I/O Aux Board is off on your Bay-Tek Arcade Game Machine, check 12 & 5 Volts DC coming into the board on cable AACE8014 from the Power Distribution Board. If it is solid on, then it is not communicating with the motherboard. Check the A5CORD58 USB cable. Swap the cable with the light board. If they are off, it is not communicating with the motherboard. Check the A5CORD58 USB cable. Swap the cable with the light board. Replace the I/O Aux board. Replace if needed (Part # AACB9604-WC).
  • E
    Emily RussellSep 9, 2025
    Why are the marquee lights not working on my Bay-Tek Willy Crash Arcade Game Machines?
    • S
      stephenmartinezSep 9, 2025
      If the Marquee Lights are not on (60 Watt 110 VAC) on your Bay-Tek Arcade Game Machine, replace the bulb (Part # A5LI0003, 60 Watt 110 VAC). Check for proper connection from the bulb to the Power Strip and check continuity (AACE8868, AACE8018, A5SP4100, A5CORD1). Swap the power cord into the next socket. Replace the strip (AACE8020).
  • M
    Michelle HallSep 6, 2025
    Why is the cannon firing by itself on my Bay-Tek Willy Crash?
    • O
      Olivia ProctorSep 6, 2025
      If the cannon is firing all by itself on your Bay-Tek Arcade Game Machine, ensure the LED is OFF and the opto beam is not blocked by the plunger arm. Clean the emitter and detector on the sensor board. Replace the sensor board (AACB3850A).
  • M
    michael03Sep 7, 2025
    How to fix menu buttons on Bay-Tek Arcade Game Machines?
    • S
      Samuel CoxSep 7, 2025
      If the Menu Buttons on your Bay-Tek Arcade Game Machine do not work, replace the button if the problem stays with the button (AAPB2700). Inspect the crimp to ensure a good connection. Check the connections from the menu buttons to the I/O board. Check the continuity on the wires (AAPB2700, AACE8005). Replace the I/O Board (AACB9604).

Summary

Game Specifications

Safety Precautions

Safety Warnings and Notices

Important safety notices, dangers, warnings, cautions, and emergency procedures.

Game Setup Instructions

Initial Setup Steps

Steps for unboxing, initial assembly, and unlocking the game cabinet.

Final Setup and Power On

Completing cabinet setup, connecting power, and initial game configuration.

Card Swipe System Installation

How to Play

Main Menu Functions

Game Settings

Payout Menu Configuration

Diagnostics Menu

Dipswitch Settings

Wiring Diagram: Coin Mech, Menu, Counter

Wiring Diagram: Speakers and Motherboard

Wiring Diagram: Sensors and LEDs

Wiring Diagram: AC In and Power Supply

Troubleshooting Guide

Power and Monitor Issues

Troubleshooting steps for no power, no lights, and monitor-related problems.

Bill Acceptor and Meter Issues

Diagnosing problems with the dollar bill acceptor and game meters.

Coining Up and Sound Issues

Troubleshooting steps for game not accepting coins and no sound issues.

Button and Lighting Issues

Diagnosing problems with menu buttons and marquee lighting.

Cabinet LED Lighting Issues

Troubleshooting for various LED lighting circuits within the cabinet.

Ticket Dispensing Issues

Troubleshooting for ticket dispensing errors and low ticket messages.

Plunger and Cannon Operation

Diagnosing issues with the plunger mechanism and accidental cannon firing.

Monitor and Boot-Up Issues

Troubleshooting monitor display, boot errors, and 'no signal' problems.

I;O Aux Board Diagnostics

Diagnosing issues with the I/O Aux Board and game coin-up functions.

Power Supply Diagnostics

Power Supply Verification and Troubleshooting

Steps to verify power supply operation and isolate short circuits.

Bill Acceptor Diagnostics

Bill Acceptor Power and Error Codes

Checking power, cleaning, and interpreting error codes for the bill acceptor.

Software Update Procedure

Monitor Replacement Guide

Monitor Removal and Preparation

Steps for unplugging cables, removing wire saddles, and preparing for monitor removal.

Wood Frame Removal and Options

Removing the monitor's wood frame and selecting an installation option.

New Monitor Installation and Wiring

Installing the new monitor, connecting cables, and securing wood pieces.

Technical Support Options

Warranty Options

Non-Warranty Repair Services

Bay-Tek Willy Crash Specifications

General IconGeneral
Players1
Cabinet StyleUpright
Game TypeRedemption
ManufacturerBay-Tek
Power Requirements120V
TypeRedemption
Ticket DispenserYes

Related product manuals