35
The new monitor assembly can now be installed onto the cabinet.
Using 2 people - Carefully lift and position so the 4 long bolts are
aligned into the cabinet.
Reinstall the 4 nuts/washers and tighten using a 7/16” wrench
Plug the monitor’s power cord back into the Y connector.
Route the HDMI cable to the front of the cabinet and plug back into the video card.
Tape the HDMI cable to a long stick to help get it to the front of the cabinet.
From the back door:
Reconnect the top 2 connectors.
Reinstall the 3 white plastic wire saddles into the wood, and clip cables in place.
Reinstall the 2 wood screws using a # 2 Square bit screwdriver.
Reconnect the bottom 2 connectors.
HOW TO REPLACE MONITOR
Install the 4 bolts with washers using a 7/16” wrench.
Tighten the 4 bolts fully, then tighten the previously installed
Phillips bolts completely.
Reinstall the 12 small black screws on the white plastic surround
by using a # 2 Square bit screwdriver.
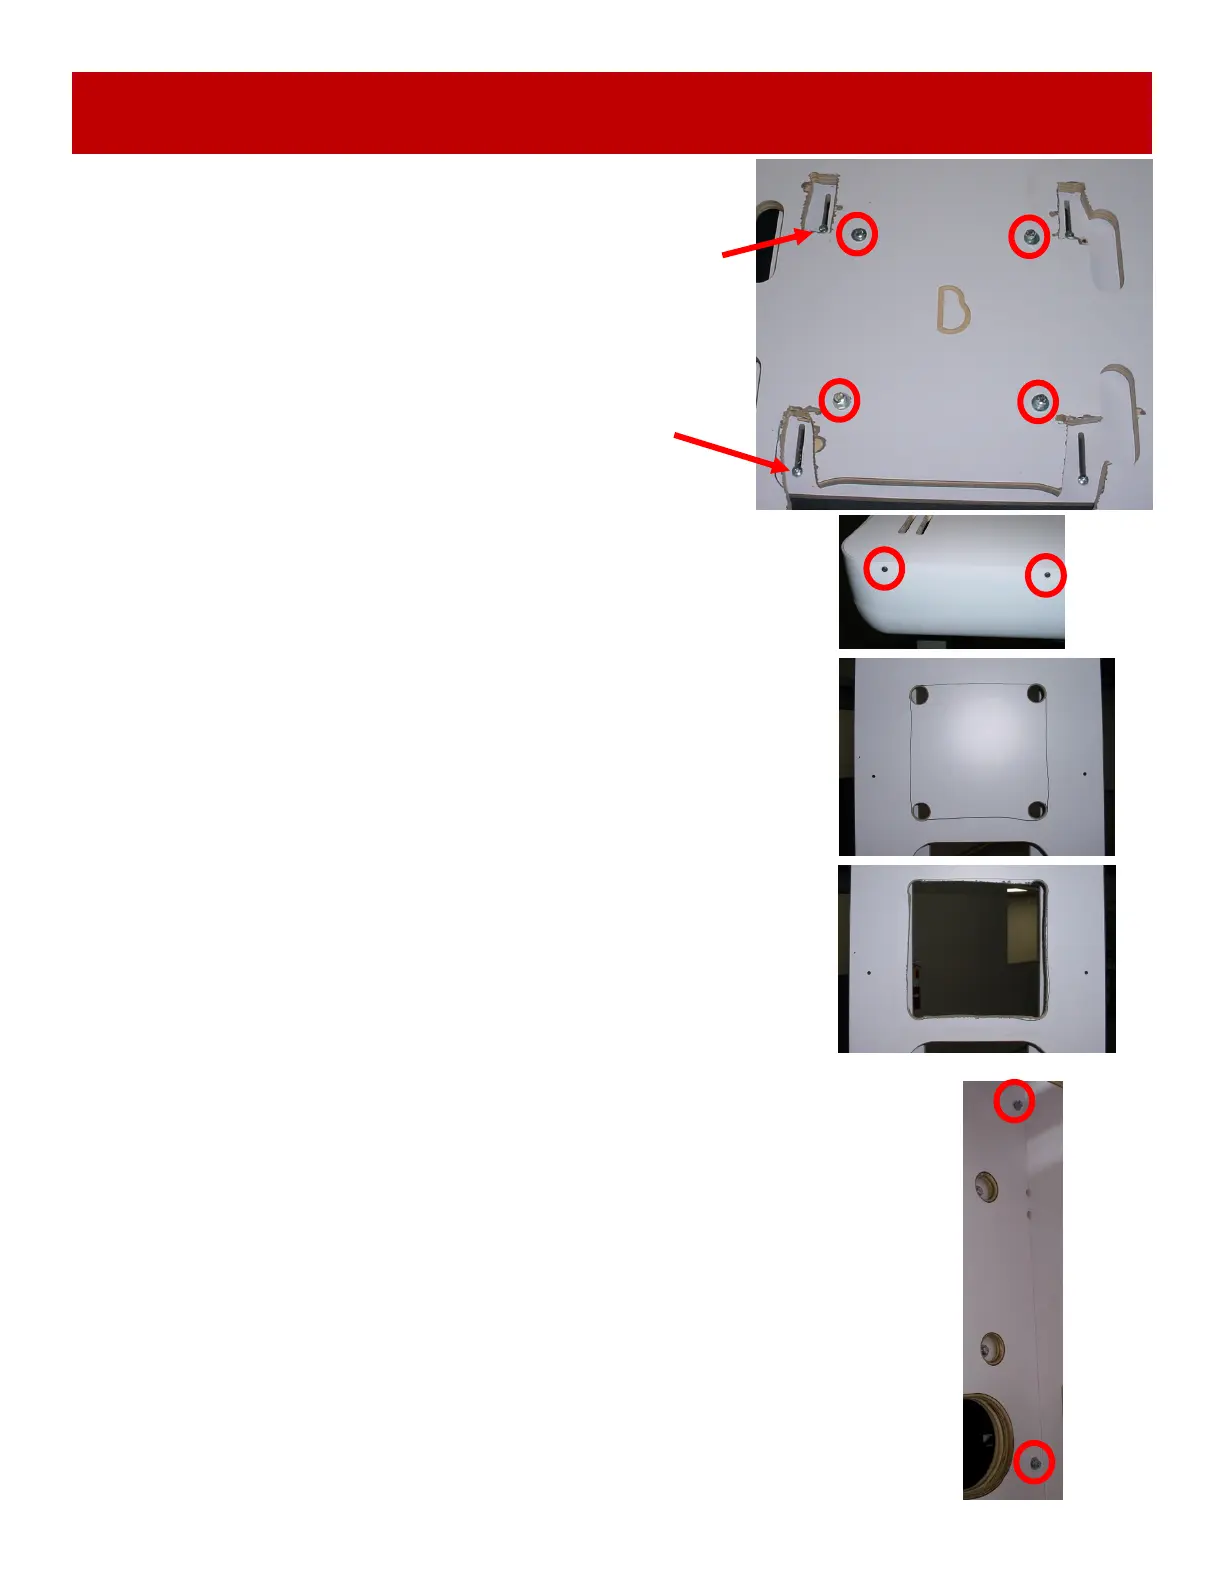
The cabinet’s receiving holes will have to enlarged to
accommodate the new bolt pattern. The easiest way to do this is
cut the entire square out from the cabinet.
On the cabinet itself, draw lines connecting the 4 holes as shown.
Carefully cut on this line using a jigsaw to create a large opening
in the cabinet.
 Loading...