EasyManua.ls Logo

Beckman Coulter CytoFLEX - User Manual

Beckman Coulter CytoFLEX
480 pages
Print Icon
To Next Page IconTo Next Page
Loading...
B49006AH
March 2017
Instructions for Use
CytoFLEX Series
CytoFLEX, CytoFLEX S, and CytoFLEX LX Flow Cytometers
For Research Use Only. Not for use in diagnostic procedures.
Beckman Coulter, Inc.
250 S. Kraemer Blvd.
Brea, CA 92821 U.S.A.

Table of Contents

Questions and Answers

  • B
    Brett AtkinsAug 16, 2025
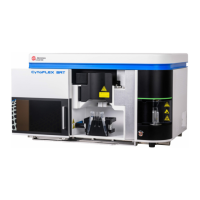
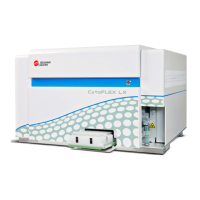
    How to fix a Beckman Coulter CytoFLEX Cytometer that will not turn on?
    • A
      Adam BarkerAug 16, 2025
      If the Cytometer cannot be turned on, it might be due to the instrument being turned off in the Cytometer menu, the power switch being in the off position, the power cable not being securely connected, or a blown fuse. Here’s how to address it: 1. Ensure the power switch is in the on position on the back of the Cytometer. 2. Select Turn On in the Cytometer menu. 3. Ensure that the power cable is securely connected to the back of the Cytometer. 4. Replace the fuse.
  • D
    deborahtuckerAug 19, 2025
    What to do if my Beckman Coulter Laboratory Equipment Workstation won't turn on?
    • T
      Tiffany FoxAug 19, 2025
      If the Workstation cannot be turned on, it may be because the power cable is not securely connected or the Workstation was restarted too fast. To solve this: 1. Ensure that the power cable is securely connected to the back of the Cytometer. 2. Unplug the power cable, wait 10 seconds, then plug it back in. Then, restart the computer.
  • R
    rlamAug 22, 2025
    How to fix Beckman Coulter Laboratory Equipment sample tube holder that won't move automatically?
    • D
      Donna CraigAug 22, 2025
      If the sample tube holder on your Beckman Coulter Laboratory Equipment cannot move up and down automatically, the setting might be incorrect. Ensure that the sample injection mode in the software is in Semi-Automatic Injection mode.
  • A
    Anita TaylorAug 25, 2025
    How to resolve low laser power on Beckman Coulter Laboratory Equipment?
    • K
      Keith PotterAug 26, 2025
      If the laser power is low on your Beckman Coulter Laboratory Equipment, it may be due to a communication error. To resolve this: 1. Reinitialize. 2. Restart the Cytometer.
  • L
    Lisa MatthewsAug 28, 2025
    What to do if the Beckman Coulter CytoFLEX shows a Disconnected and Error message?
    • V
      Vanessa MartinezAug 28, 2025
      If the connection indicator light in the lower left corner of the software screen is red and displays Disconnected and Error, it could be due to a data connection error, the Cytometer not being turned on, or the Cytometer’s power cable being disconnected. To resolve this: * Ensure the USB data cable is securely connected to the back of the Cytometer and the Workstation. * Restart the software and the Workstation. * Turn on the Cytometer using the power switch on the back of the instrument. * Verify that the power cable is securely connected to the back of the Cytometer.
  • Y
    yhughesAug 31, 2025
    Why is the alarm not working on my Beckman Coulter CytoFLEX Laboratory Equipment?
    • M
      michaeljeffersonAug 31, 2025
      If the alarm does not sound when the waste container is full or the sheath fluid container is low and the software status display is red, it could be due to the alarm not working, an instrument data connection error, the sheath fluid/waste harness float being restricted, or the sheath fluid/waste harnesses being secured on the wrong container. To resolve this: 1. Ensure the sheath fluid/waste harnesses are secured to the correct container. 2. Ensure that the USB data cable is securely connected to the back of the Cytometer and the back of the Workstation. 3. Restart the Workstation. 4. Restart the software. 5. Verify that the float of the sensor in the sheath fluid/waste container moves freely. 6. Replace the sheath fluid/waste harness.
  • S
    Shannon MyersSep 6, 2025
    Why is the sample flow rate unstable on my Beckman Coulter Laboratory Equipment?
    • S
      Shannon MeyerSep 6, 2025
      If the sample flow rate is unstable on your Beckman Coulter Laboratory Equipment, it could be due to several reasons: * The sample probe is clogged. * The sample contains aggregates or clumps. * There are air bubbles in the flow cell. * The sample peristaltic pump tubing is aged or not properly connected. To address this: 1. Run Prime. 2. Run Daily Clean. 3. Clean the sample probe. 4. Filter the sample using an appropriately sized mesh aperture filter. 5. Ensure that the sample tubing is properly connected. 6. Replace the sample probe and sample peristaltic pump tubing.
  • T
    Taylor FritzSep 9, 2025
    How do I stop populations from drifting on my Beckman Coulter Laboratory Equipment?
    • S
      Sean RuizSep 9, 2025
      If populations are drifting on your Beckman Coulter Laboratory Equipment, it could be due to air bubbles in the flow cell or system, or the sheath fluid harness float being restricted. To resolve this, you can: 1. Run Prime. 2. Ensure that the sheath fluid harness and/or waste harness is not kinked and is securely connected. 3. Run Prime again. 4. Verify that the float of the sensor in the sheath fluid container moves freely. 5. Replace the sheath fluid harness.
  • A
    Angelica MarshallSep 12, 2025
    What causes a fast sampling flow rate on Beckman Coulter CytoFLEX?
    • N
      Nicole BrownSep 12, 2025
      If the sampling flow rate is too fast on the Beckman Coulter Laboratory Equipment, it could be due to a low threshold setting, high sample concentration, too many sample fragments, a clogged sheath fluid filter, or the sample flow rate requiring calibration. To address this: 1. Increase the threshold using the manual threshold setting. 2. Calibrate the sample flow rate. 3. Dilute the sample and adjust the concentration to approximately 106/mL. 4. Filter the sample using an appropriately sized mesh aperture filter. 5. Restain the sample. 6. Replace the Sheath Fluid Filter.

Summary

CHAPTER 1: System Overview

Cytometer

Details optics, laser devices, and scatter detection specifications.

Performance Characteristics

Lists sensitivity, resolution, carryover, and throughput specifications.

CHAPTER 4: Instrument Quality Control and Standardization

Importing Lot-Specific Target Values

Guides importing lot-specific target values for QC.

Collecting QC Data

Steps for collecting QC data.

Confirming Results

How to review and interpret QC results.

CHAPTER 5: Data Acquisition and Sample Analysis

Load Sample and Record Data

Procedures for loading samples and recording data.

Sampling and Collecting Data

Steps for collecting sample data.

Configuring Acquisition Settings

Adjusting settings for data acquisition.

Adjusting the Gain

Increasing or decreasing signal value by adjusting gain.

Adjusting the Threshold

Removing signal noise by adjusting threshold.

Analyzing and Exporting Data

Procedures for analyzing and exporting data.

CHAPTER 6: Compensation

Creating a Compensation Experiment

Steps to create a compensation experiment.

Calculating Compensation Values

Calculating and exporting compensation values.

Creating a Compensation Experiment [With Plate Loader]

Creating compensation experiments with Plate Loader.

CHAPTER 7: Data Review

Setting the Plots and Statistics

Configuring plots and statistics for analysis.

CHAPTER 8: Daily Shutdown

Shutting Down the Instrument

Steps to properly shut down the instrument.

CHAPTER 9: Troubleshooting

Precautions;Hazards

Safety precautions and hazard information.

Laser Related Hazards

Information on compliance with laser safety regulations.

Laser Beam Hazards

Details laser types and safe use principles.

Troubleshooting Table

Lists common problems, causes, and corrective actions.

CHAPTER 10: Cleaning Procedures

Daily Clean

Daily cleaning for sample line, probe, and residual sample removal.

Cleaning the Sample Probe

Procedures for cleaning a blocked sample probe.

Deep Clean Procedure

Monthly procedure to clean the instrument flow cell.

CHAPTER 11: Replacement;Adjustment Procedures

Replacing the Sample Probe and;or the Sample Peristaltic Pump Tubing

Replacing sample probe or peristaltic pump tubing.

Replacing the Sample Probe Assembly [With Plate Loader]

Replacing the sample probe assembly with Plate Loader.

Plate Loader Module Removal and Reinstallation [With Plate Loader]

Removing and reinstalling the Plate Loader module.

Calibrating the Sample Flow Rate

Calibrating the sample flow rate.

Calibrating the Plate Position [With Plate Loader]

Calibrating plate and probe positions for Plate Loader.

APPENDIX A: Instrument Installation

Power Source

Power source requirements and safety warnings.

Installing the Software [CytoFLEX]

Workflow for installing CytExpert software.

Upgrading the CytExpert Software

Procedure for upgrading CytExpert software.

Reinstalling the CytExpert Software

Steps to reinstall CytExpert software.

Installing the Instrument Configuration File

Installing instrument configuration settings.

APPENDIX B: CytExpert Electronic Record Management

Electronic Signature

Signing and retracting experiments electronically.

User Management

User administration, role, and account policy management.

APPENDIX C: Sample Injection Mode Control Kit

Beckman Coulter CytoFLEX Specifications

General IconGeneral
Detection ChannelsUp to 13 fluorescence channels
Sample Volume12 µL to 1, 000 µL
Side Scatter (SSC)Yes
Data Acquisition RateUp to 30, 000 events per second
SoftwareCytExpert
Sample Volume Options12 µL to 1, 000 µL
Power Requirements100-240 V, 50/60 Hz
LasersUp to 3 lasers (405 nm, 488 nm, 561 nm, 638 nm)

Related product manuals