Do you have a question about the Behringer 2600 and is the answer not in the manual?
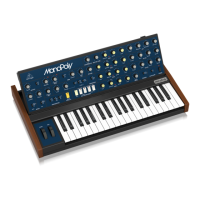
| Polyphony | Monophonic |
|---|---|
| Type | Analog Synthesizer |
| Oscillators | 3 VCOs |
| Envelopes | 2 ADSR Envelopes |
| LFO | 1 LFO |
| Connectivity | MIDI In/Thru, USB |
| Effects | Spring Reverb |
| Power Supply | External Power Supply |
Details the silk-screened connections pre-wired at the factory between modules.
Explains how VCOs electronically generate repeating wave signals in various waveforms.
Sets the low-pass filter to four coarse frequency points (10 Hz, 100 Hz, 1 kHz, 10 kHz) for adjustment.
Fine-tunes the filter cutoff point set by the Initial Filter Frequency slider.
Adjusts the filter's Q setting, affecting frequency curve sharpness and ringing.
Switches between two classic filter circuits: 4012 (16 Hz max cutoff) and 4072 (11 Hz max cutoff).
Routes the VCF output for use in other synthesizer areas via a 3.5 mm connector.
Inputs audio signals via 3.5 mm connectors, disabling pre-wired connections when used.
Accepts external control voltage signals via 3.5 mm connectors, breaking pre-wired connections.
Controls the shape of the note attack up to an initial fixed peak upon gate/trigger.
Controls the envelope shape after key release or gate/trigger voltage release.
Accepts external control voltage signals via 3.5 mm connectors, breaking pre-wired connections.
Manually produces a gate signal to trigger both AR and ADSR circuits.
Chooses between three basic time durations for the envelope's overall length.
Selects between S/H CLOCK, GATE IN, or TRIG IN for routing to AR/ADSR.
Sends out an additional AR voltage envelope where pre-wired connection is not available.
Substitutes an external signal for the Sample & Hold circuit's output.
Routes a trigger voltage into the AR and ADSR circuits via a 3.5 mm connector.
Routes a gate voltage into the AR and ADSR circuits via a 3.5 mm connector.
Controls note attack shape up to a fixed peak when gate/trigger voltage enters.
Controls how quickly the envelope drops from the initial fixed peak.
Controls the level at which the envelope holds after initial decay.
Controls envelope shape following key release or gate/trigger voltage release.
Chooses between three basic time durations for the envelope's overall length.
Sends out an additional ADSR voltage envelope where pre-wired connection is not available.
Sets the overall gain for the VCA circuit.
Inputs audio signals into the VCA and adjusts gain; disables pre-wired connections.
Accepts control voltage signals with linear/exponential response, disabling pre-wired connections.
Routes the final VCA signal out for use where a pre-wired connection is not available.
Inputs audio signals into the Mixer via 3.5 mm connectors, disabling pre-wired connections.
Outputs signals immediately following attenuator sliders for use elsewhere.
Breaks Mixer signal connection to PAN slider; routes Mixer output to Reverb circuit.
Places the summed Mixer signal in the left-right stereo field before final output.
Additional Mixer output tapping the pre-wired connection feeding the Reverb circuit.
Taps the right Reverb signal for use elsewhere.
Adds signal to Reverb circuit's left output, summed and panned hard left.
Adds signal to Reverb circuit's right output, summed and panned hard right.
Final stereo left-right outputs with 1/4" and 3.5 mm connections for external use.
Pre-wired connection for keyboard control voltage, used with Low Frequency Oscillator (LFO).
Sends out a trigger control voltage for use elsewhere via a 3.5 mm connector.
Sends out a gate control voltage via a 3.5 mm connector.
Outputs control voltage based on highest note played in DUO voice mode.
Sends out the complete keyboard control voltage signal for use elsewhere.
Determines if the keyboard plays one voice at a time (MONO) or two simultaneously (DUO).
Controls how the keyboard sends trigger signals (repeating, off, or LFO based).
Generates trigger pulse when a key is played (SINGLE) or every time any key is pressed (MULT).
Allows one pitch to change gradually to a second pitch at a predetermined rate.
Turns the Portamento function on or off.
Temporarily activates the Portamento function for as long as the button is held down.
Controls the strength of the Portamento effect, from gradual to smooth.
Purpose-built LFO primarily for keyboard use, with pre-wired connection to VCO1.
Routes a sawtooth LFO signal out for use elsewhere via a 3.5 mm connector.
Routes a square wave LFO signal out for use elsewhere.
Routes external LFO signal for blending with delayed LFO sine wave.
Sends a copy of LFO's sine wave output, delayed by VIB DELAY slider.
Controls the base speed of the LFO oscillation.
Controls the amount of delay applied to the LFO sine wave.
Controls the intensity of the vibrato effect created by the delayed LFO sine wave.
Routes an external signal into the Preamp via a 3.5 mm connector.
Determines the base amount of amplification applied to the input signal.
Determines how strongly the input signal is amplified.
Sends out a copy of the Preamp signal for use elsewhere in the synth.
Bypasses the Preamp, routing external signal directly to Envelope Follower.
Controls the sensitivity of the Envelope Follower circuit.
Routes the final Envelope Follower signal out for use elsewhere via a 3.5 mm connector.
Voltage multiplier combining two input signals (VCO1 sawtooth, VCO2 sine) for exotic timbres.
Routes external signal for blending with pre-wired VCO1 sawtooth, gain adjusted by slider.
Routes external signal for blending with pre-wired VCO2 sine wave, gain adjusted by slider.
Optimizes VCO1 signal path for audio (AUDIO) or control voltage (DC) signals.
Sends out the final, summed Ring Modulator signal for use elsewhere.
Produces adjustable noise signals (white, pink, low frequency) for sound design.
Moves between white noise (WHITE), pink noise (PINK), and low frequency noise (LOW FREQ).
Controls the overall attenuation of the noise signal prior to output.
Sends the final noise signal out for use in the synth where pre-wired connection is not available.
Offers three processors for audio/control voltage mixing, inverting, and variable lag.
Linked parallel connections used as a patch bay to duplicate and combine signals.
Accepts four inputs, summed and inverted; e.g., +10V input becomes -10V.
Attenuates the input signal by 10 V.
Optimized for control voltage signal from a keyboard.
Accepts two signals, summed and inverted for output.
Boosts the input signal by +10 V.
Responds to voltage changes, slowing them down to cut off treble frequencies.
Accepts control voltages and audio signals, optimized for Envelope Follower output.
Sends out the final signal from the Lag Processor.
Takes input signal, converts to stepped output by sampling at intervals.
Interrupts Noise Generator input signal; use to substitute another signal.
Exports the internally generated clock signal for use in other synthesizer parts.
Sends out the Sample & Hold circuit's final signal for use elsewhere.
Imports external clock signal to run Sample & Hold; disables internal clock.
Attenuates the input signal before it goes into the Sample & Hold circuit.
Controls Sample & Hold circuit's measurement frequency, not functional with external clock.
Bidirectional circuit that alternates signals between inputs and outputs.
Jacks that route signals in and out over cables with 3.5 mm connectors.
Connects headphones (1/8" plugs) and controls output level via knob.
Turns the synthesizer on or off.
Rotary knob to control the brightness of the LEDs on the front panel.
Connects footswitch to temporarily turn on the interval function in DUO mode.
Connects footswitch to turn the Portamento function on or off.
Four switches to set the MIDI Channel number from 1 to 16.
Receives MIDI data from an external source via a 5-pin DIN connector.
Passes through MIDI data received at the MIDI IN jack to other devices.
Connects to a computer via USB type B for MIDI in and out.
Connects the supplied 12V DC adapter for power.