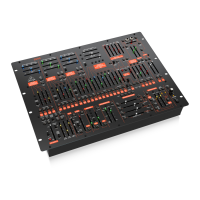
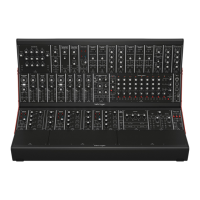
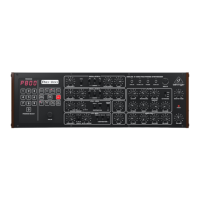
42 43Quick Start GuidePRO-800
OSCILLATOR FREQUENCY CONTROL MODE
Oscillator A and B frequency ranges are now controllable in
three modes: Octave (the default value), Chromatic and Free.
The range remains the same, but it is now possible to sweep
the frequency of the oscillators with a greater or smaller
degree of ne control. To select the oscillator sweep mode,
press button 8 twice on the additional parameters page and
use the VALUE control to select it.
GLOBAL SETTINGS MENU
Access Global Settings by pressing SETTINGS once and use
the keypad numbers to scroll through the options.
Holding the SETTINGS button and pressing the TUNE button lets
you tune the last note played.
This will be saved in the preset data.
PRESET PARAMETERS
To access the PRESET parameters hold the PRESET button and
use the keypad buttons to select the parameter required.
AUTOTUNE
The TUNE button starts the auto-calibration of the oscillators
and lters, muting the output during the process. A short
press will reset all tuning data and fully calibrate the device.
A long press will start a faster recalibration of the tuning,
adjusting to temperature changes of the analog circuits.
CHORD MODE
Holding a chord and switching the UNISON TRACK on stores
that chord an allows it to be transposed across the keyboard.
The chord will be saved as part of the preset. This can also
be set by pressing the sustain pedal while holding a chord in
UNISON mode.
TRANSPOSITION
By holding the PERF and SETTINGS buttons then playing
a note on an attached MIDI keyboard the keyboard will
transpose to the note played relative to C.
KEYBOARD MODES
The PRO-800can be either in Polyphonic, Unison
or Chord mode.
1. The synthesizer starts in Polyphonic mode, in which any
new note will be assigned to one of the 8 voices.
2. If you switch Unison Track on with no pressed key, you
are in Unison mode, all 8 voices will play the same note.
3. If you switch Unison Track on with one or more pressed
keys, you are in Chord mode. The pattern those keys made
will now be transposed over the whole keyboard range by
new notes.
Key
Parameter Choices / (Comments)
1 MIDI Rx Channel O / 1 – 16 / All / Dipswitch
MIDI Tx Channel Thru / 1 – 16 / All / Dipswitch
MIDI CC O / Tx / Rx / TxRx
MIDI PC O / Tx / Rx / TxRx
Sync In Forward On / O
Sync In Polarity Rise / Fall
Sync In Start/Stop On / O
Sync In PPQN 1 PPS / 2 PPQ / 4 PPQ /
24 / 48
2 Transpose -
3 Preset Dump (Second press to conrm
SysEx dump)
4 Voice Select 1 – 8
Voice Kill On / Kill
5 Retune Element Osc A / Osc B / VCF
Octave All / Oct 0-7
6 Retune Encoder Second press to initiate
7 Screen Brightness -
Display Parameter Time -
Preset Name Display
8 Unison Detune -
Voice Spread On / O
Autotune Precision 0.5 c / 1.0 c / 1.5 c / 2.0 c
9 External Filter Mod -
Voice Priority Last / Low / High
Glide Mode Tine / Speed
0 Factory Reset (second press conrms
restoration of factory
settings)
Key
Parameter Comments
1 Bank A -
2 Bank B -
3 Bank C -
4 Bank D -
5 Preset Copy (copies the current
preset values)
6 Preset Paste (pastes the copied preset
to a new location. Second
press conrms)
7 Randomise Preset -
8 Bank Copy First press copies current
bank. Then navigate to
another bank and use 9
9 Bank Paste Hold PRESET and press twice
to paste the copied bank to
its new location
0 Reset to basic patch
4. If you switch on Unison Track with one key pressed you
enter single voice unison mode.
The foot switch input can be used to latch a new pattern
of notes. New notes will be assigned to voices using one of
those priority rules:
1. Last: New notes will always play; the oldest notes may
be stolen.
2. Low: Only the lowest notes will play. In Unison or Chord
mode, legato will be active.
3. High: Only the highest notes will play. In Unison or Chord
mode, legato will be active.
The assignment priority is set in the additional
parameters menu.
ARPEGGIATOR
The arpeggiator has two buttons to set its parameters. To
set the arpeggio type hold the ARP UP-DN button and use
the keypad to select:
1 – Arpeggio Up
2 – Arpeggio Down
3 – Arpeggio Up and Down
4 – Arpeggio Up then Down
To assign the arpeggiator hold the ARP ASSIGN button and
use the keypad to select:
1 – Played order
2 – Random order
Holding ARP button and pressing REC holds the current
notes played. The foot switch input can also be used to hold
the arpeggiator.
SEQ RECORDING
1. Switch RECORD on.
2. Press either SEQ 1 or SEQ 2.
3. Start playing. (Recording does not begin until the rst
key is pressed.)
4. When nished, press the footswitch or RECORD at the end
point you want.
5. The sequence will play continuously loop until the
appropriate SEQ switch is switched o. Adjust the SPEED
control as required.
6. Care must be taken to not exceed the note limit, which
is approximately 400, but may be less if the specic
sequence contains long rests. If the note limit is exceeded,
the sequence will only contain the last 400 notes— the
earliest notes will be lost.
7. When both banks are being used, care must also be taken
to not exceed the 400-note limit. The sequencer assigns
memory priority to the bank which is currently being
recorded, and will “steal” notes from the other bank once
the 400 total note limit is reached. For example, if SEQ 1
already has a 250-note sequence recorded in it, you
will erase SEQ 1 if you attempt to record more than about
150 notes in SEQ 2.
SEQ PLAYBACK
1. To playback a sequence, press SEQ 1 or SEQ 2.
2. The playback speed can be varied from 1/4 to 4X real-time.
The SPEED control position for 1:1 playback speed is to the
left of centre. This provides more control range of
higher speeds.
3. The playback speed can also be programmed. As the
sequencer is playing back, set SPEED as desired, then
press the RECORD switch (which will not light). Now
whenever the sequence is selected it will play at
this speed. The programmed speed can be edited and
re-recorded (just like the synthesizer controls).
To stop, press the appropriate SEQ switch or the footswitch
POWER UP
Pressing the PRESET button while powering up the PRO-800
loads a generic preset, which can then be edited. Holding
the SETTINGS button while powering up resets all settings
to factory default. Holding the 0 key on the keypad while
powering up performs a button test.
 Loading...