© BEKA 201 !6 All rights reserved
BAL2185_PICO_with_PICOtroniX1_PICOtronic_0816_EN
...a product of BEKA
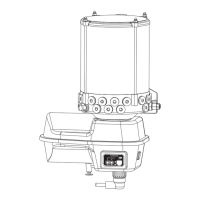
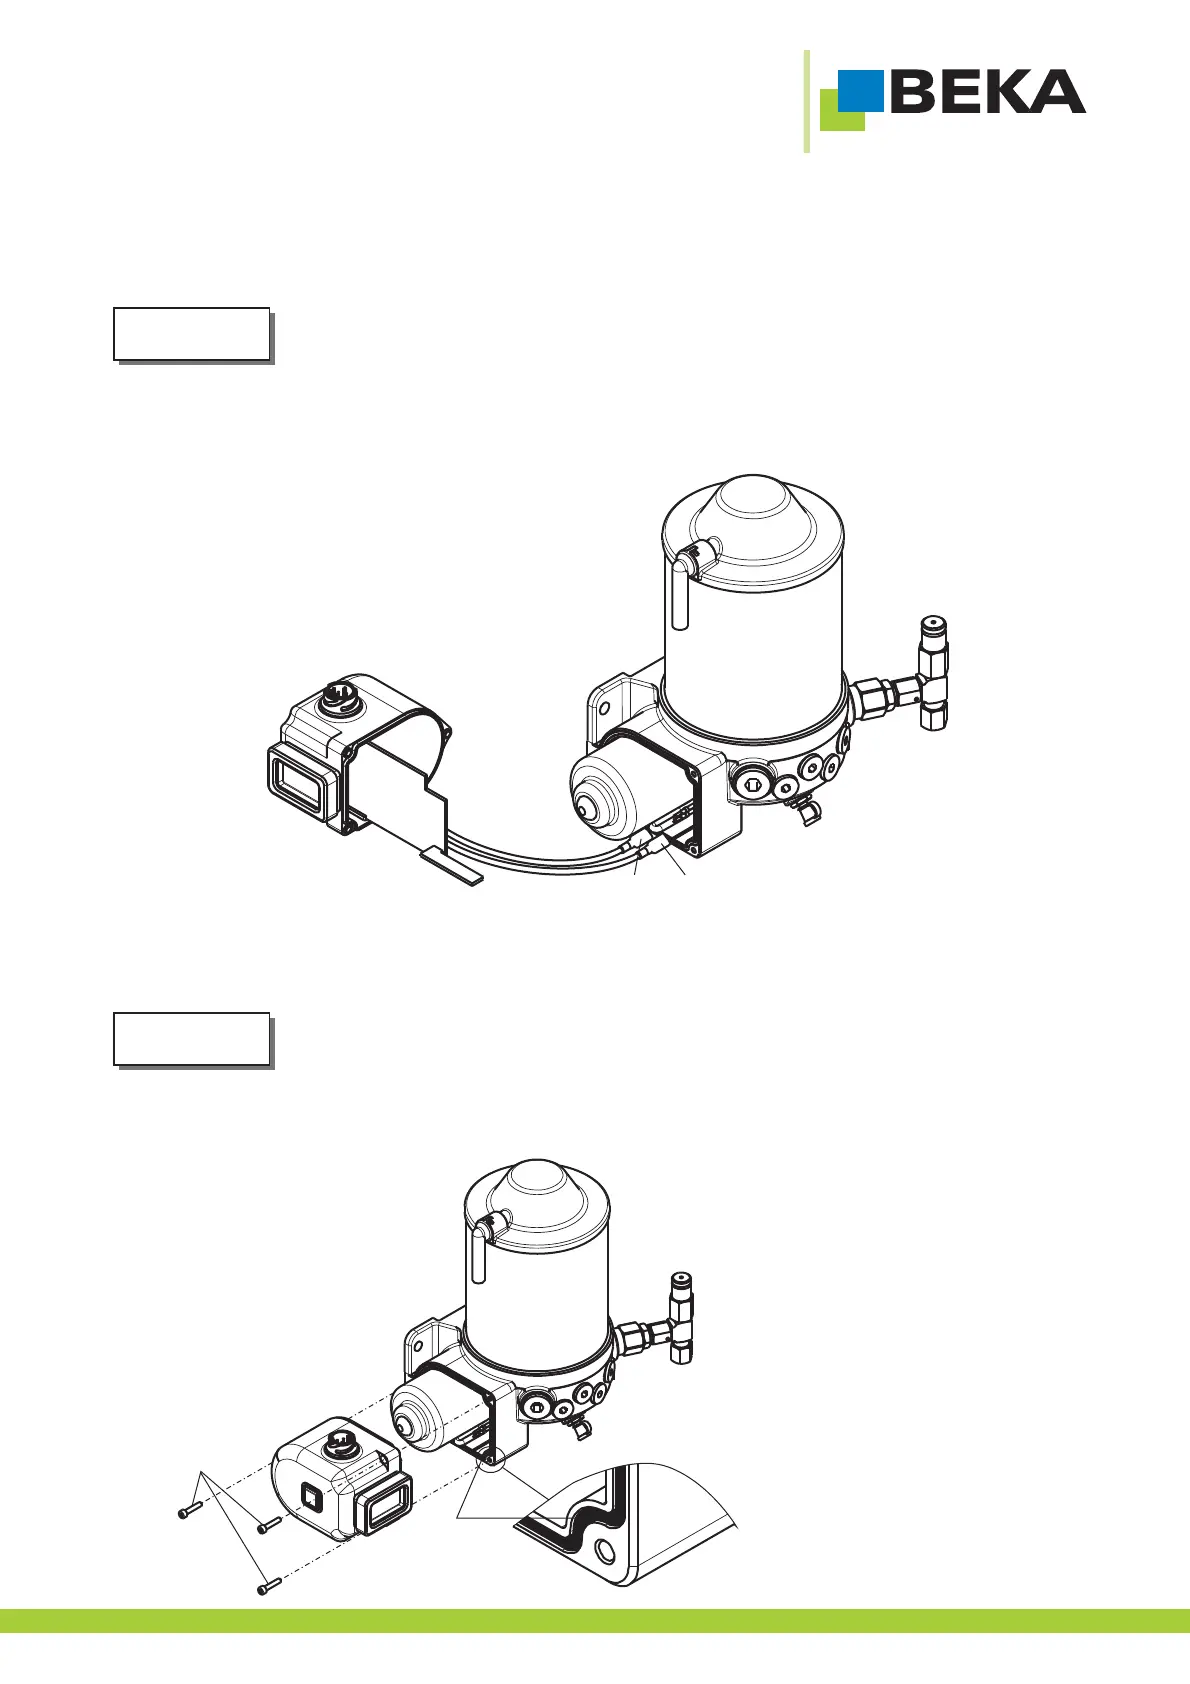
c) Removethe motorprotection housing (Pos.1, Fig. 64).
Take carethat the motorcable does notrupture.
d) Loosen the motor cable plug (Pos. 2 and 3, Fig. 64) and connect them with the new control unit. The red cable at
the red plug-type connection (Pos. 2, Fig. 64) and the green cable at the green plug-type connection (Pos. 3, Fig.
64).
Fig.64:
e) Putthe controlunit housing ontothe pump housing
Take care that the sealing is not damaged as then water can damage the control unit. The
guaranteeexpires inthis case.
f) Tightenthescrews again (Pos.5, Fig. 65)(torqueapprox. XNm).
Fig.65:
32
4
5
Caution!
Caution!
 Loading...