11
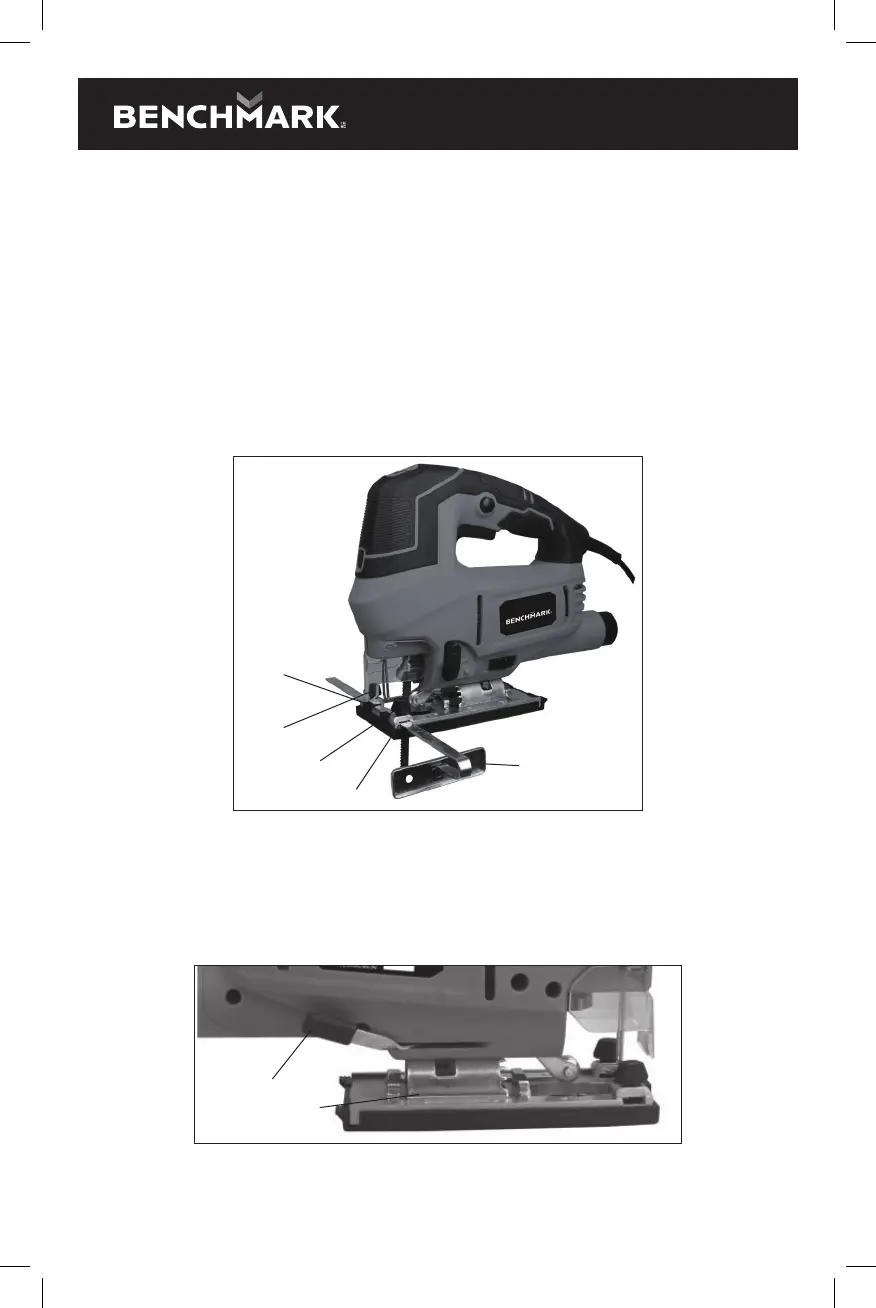
INSTALLING THE EDGE GUIDE
This jig saw is equipped with an edge guide that will assist in cutting narrow edges
from a workpiece.
1. Loosen the two edge guide mounting screws (1) (Fig. 2).
2. Insert the edge guide (2) into the edge guide mounting slots (3) in the sole plate.
3. Set the edge guide at the desired distance from the blade and lock it into place
by tightening the edge guide mounting screws.
NOTE: Tighten the screws using the 1/8" (3 mm) hex key supplied.
4. Make a test cut on a scrap workpiece to ensure the edge guide is set correctly.
5. Adjust the edge guide as required.
Fig. 2
3
1
1
3
2
SETTING THE BEVEL CUTTING ANGLE
Bevel cutting angles may be adjusted from 0° to 45° either left or right. To adjust the
bevel angle:
1. Lift the bevel angle quick release lever (1) out of the sole plate (2) until the sole
plate can be rotated (Fig. 3).
2
1
Fig. 3