Autostacker™ Parking Lift 56 P/N 5900002 — Rev. D — August 2019
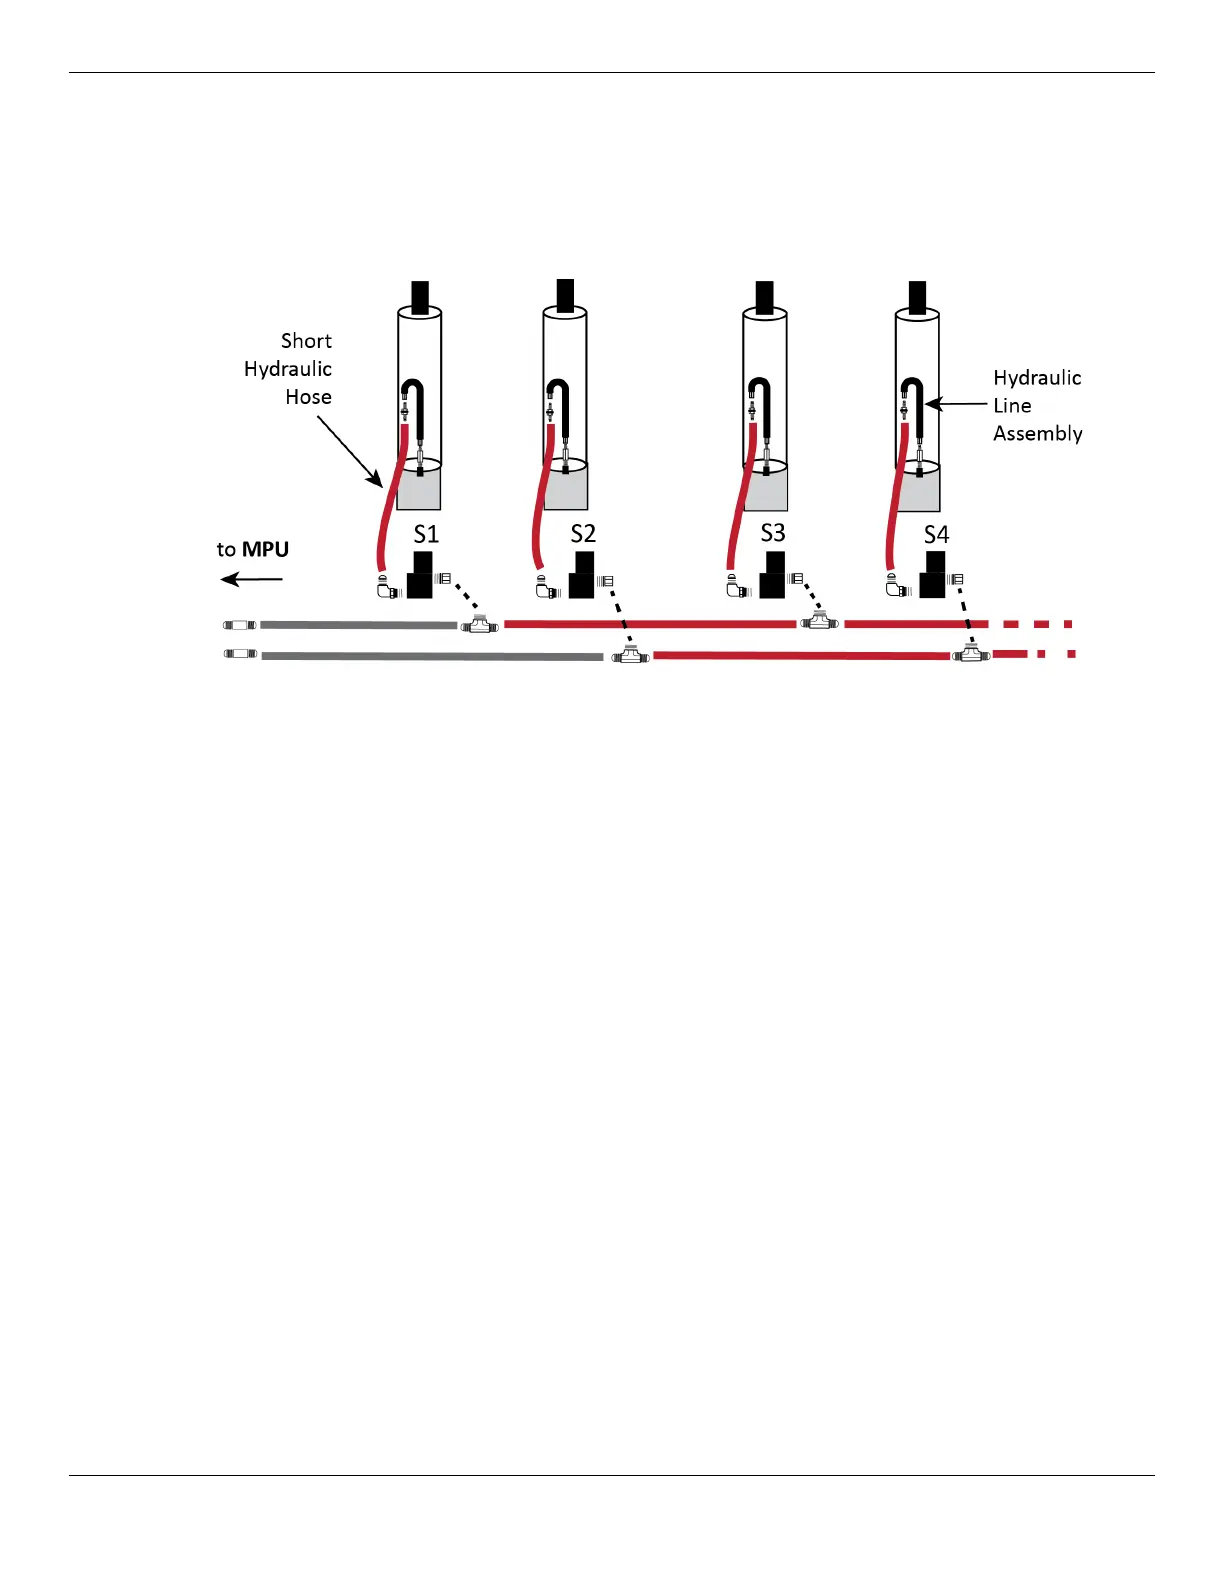
8. Attach a Short Hydraulic Hose to each Hydraulic Line Assembly, then attach the other end of each
Hose to the Elbow Fitting on the Solenoid Valve Blocks.
The Solenoid Valve Blocks are
not
labeled S1 through S4; they are only labeled here to distinguish
between the various components.
The following drawing shows the hydraulic connections between two Autostackers.
9. Remove the Power Unit from its packaging, then place the Power Unit near the first Lift.
10. Attach an Elbow Fitting (-04 JIC x -06 ORB) from the MPU Plumbing Kit to each Hydraulic Out Port
on the Power Unit.
11. Connect the two Steel Hydraulic Lines from the MPU Plumbing Kit to the Hydraulic Elbow Fittings
you just connected to the Power Unit.
12. Find the Medium and Extra-Long Hydraulic Hose from the MPU Plumbing Kit and connect them to
the Steel Hydraulic Lines using two Nipple Fittings.
13. Connect the other end of the Medium Hydraulic Hose to the Tee Fitting attached to S1.
14. Connect the other end of the Extra-Long Hydraulic Hose to the Tee Fitting attached to S2.
15. Take a Long Hydraulic Hose from the Control Kit and connect it to the unattached end of the Tee
Fitting on S1.
16. Using the components from the Control Kit for the next Lift, prepare the next set of Hydraulic
Cylinders.
Refer to steps 1-8 for additional instruction.
17. Using the same Long Hose attached to S1 on the first Lift, connect the other end to the Tee Fitting
on S3 on the next Lift.
18. Connect the second Long Hydraulic Hose to the Tee Fitting on S2 on the first Lift, then connect
the other end of the same Hose to the Tee Fitting connected to S4 on the next Lift.
19. If there are no further Lifts to connect to, secure the unattached ends of the Tee Fittings with a Cap
Fitting, as shown in the following drawing.